Blog

Introducing the Blackstone Pellet Grill and Griddle: The Ultimate Backyard Cooking Duo!

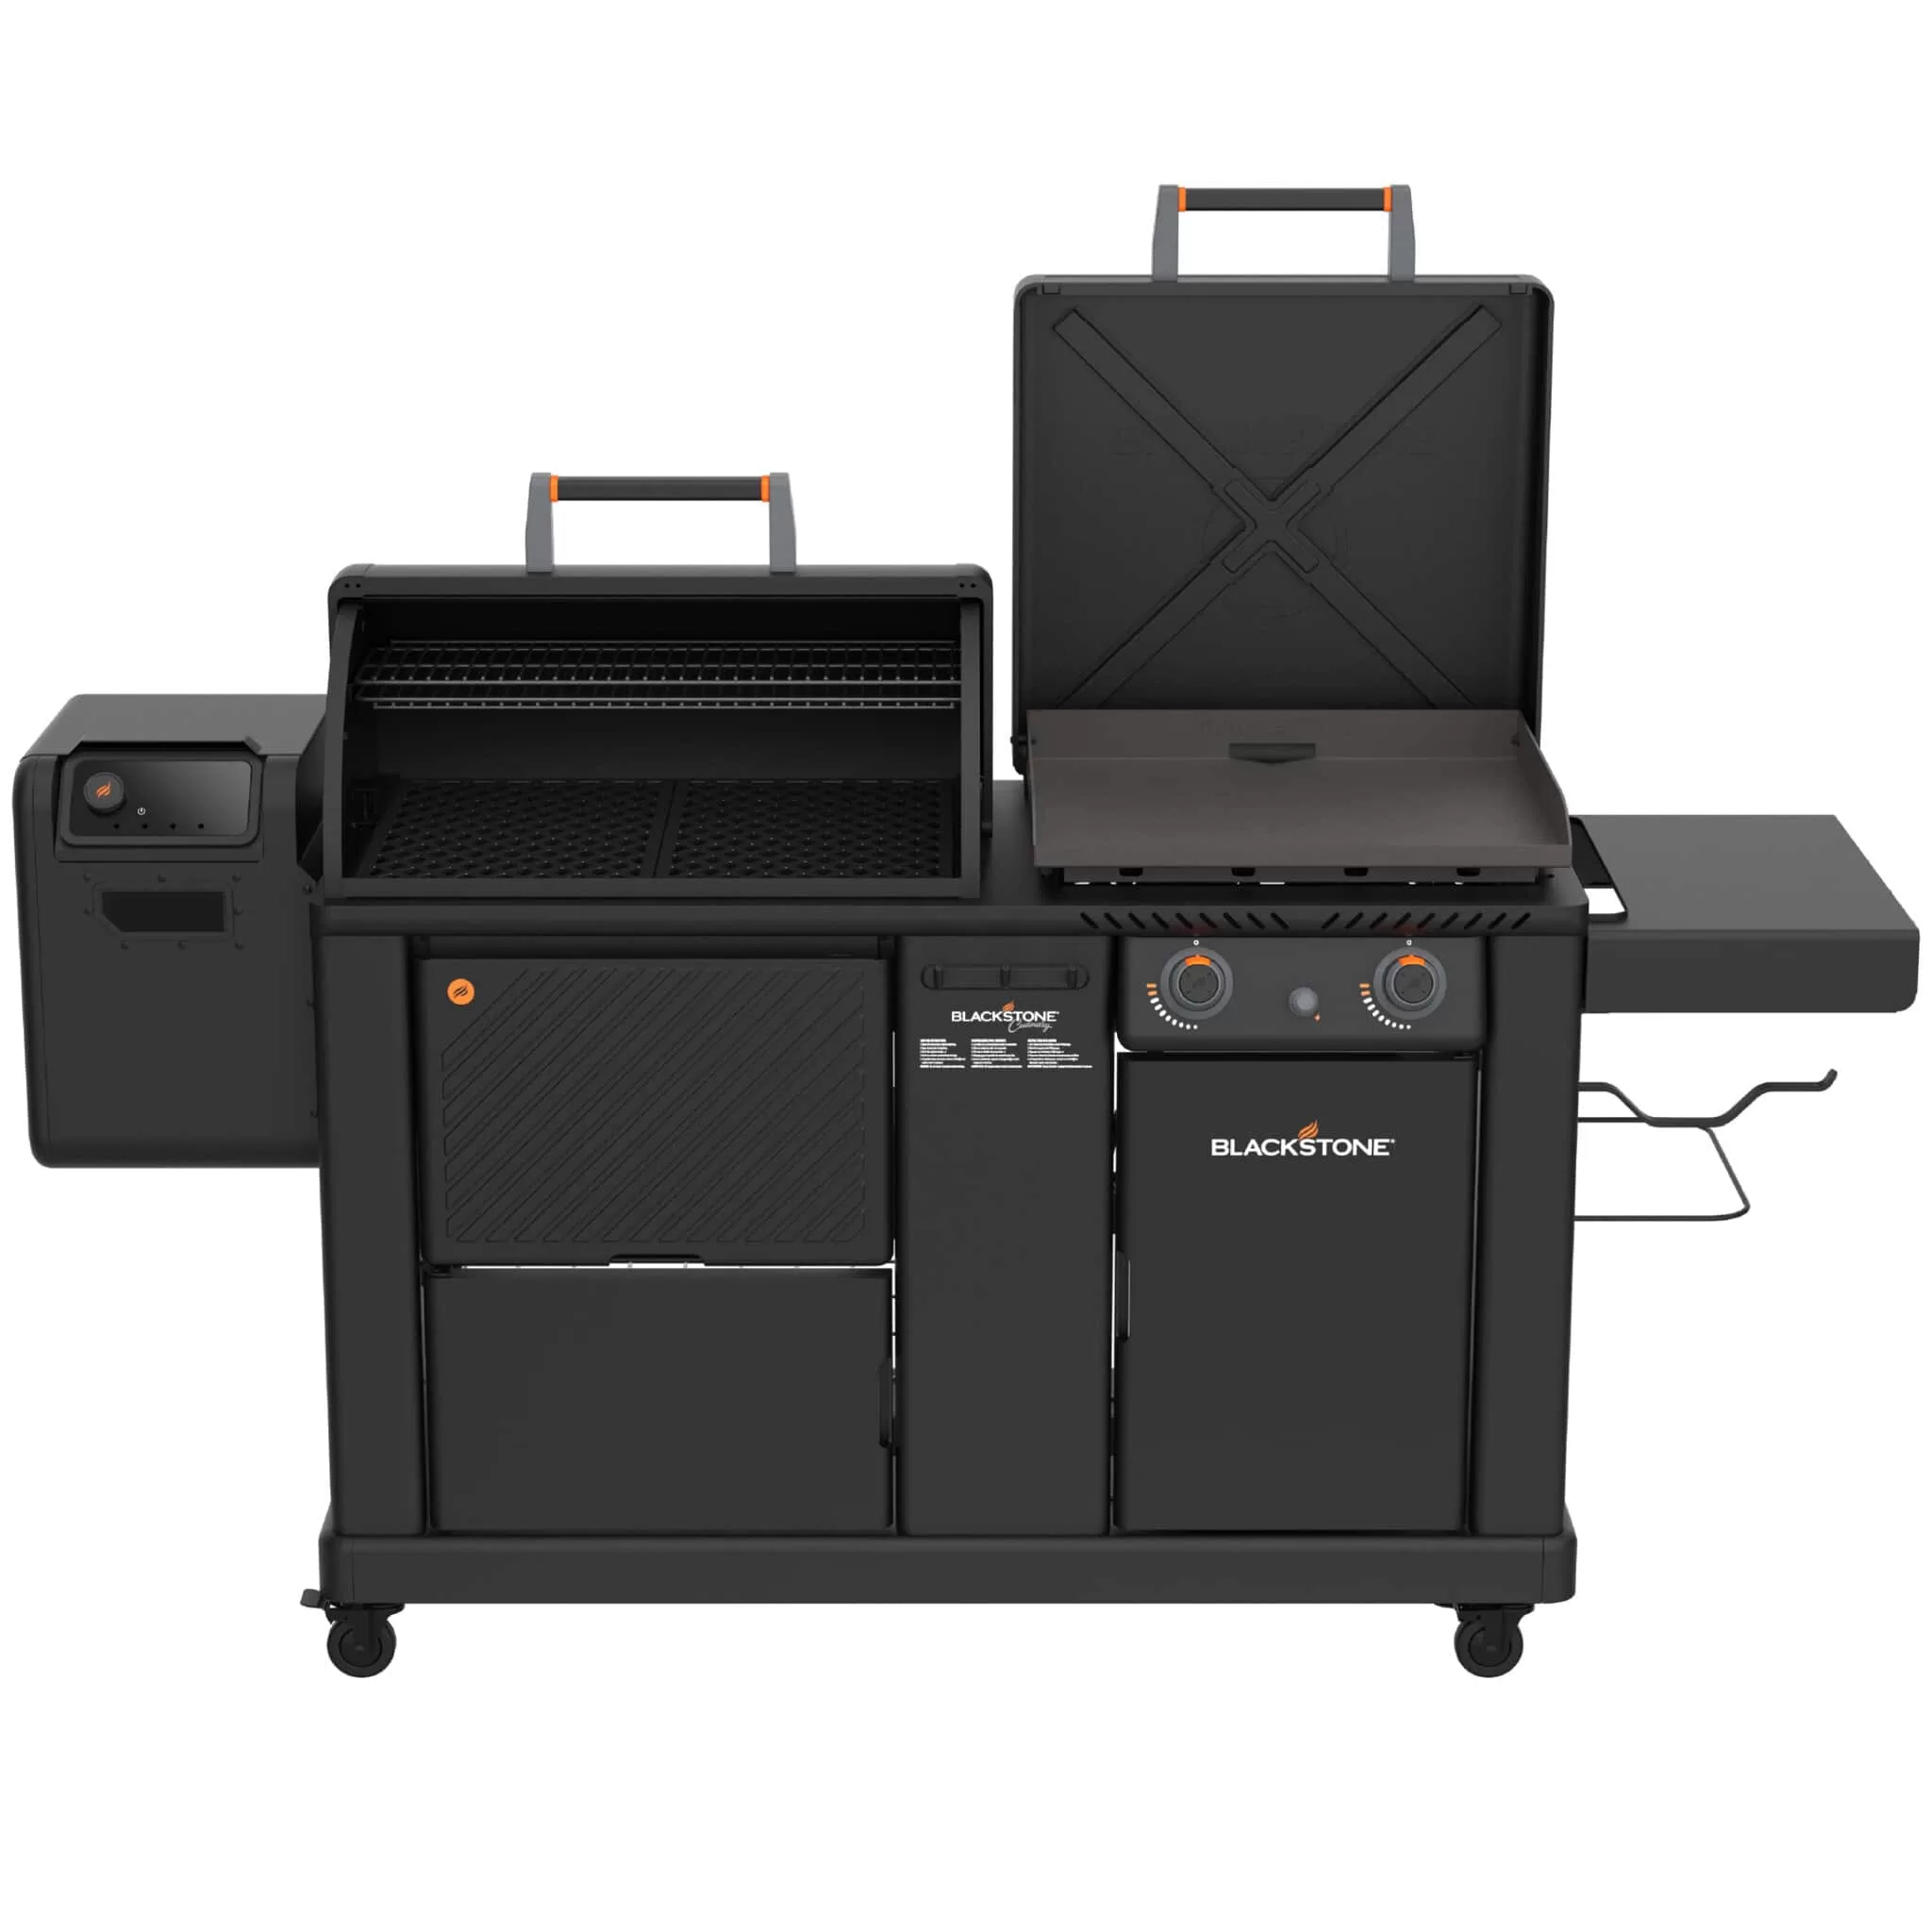
Get ready to revolutionize your outdoor cooking with the all-new Blackstone Pellet Grill and Griddle Combo. This innovative two-in-one appliance is the ultimate grilling powerhouse, letting you sear, smoke, and sizzle like a culinary pro.

Searing Versatility:

  • Griddle Glory: The expansive 22-inch griddle surface boasts superior heat distribution, ensuring perfectly seared steaks, sizzling veggies, and fluffy pancakes. From delicate crepes to a full-on hibachi feast, this griddle is your blank canvas for endless culinary creations.
  • Pellet Prowess: Elevate your grilling game with the magic of wood-fired flavor. The integrated pellet grill delivers low-and-slow smoking perfection for melt-in-your-mouth pulled pork, juicy brisket, and flavorful ribs. It has an 884 sq pellet grill with a rolling barrel hood, lower cast iron grates, and an upper adjustable stow-away rack. It also has a 20-pound hopper for pellets that will get you through those 8 to 10-hour brisket cooks.

Convenience King:

  • Effortless Efficiency: Say goodbye to juggling separate grills! The Blackstone Pellet Grill and Griddle Combo lets you switch seamlessly between searing and smoking, all on one convenient unit.
  • Fuel Flexibility: Choose your grilling adventure! Power the griddle with propane or the pellet grill with your favorite wood pellets for maximum versatility.

Built to Last:

  • Heavy-Duty Construction: Crafted from durable materials like porcelain-coated steel and cast iron, the Blackstone Pellet Grill and Griddle is built to withstand years of backyard grilling fun.
  • Easy Cleanup: The integrated grease management system makes cleaning a breeze, letting you spend less time scrubbing and more time enjoying your grilling masterpieces.

The Blackstone Pellet Grill and Griddle Combo is more than just a grill – it’s an outdoor kitchen. Whether you’re a seasoned grilling guru or a backyard barbecue newbie, this versatile appliance has something for everyone.

Additional Features:

  • The Griddle has dual control knobs for independent temperature control of the griddle. The pellet grill has a PID controller and can be controlled using a phone app using Bluetooth or WiFi.
  • Spacious hopper holds up to 20 pounds of pellets for extended grilling sessions. You can do those low and slow cooks overnight to make the best brisket or pulled pork.
  • The convenient side shelf and front shelf provide ample prep space.
  • Built-in igniter for the griddle supply quick and easy startup.

In the coming weeks, we will do a full product review on our YouTube Channel.

If you want to be notified when it is available, please subscribe to our YouTube channel by clicking the subscribe button.

To purchase this product click here.

Top 10 Barbecue Rubs by Sales

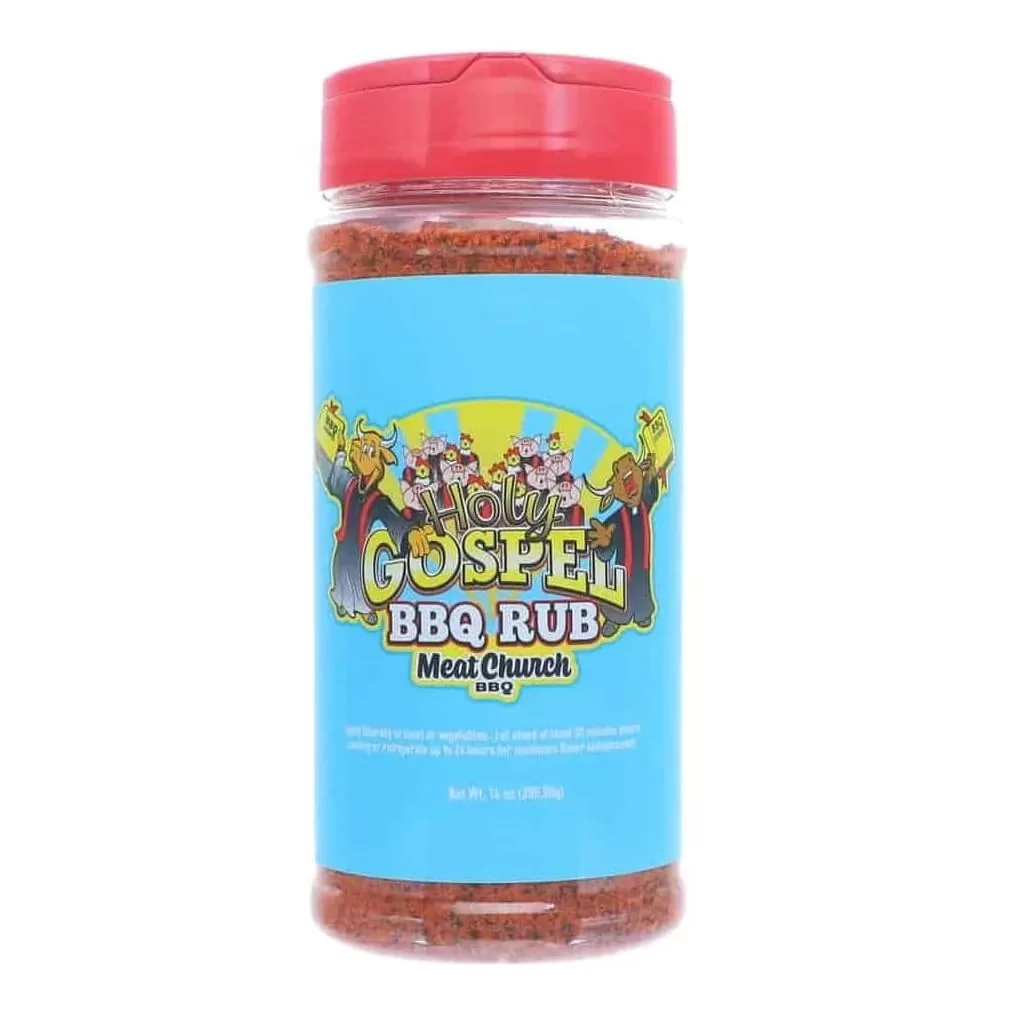
  1. Meat Church Holy Gospel All-Purpose Rub: This versatile rub is a blend of savory spices like salt, pepper, garlic, and onion, with a touch of sweetness from brown sugar. It’s a crowd-pleaser that works well on all meats, vegetables, and even popcorn.
  2. Spiceology Smoky Honey Habanero: This sweet and spicy rub packs a punch with habanero peppers, balanced by brown sugar and honey. It’s perfect for those who like a little heat and pairs well with chicken, pork, and ribs.
  3. Sweet Swine O’Mine Lambert’s Sweet Rub O’ Mine: This sweet and tangy rub is loaded with brown sugar, paprika, and molasses. It’s a classic Southern-style rub that’s ideal for pork and ribs.
  4. Five Star Seasonings Texas BBQ Rub: This bold and smoky rub features chili powder, paprika, and garlic. It’s a classic Texas-style rub that’s perfect for brisket, beef, and sausages.
  5. Kosmos Q Honey Killer Bee BBQ Rub: This sweet and smoky rub combines brown sugar, molasses, and chipotle peppers for a complex flavor profile. It’s versatile and works well on all meats, vegetables, and even tofu.
  6. Lane’s BBQ Black Gold Rub: This versatile rub is a blend of savory and sweet spices with a hint of hickory smoke. It’s a popular choice for all meats, poultry, and seafood.
  7. Slap Ya Mama Cajun Seasoning: This spicy rub is loaded with cayenne pepper, paprika, and garlic. It’s a Louisiana-style rub that’s perfect for chicken, shrimp, and vegetables.
  8. Meat Church Honey Hog BBQ Rub: This sweet and savory rub features brown sugar, paprika, and onion powder. It’s a crowd-pleaser that’s perfect for pork, chicken, and vegetables.
  9. McCormick Grill Mates Montreal Steak Seasoning: This classic Montreal-style rub features black pepper, garlic, coriander, and paprika. It’s a versatile rub that’s perfect for steaks, burgers, and vegetables.
  10. Kinder’s Hickory Smokehouse Pitmaster’s Choice Rub: This smoky and savory rub features paprika, brown sugar, and chili powder. It’s a versatile rub that’s perfect for all meats, poultry, and seafood.

Bonus: Keep in mind that taste preferences are subjective, and the “best” rub is ultimately the one you enjoy the most! Don’t be afraid to experiment with different rubs and find your own favorites.

I hope this helps you find the perfect barbecue rub for your next cookout!

How to Host a Pizza Party around your own Pizza Oven

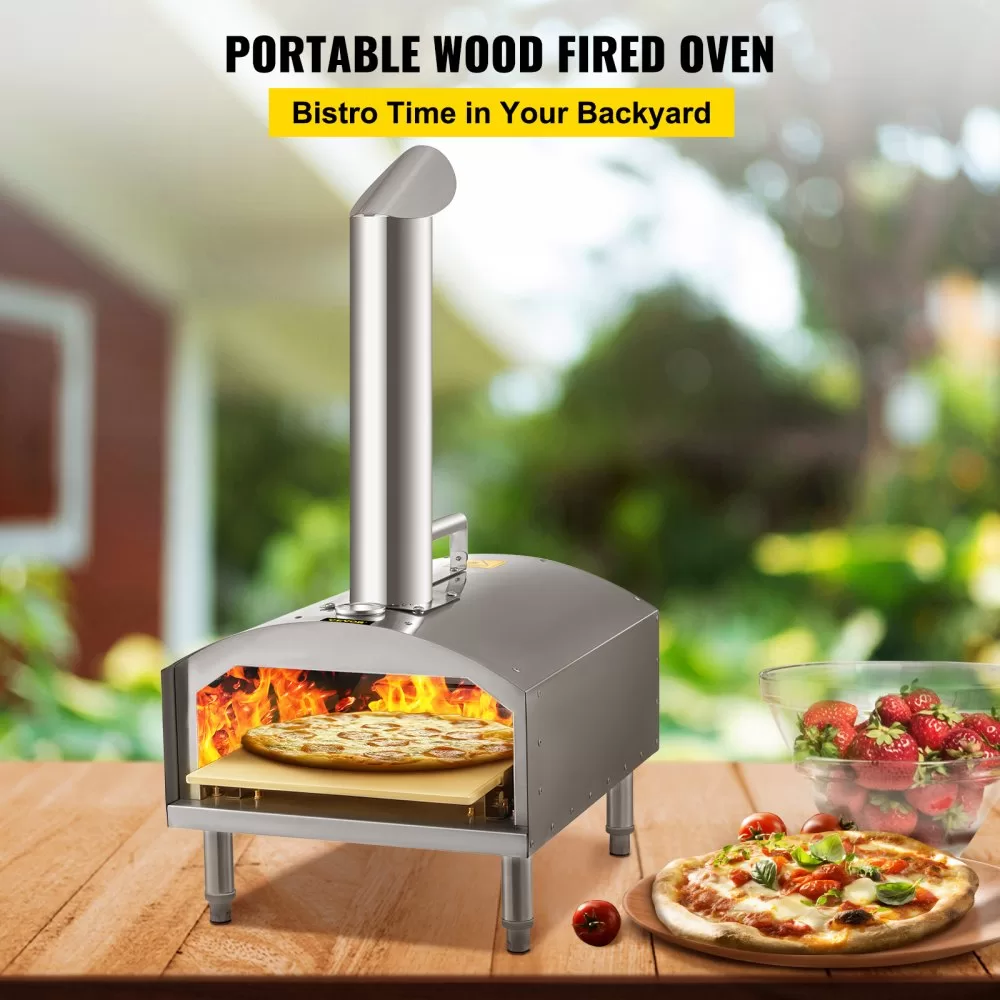
Hosting a pizza party centered around your pizza oven can be a fantastic way to impress your guests, enjoy delicious food, and create lasting memories. Here are some tips to turn your pizza oven into the star of the show:

Planning and Preparations:

  • Gather your resources: Make sure your pizza oven is clean and fully stocked with fuel (if needed). Prepare all necessary tools like peels, brushes, and serving platters.
  • Plan your menu: Offer a variety of pizzas to cater to different preferences. Consider a mix of classics like Margherita and pepperoni, alongside a few adventurous options like pesto and shrimp or white pizza with figs and prosciutto.
  • Prepare toppings: Pre-chop vegetables, slice meats, and grate cheeses beforehand to streamline the pizza-making process. Set up dipping sauces and other condiments for added flavor.
  • Drinks and sides: Have a selection of refreshing beverages like beer, lemonade, and iced tea. Don’t forget small appetizers or side salads to round out the meal.
  • Entertainment: Set up outdoor games like cornhole or bocce ball for pre-pizza entertainment. Prepare some music playlists to create a fun atmosphere.

Party Time:

  • Get hands-on: Invite your guests to participate in the pizza-making process! Let them choose their toppings, assemble their own pizzas, and even learn how to launch them into the oven (with proper guidance, of course!).
  • Create a station: Set up a designated topping station with all the ingredients organized and easily accessible. Provide aprons and rolling pins for extra fun.
  • Cook in batches: Depending on your oven’s capacity, cook pizzas in batches to keep everyone engaged and fed. Rotate pizzas for even cooking and don’t be afraid to experiment with different temperatures and timings for unique textures.
  • Slice and share: Present the finished pizzas on a large platter and encourage everyone to share and try different flavors.
  • Relax and enjoy: Once the pizzas are out, focus on creating a cozy and enjoyable atmosphere. Light some candles, dim the lights, and unwind with good company and delicious food.

Bonus Tips:

  • Fireside ambiance: If your pizza oven has a built-in fire pit, utilize it for warmth and atmosphere. Toast marshmallows for s’mores after the pizzas are done!
  • DIY dough station: Feeling ambitious? Offer pre-made dough balls and let your guests get creative stretching and shaping their own crusts.
  • Sweet pizzas for dessert: Don’t forget dessert! Experiment with sweet toppings like Nutella, mascarpone cheese, and fresh fruit for a unique and delicious twist.
  • Clean up together: Make the clean-up process fun by turning it into a group activity. Divide tasks and make it a lighthearted way to end the evening.

With a little planning and a lot of enthusiasm, your pizza oven can be the center of a memorable and delicious party. Get creative, have fun, and enjoy the joy of sharing delicious homemade pizza with your loved ones!

Checkout this Pizza Oven

Griddle-tastic Korean Fried Chicken: A Crispy, Flavorful Adventure!

korean fried chicken

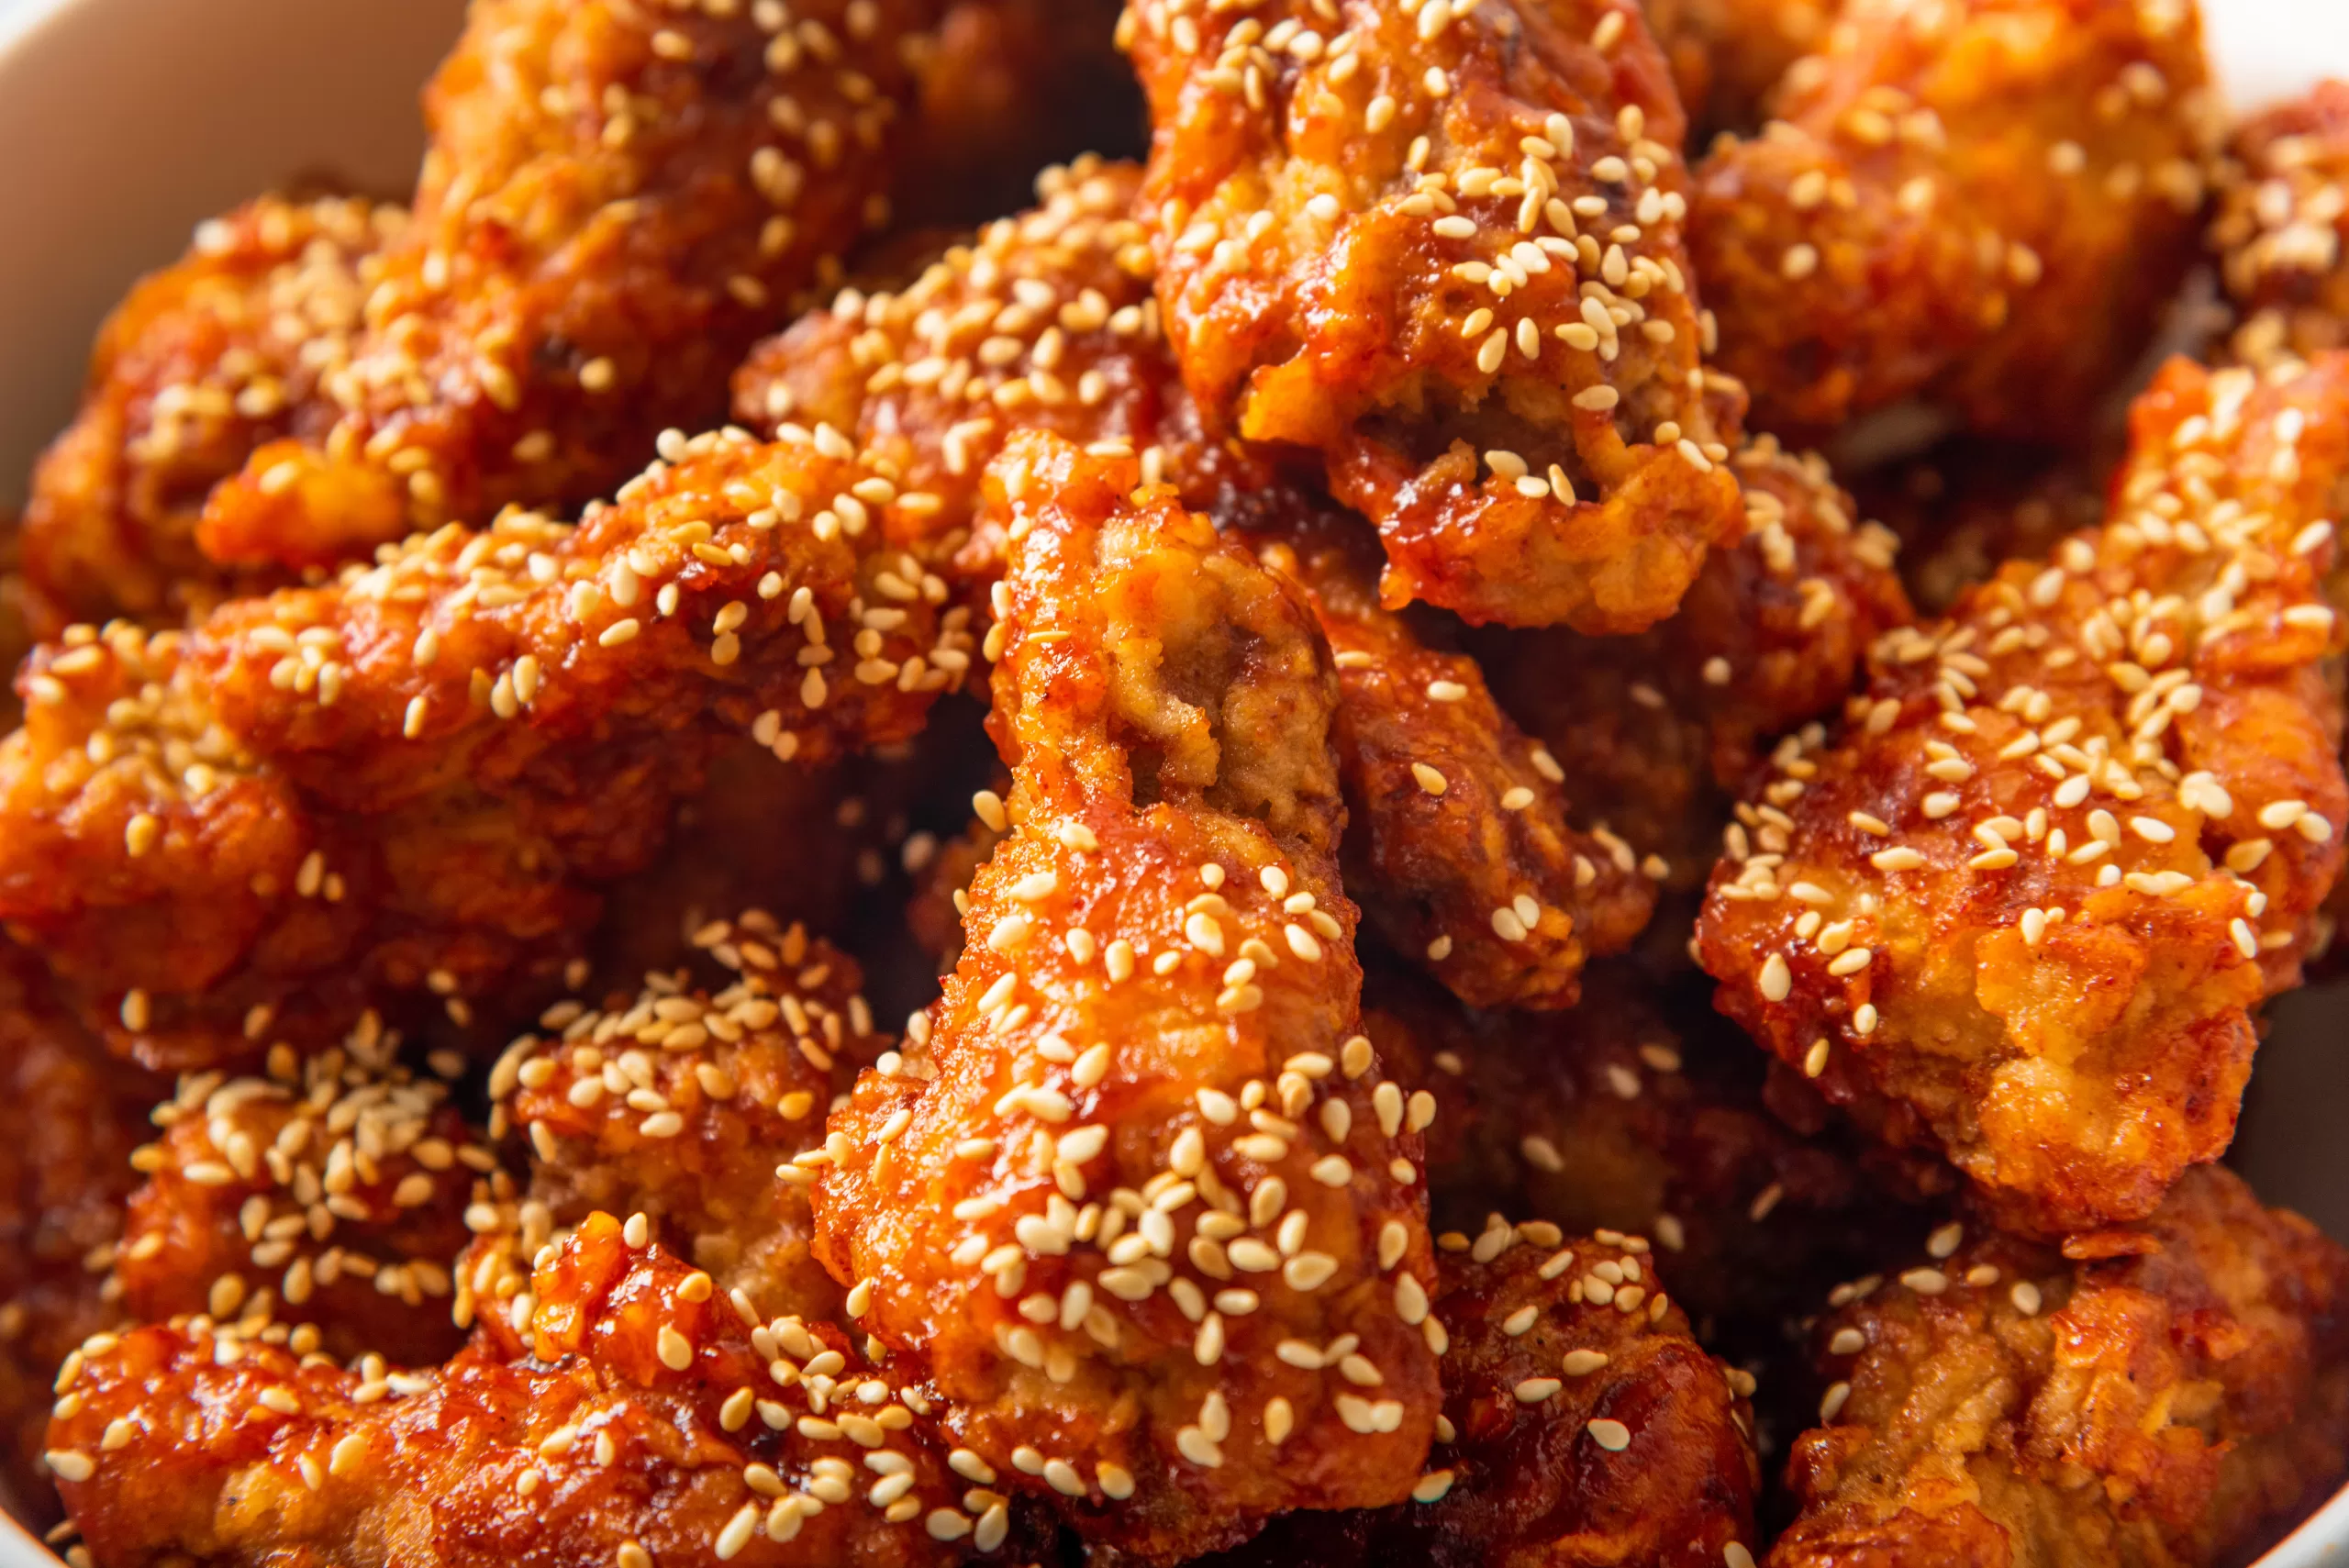
Craving that crispy, juicy Korean Fried Chicken magic? Ditch the deep fryer and embrace the griddle for a healthier, creative twist on this beloved dish! This recipe is all about flavor, texture, and fun, so grab your apron and let’s get cooking!

korean fried chicken

Griddle-tastic Korean Fried Chicken: A Crispy, Flavorful Adventure!

Craving that crispy, juicy Korean Fried Chicken magic? Ditch the deep fryer and embrace the griddle for a healthier, creative twist on this beloved dish! This recipe is all about flavor, texture, and fun, so grab your apron and let’s get cooking!
Print Recipe
CourseMain Course
CuisineAsian, Korean
Keywordkorean fried chicken
Prep Time30 minutes
Cook Time30 minutes
Total Time1 hour
Servings4
Calories400kcal

Equipment

Ingredients

For the Marination:

For the Double-Coating:

For the Gochujang Glaze:

Instructions

  • Marinate to Mellow: Combine all marinade ingredients in a bowl and toss in your chicken pieces. Let them soak in this flavorful bath for at least 4 hours, or overnight for maximum yum factor.
  • Double Coat for Crunch: Dust your marinated chicken in cornstarch. Then, whisk together the flour, egg, water, baking powder, and salt in a separate bowl. Dip each piece in the batter, letting the excess drip off, then coat again in the cornstarch. Repeat this double-coat magic for a guaranteed crispy bite.
  • Griddle Groove: Heat your griddle to medium-high with a thin layer of oil. Gently lay your coated chicken down, leaving space for even cooking. Cook for 5-7 minutes per side, adjusting heat if needed, until golden brown and sizzling with crispy joy.
  • Gochujang Glaze Mania: While your chicken sizzles, stir together the gochujang, soy sauce, honey, and sesame oil in a small saucepan. Heat gently until simmering and the glaze thickens slightly.
  • Brush and Glaze: Once your chicken is cooked through, generously brush them with the gochujang glaze. Watch the colors dance and the aroma fill the air!
  • Serve and Savor: Plate your griddle-kissed KFC and enjoy! Pair them with kimchi, pickled radishes, and your favorite dipping sauces for a complete Korean feast.

Notes

Use bone-in, skin-on chicken pieces for maximum flavor and texture.
Don’t overcrowd the griddle! Cook your chicken in batches to ensure even cooking.
Adjust the spiciness of the gochujang glaze to your preference.
Get creative with your glazes! Experiment with different spices and sauces to personalize your KFC adventure.
Enjoy this delicious, healthy, and inclusive take on Korean Fried Chicken! Remember, food is a celebration of joy and flavor, so let your creativity shine and have fun in the kitchen!

Nutrition

Calories: 400kcal

Griddle Paella: A Smoky Twist on the Classic

While traditionally prepared in a paella pan over an open flame, this recipe brings the beloved Spanish dish to the griddle for a unique and flavorful twist. The smoky touch adds depth to the classic paella flavors, making it a fun and delicious experiment for paella enthusiasts.
Print Recipe
CourseMain Course
CuisineSpanish
Keywordpaella
Prep Time30 minutes
Cook Time45 minutes
Total Time1 hour 15 minutes
Servings4
Calories500kcal

Ingredients

Instructions

  • Heat the griddle and paella pan to medium-high. Drizzle with olive oil and add the onion, garlic, and bell peppers. Sauté until softened, about 5 minutes.
  • Add the rice to the pan and stir to coat with oil. Toast for a minute or two until slightly translucent.
  • Stir in the smoked paprika and cook for 30 seconds.
  • Gradually add the hot broth, one ladleful at a time. Let the rice absorb the liquid before adding the next ladleful. This should take about 20-25 minutes, until the rice is almost cooked through.
  • While the rice cooks, cook the chicken and chorizo on the griddle in batches on a separate part of the griddle. Sear until golden brown on both sides.
  • Once the rice is almost cooked, add the chicken, chorizo, and peas to the paella pan. Stir gently to combine.
  • Increase the heat to high and cook for a minute or two to form a slight crust (socarrat) on the bottom of the paella.
  • Turn off the heat, cover the pan, and let the paella rest for 5-10 minutes.
  • Serve the paella garnished with chopped parsley and lemon wedges.

Notes

Use a wide spatula to move the rice around without breaking the grains.
Don’t overcrowd the griddle! Work in batches if needed to ensure even cooking.
Adjust the broth addition based on the absorbency of your rice and desired texture.
Embrace the smoky twist! The griddle adds a unique flavor dimension that complements the traditional paella spices.
Feel free to adjust the protein and vegetables to your liking. Seafood paella works well on the griddle too, but be careful of flare-ups.
You can also use pre-cooked chorizo for convenience.
For a vegetarian paella, omit the chicken and chorizo and add additional vegetables like mushrooms or zucchini.
Enjoy this delicious and smoky take on paella! The griddle adds a fun twist to the classic dish, making it a perfect option for adventurous cooks and paella lovers alike.

Nutrition

Calories: 500kcal

Why Your Outdoor Kitchen Needs to Be Off-Grid: Resilience, Resourcefulness, and Romance

The allure of an outdoor kitchen is undeniable. Imagine balmy summer evenings spent grilling with friends, the aroma of wood smoke mingling with laughter. Or cozy fall mornings sipping coffee by a crackling fire pit. But beyond the idyllic scenes, a well-equipped, off-grid outdoor kitchen offers a surprising layer of preparedness for the unexpected.

Power Outages Got You Down? Not in This Kitchen!

Let’s face it, power outages happen. Whether it’s a downed line from a storm or planned maintenance, being plunged into darkness can disrupt our routines and leave us feeling vulnerable. But with an off-grid outdoor kitchen, you can keep the culinary fires burning (and stay warm!) no matter what the grid is doing.

Fueling Your Off-Grid Feast

There are plenty of ways to cook and stay warm in your outdoor kitchen without relying on electricity. Here are a few options:

  • Wood-fired Ovens and Stoves: These beauties harness the power of nature, using firewood or charcoal to generate heat for cooking and baking. Imagine pizzas bubbling in a clay oven or stews simmering on a cast iron stovetop – pure culinary magic.
  • Rocket Stoves: These efficient and portable stoves use minimal fuel (twigs, leaves, even pinecones!) to create surprisingly intense heat. Perfect for boiling water, grilling, or stir-frying.
  • Solar Ovens: Let the sun do the cooking! These ingenious gadgets trap sunlight to bake bread, roast vegetables, and even dehydrate food. Sustainable and surprisingly effective.
  • Propane Grills: For those who want a familiar cooking experience, propane grills offer convenience and reliability. Just make sure you have spare canisters on hand!

Beyond the Basics: Building Resilience

An off-grid outdoor kitchen isn’t just about weathering power outages. It’s about embracing a more resourceful and resilient lifestyle. You can:

  • Grow your own food: Plant an herb garden, build raised vegetable beds, or even install fruit trees. Fresh, homegrown ingredients will elevate your outdoor cooking experience.
  • Preserve your harvest: Canning, pickling, and fermenting are all excellent ways to extend the shelf life of your garden bounty. Enjoy the fruits (and vegetables) of your labor all year round.
  • Collect rainwater: Invest in a rainwater harvesting system to collect and store precious H2O. Use it for watering your plants, washing dishes, or even showering – every drop counts!

A Touch of Romance in the Rustic Setting

Let’s not forget the intangible benefits of an off-grid outdoor kitchen. The flickering flames of a fire pit cast a warm glow, creating an intimate and inviting atmosphere. Gather around with loved ones, share stories, and reconnect with life’s simple pleasures.

So, ditch the dependence on the grid and embrace the possibilities of an off-grid outdoor kitchen. It’s an investment in resilience, resourcefulness, and maybe even a little bit of romance. Start planning your own slice of culinary freedom today!

Additional Tips for Your Off-Grid Kitchen Adventure:

  • Invest in quality cookware: Cast iron skillets, Dutch ovens, and enamelware are all built to last and thrive in an outdoor setting.
  • Lighting is key: Lanterns, string lights, and solar-powered lamps will keep your kitchen illuminated after dark.
  • Don’t forget the fun! Board games, stargazing, and outdoor movies are all perfect activities to enjoy in your off-grid oasis.

Remember, the beauty of an off-grid outdoor kitchen lies in its versatility and adaptability. Tailor it to your needs and preferences, and let your creativity flow. With a little planning and resourcefulness, you can create a space that nourishes your body, warms your soul, and keeps you cooking (and smiling) no matter what the circumstances.

How to Convince your Spouse that we need a Barbecue

Ah, the age-old struggle of the barbecue enthusiast versus the budget-conscious spouse. Fear
not, grill master, for I have concocted a plan so cunning, so well thought out, that your significant other will be begging you to fire up that smoky beast before you can say “charcoal briquettes!”

Operation: Sizzle and Snuggle

Phase 1: The Smoke Signals

  1. Subliminal Messaging: Casually leave open cookbooks featuring drool-worthy grilled
    masterpieces. Accidentally “forget” to close the browser tab displaying that sleek new
    smoker you’ve been eyeing. Hum “Smoke Gets in Your Eyes” while doing the dishes.
    Subtlety is key.
  2. The (Accidental) Charred Offering: “Honey, I was just practicing my fire-starting skills for
    a… survivalist course, yes, that’s it! And well, things got a little out of hand. But hey, at
    least dinner is ready?” Bonus points if your accident turns into two medium rare ribeye steaks.


Phase 2: The Allure of the Flame

  1. The Strategic Picnic: Pack a picnic basket filled with gourmet cheeses, fancy crackers,
    and, oh yeah, a couple of juicy, pre-marinated steaks. Head to the park, find a cozy spot
    with a public grill, and work your magic. Soon, the intoxicating aroma of grilled goodness
    will have your partner swooning like a T-bone on the barbie.
  2. The Neighborhood Blockbuster: Channel your inner Spielberg and stage a dramatic
    backyard movie night. String up some fairy lights, gather comfy blankets, and pop in a
    sizzling grilling documentary (think “Steak Revolution” or “The Art of Fire”). By the time the
    credits roll, your spouse will be chomping at the bit for a real-life grilling adventure.

Phase 3: The Clincher

  1. The Seductive Sizzle: Dress up in your finest apron (bonus points for grill-themed puns
    like “Kiss the Chef” or “Master of the Flame”). Light a few candles, put on some smooth
    jazz, and unleash your inner culinary Casanova. Whip up a masterpiece on the grill (don’t
    forget the theatrics – flipping with flair, basting with panache!), and serve it up with a wink
    and a smile. Resistance is futile.
  2. The Future of Flavor: With your partner sufficiently seduced by the smoky siren song of
    the grill, unveil your grand plan. Present them with brochures, websites, or even a
    homemade blueprint of your dream barbecue setup. Emphasize the endless grilling
    possibilities, the backyard barbecues with friends, the romantic evenings under the stars,
    all soundtracked by the satisfying sizzle of a well-loved grill.

Remember, dear grill master, a little humor, a touch of romance, and a whole lot of sizzle go a
long way. With these tactics in your arsenal, your backyard barbecue dreams will be wafting
through the air in no time!
And hey, if all else fails, there’s always the classic “Honey, I bought you a new grill for your
birthday… and it comes with a lifetime supply of steaks… and maybe a massage chair for after
all that grilling?”
Now go forth and conquer, grill master! May your spatula wield the power of persuasion, and
your flames ignite the passion for a backyard barbecue paradise.

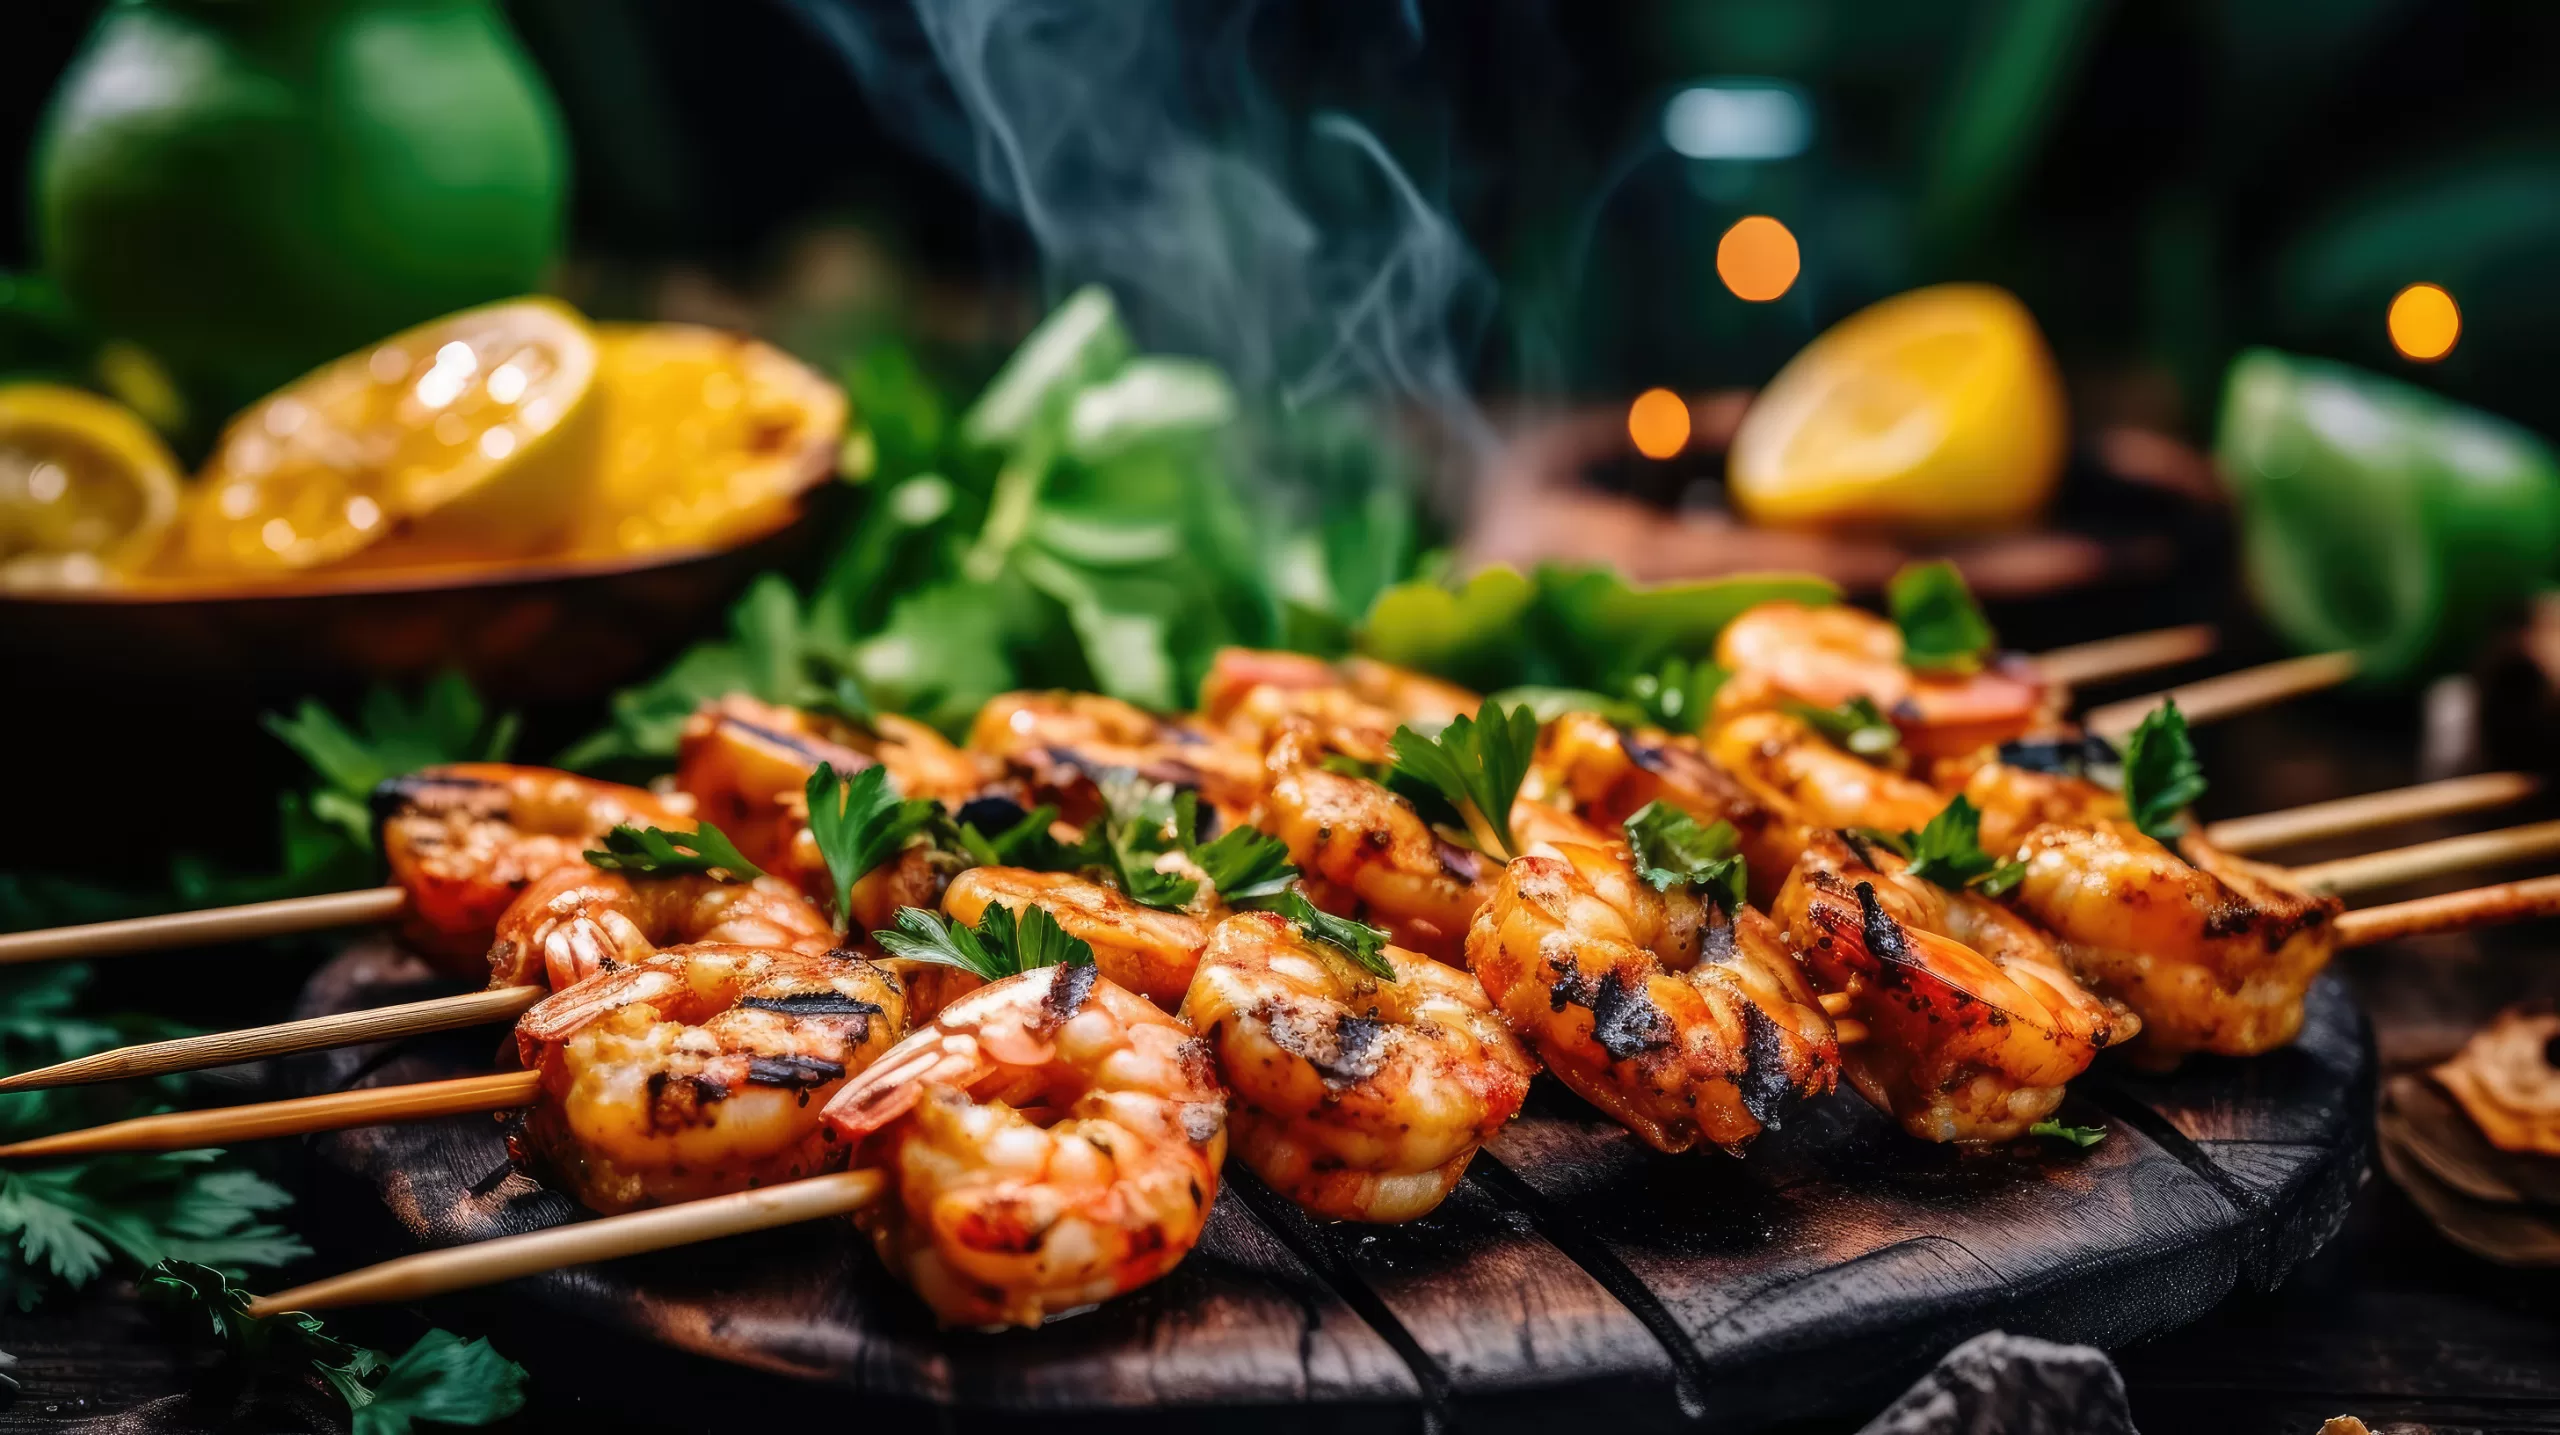
Spicy Tomatillo Shrimp

shrimp on skewers

Spicy Tomatillo Shrimp is a vibrant and flavorful Mexican dish combining succulent shrimp with a bright, tangy tomatillo sauce.

shrimp on skewers

Spicy Tomatillo Shrimp

Spicy Tomatillo Shrimp is a vibrant and flavorful Mexican dish that combines succulent shrimp with a bright and tangy tomatillo sauce.
Print Recipe
CourseMain Course
CuisineMexican
Keywordshrimp
Prep Time1 hour 15 minutes
Cook Time10 minutes
Total Time1 hour 25 minutes
Servings4
Calories200kcal

Ingredients

Instructions

  • Place the tomatillos on a hot skillet and roast for a couple of minutes or until blackened on all sides. Saute the onion and garlic in the oil until soft. Place the tomatillos, onion mixture, lime juice, and black pepper in a blender and puree until smooth. Stir in the cilantro.
  • Marinate the shrimp in the mixture for an hour. Remove and thread on skewers along with the chile strips. Grill until just done (a few minutes on each side) and serve with the sauce on the side.

Nutrition

Calories: 200kcal

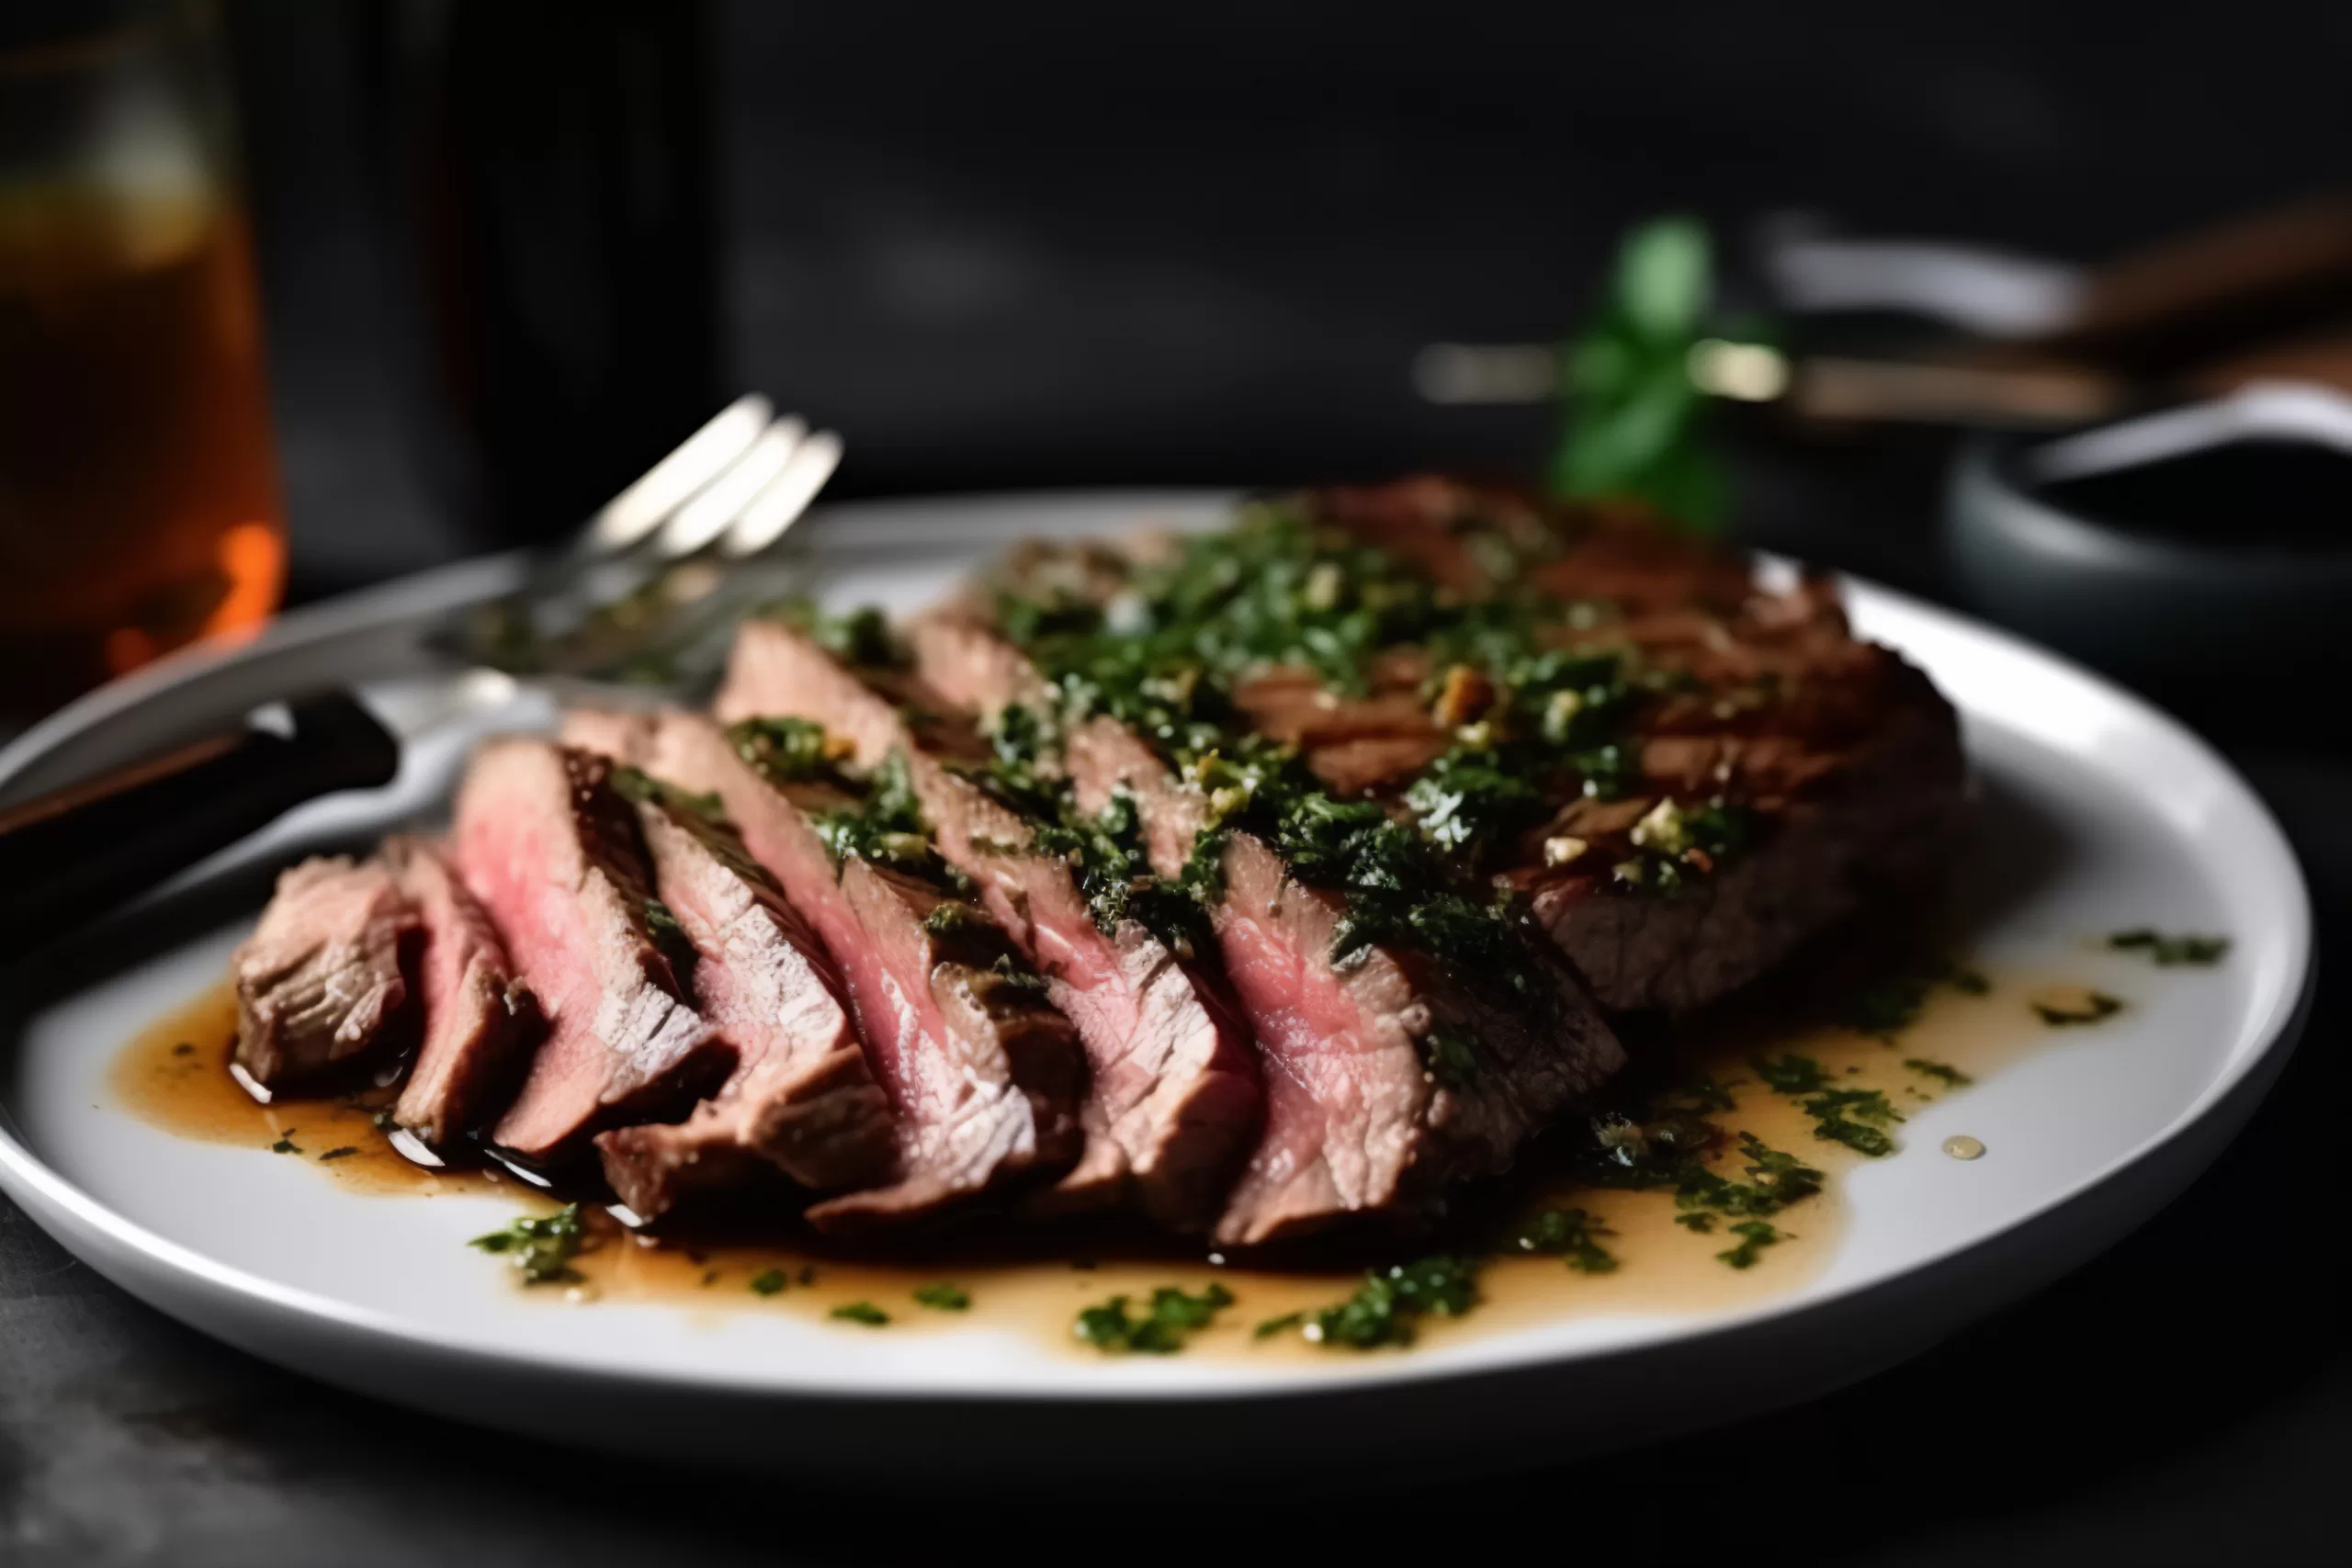
Santa Fe Flank Steak

flank steak

Santa Fe Flank Steak is a flavorful and vibrant dish that captures the essence of Southwest cuisine. The lean and tender flank steak is marinated in a blend of spices like Guajillo Chiles and garlic, creating a symphony of savory and tangy notes. This marinated steak is then perfectly cooked, resulting in a juicy and flavorful experience.

flank steak

Santa Fe Flank Steak

Santa Fe Flank Steak is a flavorful and vibrant dish that captures the essence of Southwest cuisine. The lean and tender flank steak is marinated in a blend of spices likGuajillo Chiles,and, garlic,, creating a symphony of savory and tangy notes. This marinated steak is then cooked to perfection, resulting in a juicy and flavorful experience.
Print Recipe
CourseMain Course
CuisineAmerican
Keywordbullseye grill, santa fe, steak
Prep Time1 hour 15 minutes
Cook Time15 minutes
Total Time1 hour 30 minutes
Servings4
Calories500kcal

Ingredients

Instructions

  • Place chiles and enough water to cover the chiles in a 2-quart saucepan. Heat to boiling. Boil, uncovered, for 5 minutes and then drain. Remove stems and finely chop the chiles.
  • Mix chiles and remaining ingredients except the steak. Rub mixture on both sides of the steak. Cover and refrigerate for an hour. Set grill to high or 400F then Place beef on grill.
  • Grill with tops about 3 inches from the heat until brown, about 5 minutes. Turn beef and grill until medium-rare (135F) about 4 to 6 minutes longer.
  • Cut beef, diagonally across the grain, into very thin slices.

Nutrition

Calories: 500kcal

Southwest Ham And Cheese

southwest ham and cheese

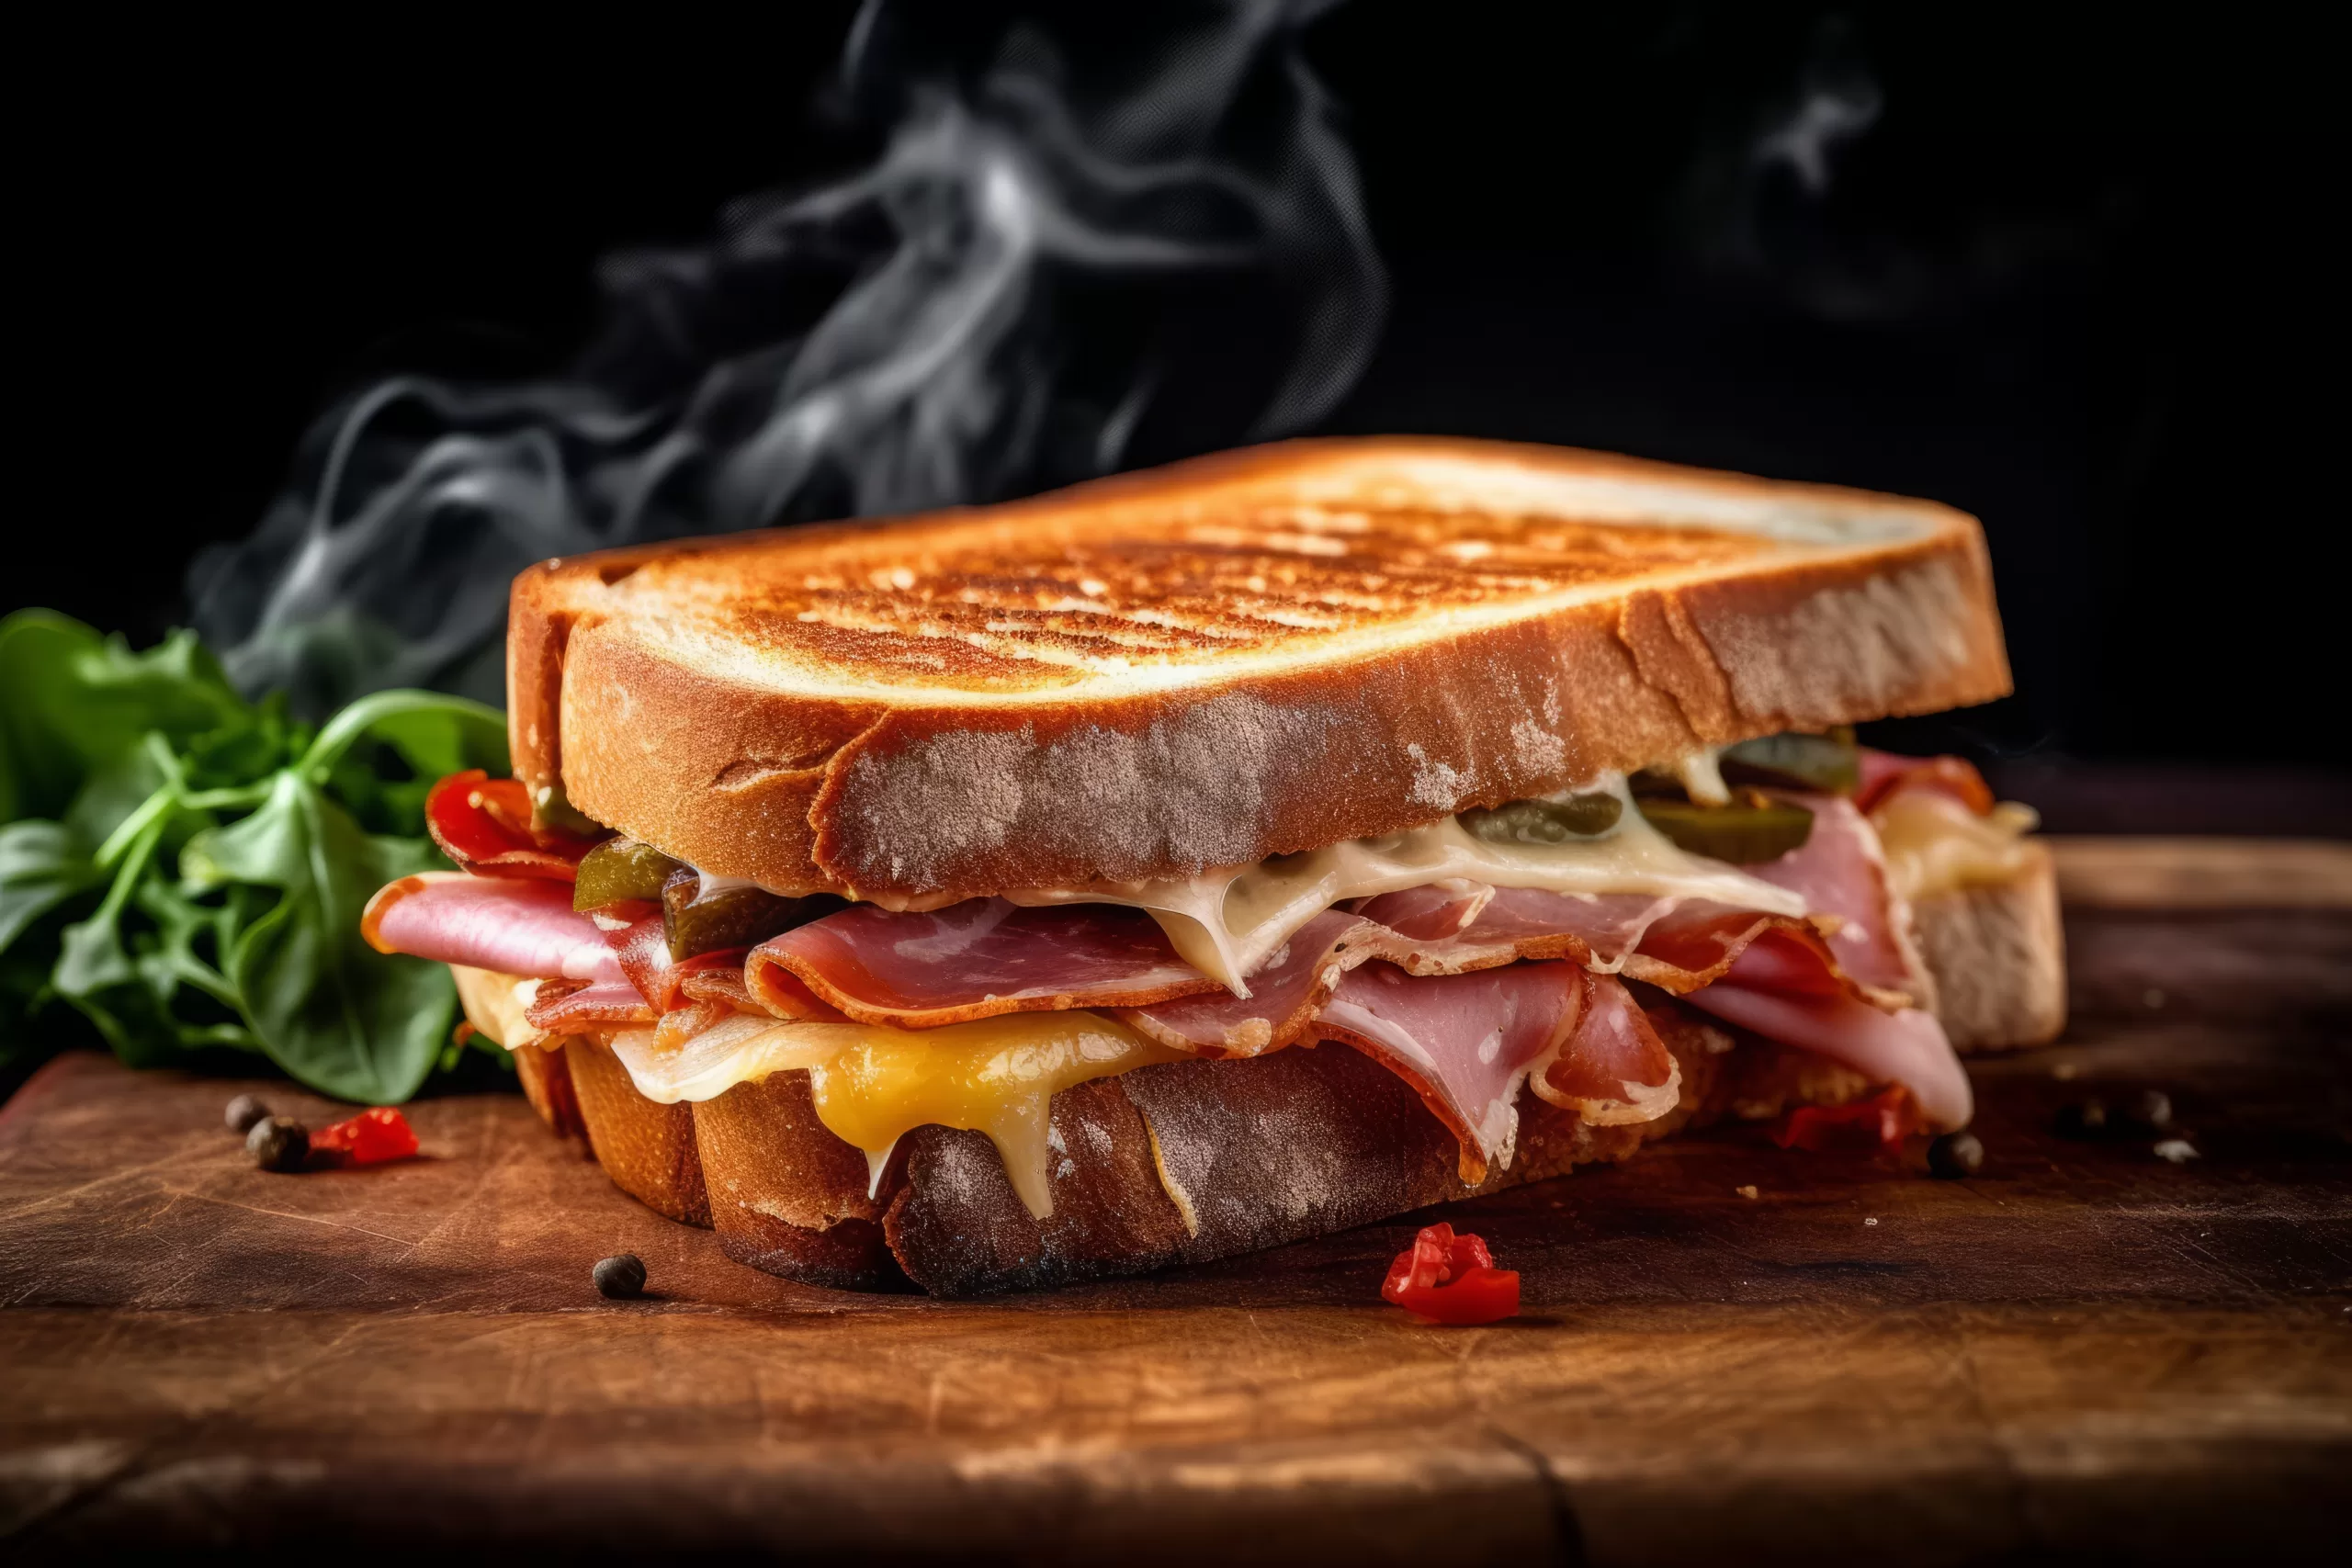
The Southwest Ham and Cheese is a delicious and flavorful twist on the classic ham and cheese sandwich. It features nitrate-free, antibiotic-free, and hormone-free ham, Swiss cheese, house-made chipotle sauce, and fresh greens served on locally-made multigrain bread. This sandwich is tasty and packed with protein, fiber, and iron.

southwest ham and cheese

Southwest Ham And Cheese

The Southwest Ham and Cheese is a delicious and flavorful twist on the classic ham and cheese sandwich. It features nitrate-free, antibiotic-free, and hormone-free ham, Swiss cheese, house-made chipotle sauce, and fresh greens served on locally-made multigrain bread. This sandwich is not only tasty but also packed with protein, fiber, and iron.
Print Recipe
CourseMain Course
CuisineAmerican
Keywordham and cheese
Prep Time30 minutes
Cook Time30 minutes
Servings4
Calories500kcal

Instructions

  • Place 1 slice ham on each of 4 bread slices. Top each with cheese, another slice of ham and the other slice of bread. Heat 2 T of the oil in a 10-inch skillet over medium heat until hot.
  • Cook 1 sandwich in oil, turning once, until golden brown and cheese is melted, about 3 minutes.
  • Repeat with remaining oil and sandwiches.

Nutrition

Calories: 500kcal