When I was young I always had a craving for barbecue. Meat cooked outside on a grill or smoker always tasted better than anything cooked in an oven or on a cooktop. As I tried to understand what I realized is the following. The combination of smoke, low and slow cooking and the unique texture that an open flame has on the outside of the meat actually changes the flavor and texture of the meat. That is what we call the sear. If you look at the steps of how a pitmaster cooks ribs versus how someone in a kitchen does it here are the
distinct differences.
In a kitchen, you season the ribs and in most cases, you put them in a 300F oven. Then cook them for a couple of hours. Then put some sauce on them and you are done.
In the backyard, you set up a BBQ for indirect cooking and adjust it to 225F (check article). Or set up a smoker to cook at 225F using a wood like Hickory or Oak. Season the ribs using a rub that you personally like. Put the ribs on the grill or grate. Then cook for three hours, remove and wrap in foil adding some moisture and cook for two more hours. Then remove the foil and glaze with a BBQ sauce and cook for one more hour. This is the famous 3,2,1 technique that many BBQ competitors still use today.
So why are the outdoor ribs so much better? Let’s go through each step.
Classic “3 2 1” Ribs
Step 1
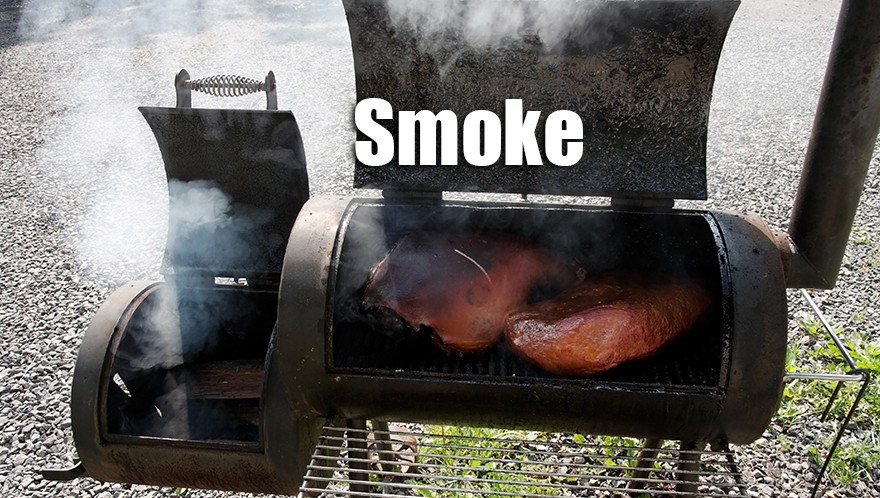
The first three hours two things are happening. The flavor of burning wood called smoke, penetrates the meat giving it a distinct taste based on the type of wood being used. The second is at 225F the connective tissues are slowly dissolving making the meat more tender.
Step 2
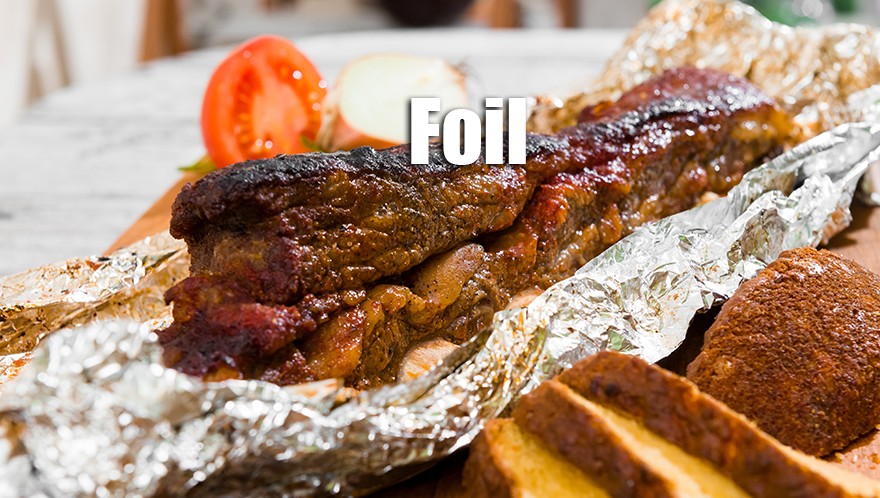
You now foil the ribs. Also, some people actually add moisture using apple juice, butter or even Parkay. This seals in the juices and the added liquid actually brazes the ribs. This gives them this extra time to dissolve even more connective tissue. It also gives the ribs more moisture making them tender and not dried out.
Step 3
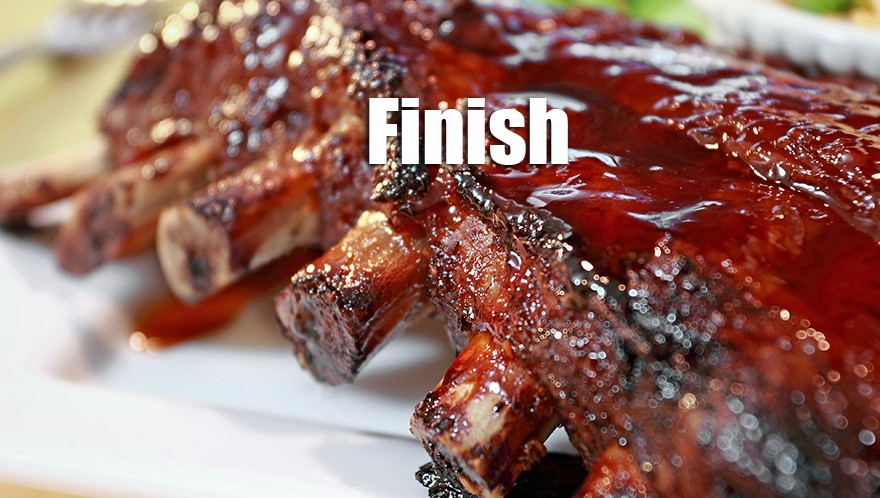
This is the finishing step allowing you to add another flavor enhancer call BBQ sauce but if you like your ribs without sauce then this step dries up some of the excess moisture and allows the outside to get a sear, or as the flames cause moments of intense heat that cause the maillard reaction. The maillard reaction is a chemical reaction between amino acids and reducing sugars that gives browned food its distinctive flavor. It is also why a steak on the grill is 100 times better than one cooked in an oven.
The 3,2,1 method of cooking ribs has been my favorite for years and if I am having company over it still the best way to cook ribs in the backyard but I actually found a better way to cook ribs.
So what is the difference? Hot water and a lot of time and I mean a lot of time. Sous vide is the French word for “under vacuum”. Should have been sous-marin for that is the French word for underwater but sous vide is easier to say. The French developed this technique to put food in a plastic bag, remove the air and then put in a hot water bath. To give you an idea of how long to cook a steak it is at least an hour, Chicken thighs take at least two hours to cook.
Ok so how long for the ribs? 12 to 36 hours depending on how tender you want them but they are going to be extremely tender. Also, they are going to be extremely moist. But that is only part of the story for sous vide cannot add smoke and there is no way you can sear in a plastic bag. Let me show you the steps to cooking really good ribs using the new enhance method using sous vide.
Sous Vide Ribs
Step 1
Season ribs and cook for one to two hours on the smoker or BBQ using the indirect cooking method and whatever wood you want to use. The primary purpose is to add smoke to the meat.
Step 2
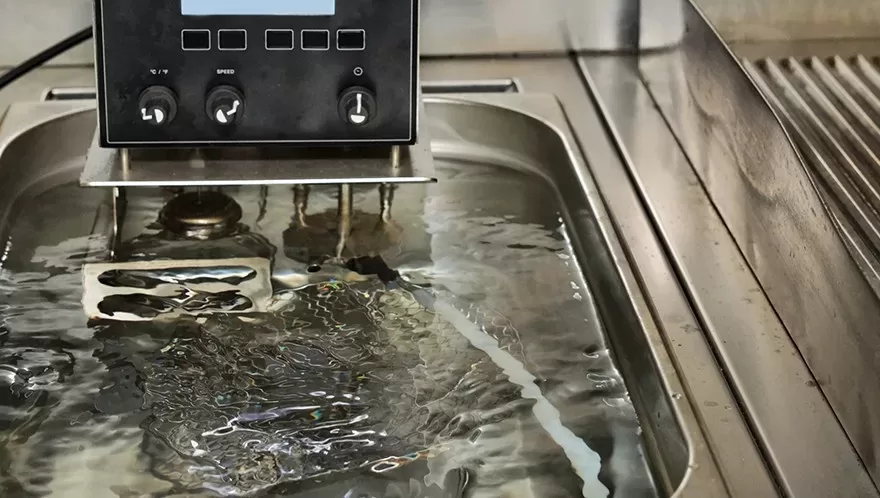
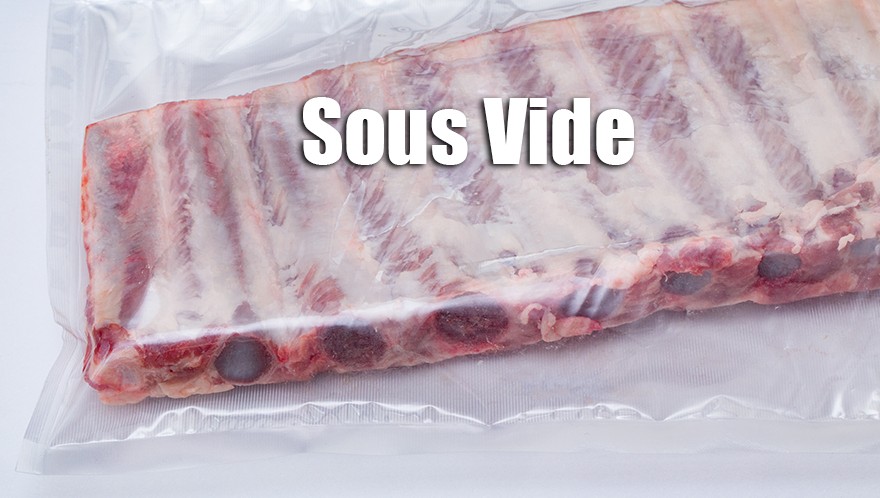
Remove and let ribs cool down so you can handle them. Seal in a plastic bag, removing all the air and then submerge into a waiting sous vide bath. Yes, it is called a bath. Cook for 36 hours at 145°F or 12 hours at 165°F.
Step 3
Set up grill or smoker and bring the temperature up till at least 400F. Remove the ribs from the bag and now put them back on the grill or grate so you can get a sear on the ribs. About 15 to 20 minutes at best. Do NOT put BBQ sauce on before doing this or the sauce will burn and ruin your ribs. If you want a glaze after the sear put the sauce on the ribs and put into the oven at 300F for about 15 minutes. Don’t worry you are not going to overcook the ribs.
I was going to call it the 2,36,15 minute method but not as easy to remember as 3,2,1 method.
It is hard for me to plan days in advance to make ribs so I get up early and do the 12-hour version. They are the best ribs I have ever made and if you have the time the only way to do ribs. One other advantage is I never leave the house when I am smoking due to the fire danger. With sous vide, you could go on vacation and might have to if you cook a brisket for that can take over 48 hours. The cooker is connected to my smartphone showing me all I need to make sure the cook is OK and it cooks inside with no flame. Takes time but does not take my time so I can enjoy the day or days.
Here is my Baby Back Ribs Sous Vide BBQ video recipe
[embedyt] https://www.youtube.com/watch?v=UEF9CId48uE[/embedyt]
Coming soon I will have a series of Sous Vide BBQ recipes and each one will have it own video up on our YouTube site. If you want to be notified just hit the subscribe button at the top of this post.
Here are our current Sous Vide BBQ Recipes: