Beer Marinated Chicken Thighs on the Rec Tec Trailblazer

Simple Chicken Thighs

Beer Marinated Chicken Thighs on the Rec Tec Trailblazer

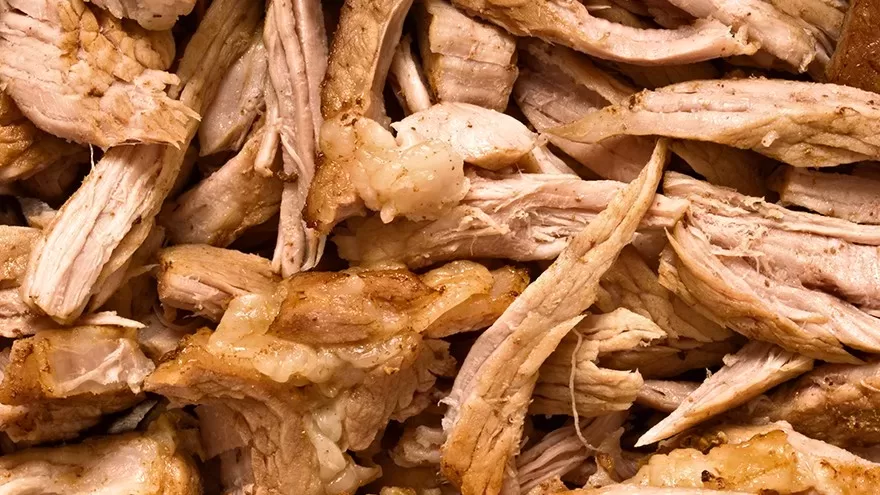
This recipe we are cooking beer marinated chicken thighs on the Rec Tec Trailblazer. Making the marinade is very straight forward but there are a few steps.
Print Recipe
CourseMain Course
CuisineAmerican
Keywordbeer marinade, beer marinated, chicken thighs, rec tec trailblazer
Prep Time30 minutes
Cook Time45 minutes
Total Time1 hour 15 minutes
Servings5
Calories260kcal
AuthorWiley

Instructions

Marinade

  • One Tablespoon of Sea or Kosher Salt.
    Salt
  • One Tablespoon of Course Black Pepper.
    black pepper
  • One Tablespoon of Granulated Garlic.
    granulated garlic
  • One Tablespoon of Onion Powder.
    onion powder
  • One Tablespoon of Red Chili Powder.
    red chili powder
  • One Tablespoon of Cumin.
    cumin
  • One Tablespoon of Smoked Paprika.
    smoked paprika
  • 1/2 Cup of Olive Oil.
    olive oil
  • 1 & 1/2 Cups (12 oz.) of a Good Kraft Beer.
    beer
  • Mix all ingredients well.
    mix well
  • Place 10 Chicken Thighs in a One Gallon Zip Lock Bag.
    chicken in bag
  • Pour Marinade into the Bag with Chicken. Try and get most of the air out of the bag.
    add marinade
  • Place Bag with Marinade into the refrigerator for at least 4 hours.
    put into refrigerator
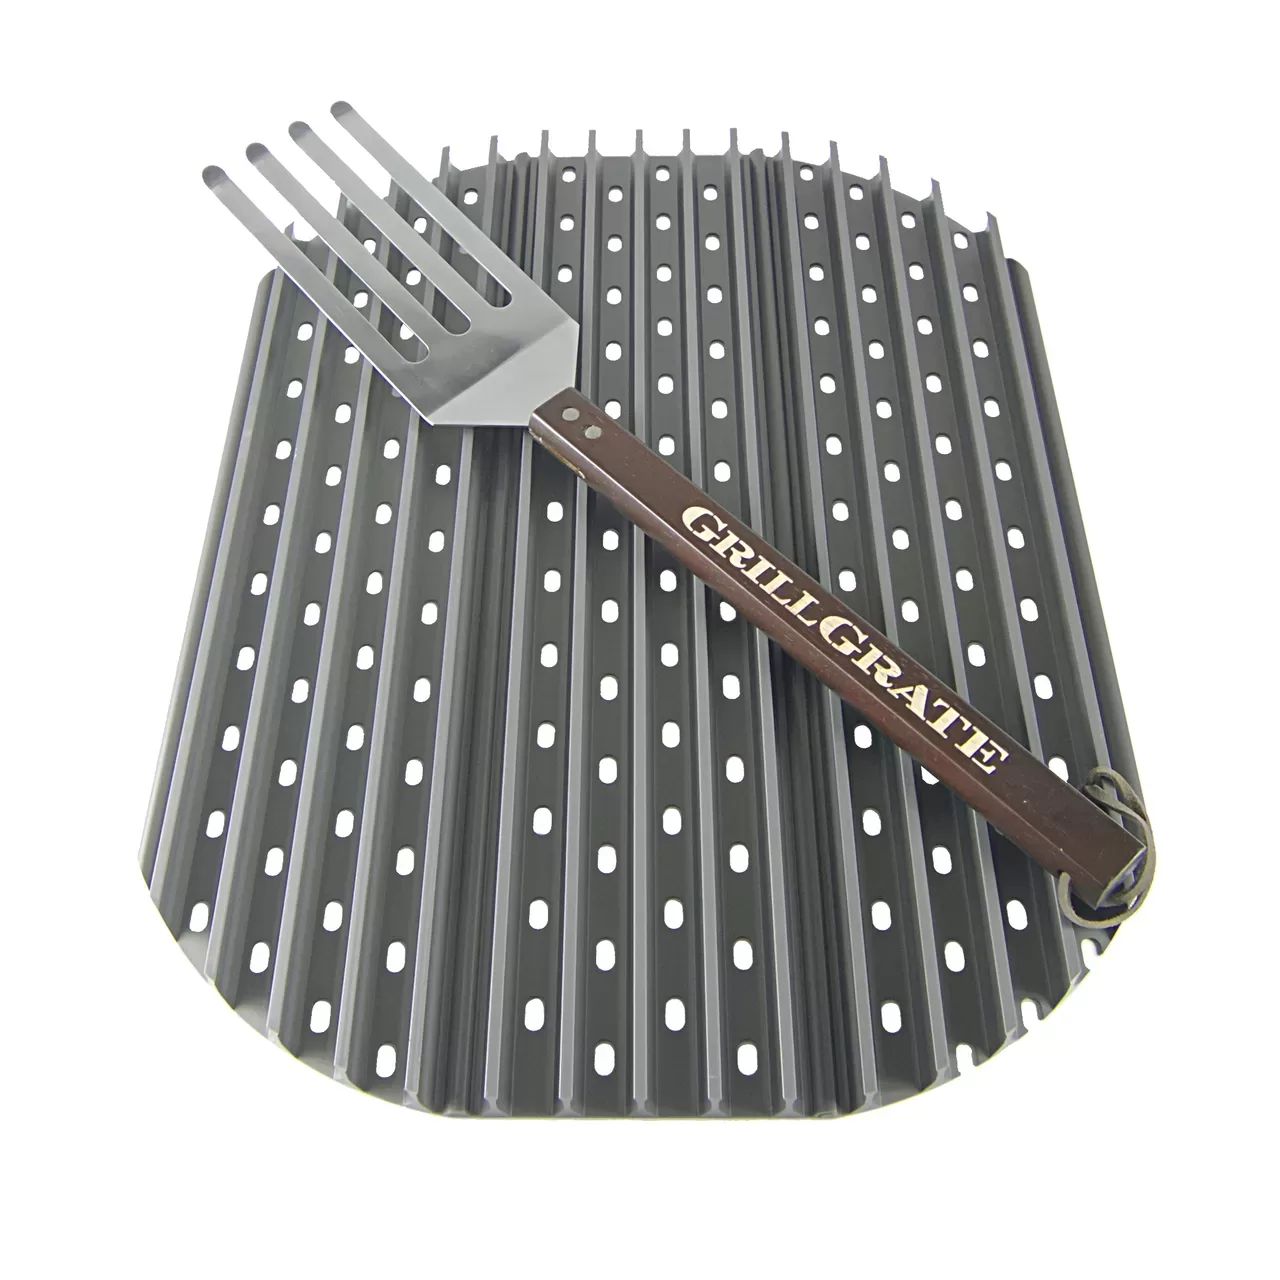
  • Remove chicken from bag and place on frogmat. Make sure that chicken skin covers the top side of the chicken thigh.
    chicken on frog mat
  • Season chicken thighs using SPG, (Salt, Pepper, and Garlic)
    add spg

Cook

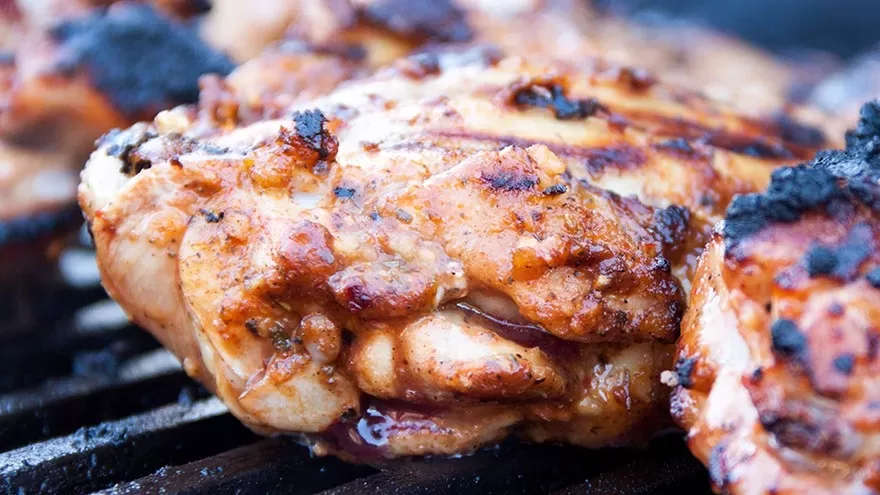
  • Place Chicken on Frogmat into Pre-heated Grill set at 425F. Put meat probe into thickest thigh in the middle of the Frogmat.
    place chicken on grill
  • Pull Chicken when internal temperature hit 175F.
    pull chicken
  • Rest Chicken for 3 to 5 Minutes. Then Serve.
    rest chicken

Video

Nutrition

Calories: 260kcal

Pulled Pork with White Sauce on the Rec Tec Trailblazer Grill

pulled pork
pulled pork

Pulled Pork with White Sauce on the Rec Tec Trailblazer Grill

Pulled Pork with White Sauce. This recipe review is my first on the Rec Tec Trailblazer grill. It is pulled pork with a simple homemade rub but also using Bib Bob Gibson White Sauce. Total cook time is just under 6 hours. We also incorporated the FireBoard Smart Thermometer.
Print Recipe
CourseMain Course
CuisineAmerican
Keywordbob gibson, fireboard, pulled pork, white sauce
Prep Time30 minutes
Cook Time6 hours
Total Time6 hours 30 minutes
Servings7
Calories706kcal
AuthorWiley

Instructions

  • To do this cook we started with a 7-pound pork shoulder with blade bone.
    pork shoulder
  • First, we need a simple rub.
    the rub
  • 4 tablespoons of kosher or sea salt.
    salt
  • 4 tablespoons of black pepper.
    black pepper
  • 4 Tablesppon of Minced Onion.
    onion
  • 4 Tablespoons of Garlic Powder.
    garlic powder
  • Now you need to mix well. Some people even use a spice blender but a bowl and large spoon will also work.
    mix well
  • Now we need to apply the rub The process is, apply rub and then spray with oil. It is important that the salt make contact with the meat before applying the oil. This way the salt will penetrate the meat.
    apply rub
  • Try and make sure the pork shoulder is fully covered in the rub. Repeat this process until all sides are covered. The rub does two things. It seasoned the meat and adds flavor. Also, it allows the outside of the shoulder to develop a bark that adds texture to the meat.
    spray oil
  • Preheat Trailblazer to 275F and then add pork shoulder to grill.
    preheat
  • Insert meat probes for both the grill and the FireBoard thermometer.
    meat probes
  • The Rec Tec App allows you to have full control over the grill as long as you have access to the internet. As you can see the grill set point is 275F. The meat temperature is 36F and the ambient temperature or current air temperature inside the grill is 80F.
    rec tec app
  • Now here is the data from the FireBoard that does not even need an app for it records all temperatures directly to a website that actually catalogs each cook. As you can see here is when the shoulder hit 160F and had to be foiled.
    160F
  • Add ½ of apple juice to the pan then seal up the shoulder with foil and then let it cook till it reaches an internal temperature of 195F.
  • Remove from grill and let rest for 30 to 60 minutes. Here how that looks on the FireBoard chart. The large swings in ambient temperature were due to having to readjust the minimum pellet rate on the grill This adjustment only needed to be done on extremely hot or cold days. This day it was 98F and we were in direct sunlight. Now that the grill is adjusted it holds temperature with 3 degrees. Now the pork should is done we need to pull from the grill. The ultimate test of a done pork shoulder is removing the shoulder blade bone.
    remove bone
  • Now drain off Excess Juices but leave about a cup in the pan so the meat stays moist as you shred it. Now get you bear claw shredders and start breaking it down into smaller pieces.
    bear claws
  • As you can see the very dark part is the bark and the darker red sections are the smoke ring.
    finished pork
  • To finish this pulled pork I am going to use Big Bob Gibson's white sauce. Highly recommend it if you want to reduce sugar or carbs in your diet. In the south when they use the white sauce with pulled pork they usually serve with biscuits instead of rolls but it good no matter how you eat it.
    white sauce
  • Highly recommend the Rec Tec Trailblazer for it did a great job cooking this pork shoulder. I now use the FireBoard thermometer to monitor and catalog all my BBQ cooks. Actually, the two together are a dynamite combination if you are serious about making great BBQ.
    firebpard thermpmeter

Video

Nutrition

Calories: 706kcal

Papa Murphy’s Pizza on the Rec Tec Bullseye Grill

Papa Murphy
Papa Murphy

Papa Murphy's Pizza on the Rec Tec Bullseye Grill

Here are the cooking instructions to grill a Chicken Special pre-prepared pizza from Papa Murphys. WARNING: If you are using a Bullseye do NOT follow the directions on the Papa Murphy's website on how to cook a Papa Murphy's pizza on a pellet grill.
Print Recipe
CourseMain Course
CuisineItalian
Keywordbullseye grill, papa murphy, pizza
Prep Time10 minutes
Cook Time10 minutes
Total Time20 minutes
Servings1
Calories285kcal
AuthorWiley

Instructions

  • Here are the instructions on how to cook a Chicken Special pre-prepared pizza from Papa Murphys on a Pellet Grill If you are using a Bullseye do NOT follow their directions. I will take you step by step and also give you recommendations on the correct way to cook a pizza on a Bullseye Grill.
    instructions 1
  • Preheat Bullseye to 450F.
    instructions 2
  • Put pizza and tray on a heat shielding surface. I strongly recommend using a pizza stone. One is listed in the Cooking Tools section but any good pizza stone will work. Now item 3 is where the instructions fall off the rail. The Bullseye is a lot hotter due to all the radiant heat that is generated. The pizza is going to be done in less than 10 minutes. If you went 20 to 30 minutes like the instructions say the pizza will come out looking like a blacken frisbee and would most likely taste like one too.
    instruction 3
  • Item 4 is just dangerous. Use oven mitts to remove pizza and tray. Only if you want to have pizza with some paramedics that are hauling you off to the burn ward. For $17 you can get a Pizza Peel and have complete control of the pizza during the cooking process.
    instructions 6
  • So here is the CORRECT way to cook a pizza on the Bullseye Grill. Preheat Bullseye Grill to 450F using a Pizza Stone.
    preheat bullseye
  • Using a Pizza Peel (oversized spatula) to slide the pizza onto the Pizza Stone.
    slide pizza on
  • After 5 minutes start checking for doneness. When the pizza starts to darken on the bottom be prepared to remove the pizza. The Pizza Peel is real handy when trying to see if the pizza is done.
    test for doneness
  • Remove pizza from Bullseye Grill using the Pizza Peel. I will never ever cook another pizza unless I have a Pizza Peel. Check it out in the Cooking Tools section. Let the pizza sit for a couple of minutes and then slice into serving pieces.
    cut pizza
  • I like the crust on the pizza to be crunchy. When you go to bite into it you can actually hear the crunch. If you want a softer crust then be prepared to remove the pizza at around 8 minutes or sooner.
    pizza closeup

Video

Nutrition

Calories: 285kcal

Baby Back Ribs on the Recteq Bullseye Grill

ribs 880
ribs 880

Baby Back Ribs on the Rec Tec Bullseye Grill

In this recipe, we will be smoking baby back ribs on the Rec Tec Bullseye Grill.
Print Recipe
CourseMain Course
CuisineAmerican
Keywordbaby back ribs
Prep Time30 minutes
Cook Time4 hours 30 minutes
Total Time5 hours
Servings4
Calories669kcal
AuthorWiley

Instructions

  • In this video, we will be smoking baby back ribs on the Rec Tec Bullseye Grill First, we have to prepare the ribs and then mean we need to remove the membrane. Find a really dull butter knife.
    butter knife
  • Starting on the wider part of the ribs slowly lift the membrane using the dull knife. When there is enough membrane to grab use a paper towel to slowly remove the membrane The more membranes you remove the easier it gets.
    remove membrane
  • Now get a broiling pan and lay the ribs with the membrane side up. We now apply the rub. This time I am using Mc Cormick grill mates sweet and smoky rub. I do one rack of ribs at a time. First, I apply rub and then I spray with a vegetable oil so the rub stays in place. The reason you apply the rub first is you want the salts and sugars to dissolve in the meat. You do not want the oil to get in between the rub and the meat.
    apply rub
  • Then flip over the ribs and do it all over again. As far as oil I have tried many but any low-cost cooking oil will work. If you have the time you might want to let the rub sit for about thirty minutes. Then it is off to the grill.
    flip ribs and add more rub
  • You should pre heat the bullseye grill till it is a minimum of 225F. I find adjusting the Temperature dial to the 10 o clock position will get pretty close to temperature.
    10 o clock
  • I like my ribs without a lot of moisture but you could add apple juice, honey or even Parkay. Now cook for 2 more hours.
    foiled ribs
  • Remove the foil and be careful to not let the juice fall to the bottom of the grill. You can see how the ribs are bending they are technically done but we are going them dry out on the grill for another 30 minutes. I did not save the juices this time but if I had been doing mash potatoes I would of use them to make a gravy.
    last 30 minutes
  • So here is our FireBoard Session. We cooked for 4 hours and 38 minutes. Our average temperature was 231F and as you can see the Bullseye was extremely consistent on temperature. We cook for 2 hours on top of the GrillGrates
    fireboard 1
  • We then wrapped in foil for 2 more hours.
  • We then let the ribs dry out for 30 more minutes.
  • Ribs are now done and the first thing we look for are they tender and not mushy. They sliced very well and were consistent all the way from the outside rib to the middle ribs.
    cut ribs
  • I then took some of the meat from an end rib and boy was it tasty. One big greasy thumbs up.
  • Now we look to make sure the rib is not dry and has a well-developed smoke ring. The ribs were not dry and had a great looking smoke ring.
  • The next and last test is the tug test.
  • The meat is NOT falling off the bone but as you bite the meat come CLEAN from the bone. We call that a clean tug. All I can say is the Bullseye does a great job of smoking ribs.

Video

Nutrition

Calories: 669kcal

Paella on the Rec Tec Bullseye Pellet Grill

Paella on the Rec Tec Bullseye Pellet Grill or Weber 22 inch Kettle Grill

We are doing Paella on the Bullseye grill. Traditional Paella is cooked outdoors over wood-burning pits and they use a very special paella pan.
Print Recipe
CourseMain Course
CuisineSpanish
Keywordbullseye grill, paella, rec tec
Prep Time30 minutes
Cook Time1 hour
Total Time1 hour 30 minutes
Servings8
Calories234kcal
AuthorWiley
Cost25

Instructions

  • We are doing Paella on the Bullseye grill. Traditional Paella is cooked outdoors over wood-burning pits and they use a very special paella pan. The pan I got is the Valenciano paella pan that is 16.5 inches in diameter, and that is not counting the handles.
  • As you can see this pan is the perfect size for the Bullseye. For more information on this pan check out the Cooking Tools section above. With pan in place preheat the BBQ to 500F.
  • First coat bottom of the pan with olive oil. Now add the chicken. You are going to cook each ingredient separately but use the same pan. This allows all the different flavors to come together with the olive oil. Then that flavor mixed with the saffron gives Paella that very unique taste.
  • The chicken will take the longest to cook and because this is a very hot pan keep turning the chicken so it will not burn. Chicken should be done in 20 minutes.
  • Now remove chicken from pan and start cooking the prawns The prawns only take a few minutes and when they turn bright red they are done. When cooking the prawns make sure each one makes full contact with the bottom of the pan.
  • Time to remove prawns and start cooking the chorizo sausage. The sausage is actually already cooked but you want the sausage to sweat and coat the pan with flavor. Spanish chorizo is milder than the Mexican version. For that reason, there is no worry about it being too spicy.
  • With the sausage is done remove the sausage and then cook the onion, garlic and green beans or peas all together. This will only a take a few minutes.
  • Remove the vegetables and then pour 4 cups of chicken broth into the pan.
  • Now pour in 2 cups of yellow or saffron rice. With the spatula even the rice out so that it covers the bottom of the pan.
  • With the broth close to boiling put the cooked meat back into the pan and evenly distribute.
  • Then add the cooked onion, garlic, and green beans/peas. Now cover and wait about 10 minutes.
  • When the rice has absorbed almost all of the liquid the Paella is done.

Video

Nutrition

Calories: 234kcal

Pulled Pork on the Rec Tec Bullseye Grill – FireBoard Thermometer – Keto – HFLC

Pulled Pork on the Rec Tec Bullseye Grill - FireBoard Thermometer - Keto - HFLC

This is my first low and slow cook using a Rec Tec Bullseye Grill. Making Pulled Pork and using the FireBoard Cloud Connected Smart Thermometer.
Print Recipe
CourseMain Course
CuisineAmerican
Keywordbullseye grill, pork shoulder, pulled pork
Prep Time30 minutes
Cook Time6 hours 30 minutes
Total Time7 hours
Servings8
Calories690kcal
AuthorWiley

Ingredients

Meat and Rub

Carolina Mustard Sauce

Instructions

Real Time Chart of Cook

  • This is my first low and slow cook using a Rec Tec Bullseye Grill. Making Pulled Pork and using the FireBoard Cloud Connected Smart Thermometer. Estimated time to cook 8 hours at 275F. Real-time was 8 hours and 36 minutes at an average temperature of 284F Cooked on grate till an internal temperature of 160F then foiled and cooked till 195F and then pulled.

Setup Grill

  • First thing, we put a foil pan underneath where the pork shoulder is going to sit on the grate. The Bullseye does not have a drip pan and no one wants to clean the grease out of the bottom of the grill. We then put the ambient temperature probe right in from of the pork shoulder as close to the middle of the grill as possible.

Applying the Rub

  • Now we need to season the pork shoulder. For this cook, I am using only Adobo seasoning with Pepper as my rub. Adobo seasoning is my goto when making carnitas and wanted to give this pulled pork a Mexican flavor. Make sure you season all sides and I go around the roast two time. Adobo has plenty of salt and will still give you a nice bark without having to add any sugar. Actually, this recipe is great if you on a Keto diet.

Putting Pork Shoulder on Grate

  • Now make sure you have preheated the bullseye grill to at least 250F. One really cool feature of the fireboard thermometer is the moment you plug in a probe it will start data logging. Now center the pork shoulder over the foil pan and make sure the meat probe is in the middle of the roast but not touching the bone. Close the lid and set the pellet speed to third position from off or if you are x military set it at 10:00 a clock.

Cooking until 160F then Foil

  • Now three more hours and the pork shoulder is at 160F and will be foiled so it will not dry out. To be on the safe side I use a foil pan with foil wrap to make sure the pork shoulder is fully wrapped but if I get a tear I can keep the juices out of the bottom of the bullseye.
  • Leave the meat probe in and make sure the foil is not touching the probe. Now put the pork shoulder back on the grill and close the lid.

Carolina Mustard Sauce

  • Mix all ingredients well and then let the sauce sit for about 20 minutes.

Shred and Add Sauce

  • Shred with Bear Claws and then switch to two forks. Add Carolina Mustard Sauce to pork and then use forks to evenly spread the sauce over every inch of the pork. Now serve the pulled pork with your favorite coleslaw.

FireBoard Results

  • Here are the final results of the cook using the FireBoard Smart Thermometer. First Low and Slow cook on Bullseye Grill using FireBoard Smart Thermometer. Estimated time to cook 8 hours at 275F. Real-time was 8 hours and 36 minutes at an average temperature of 284F Cooked on grate till an internal temperature of 160F then foiled and cooked till 195F and then pulled.
    fireboard final results

Video

Nutrition

Calories: 690kcal

Hot and Fast Chicken Thighs on the Rec Tec Bullseye Grill

chicken thighs
chicken thighs

Hot and Fast Chicken Thighs on the Rec Tec Bullseye Grill

Hot and fast chicken thighs on the Rec Tec Bullseye Pellet Grill. How about from cold grill to finished chicken in 45 minutes or less.
Print Recipe
CourseMain Course
CuisineAmerican
Keywordbullseye grill, chicken, chicken thighs, rec tec
Prep Time20 minutes
Cook Time45 minutes
Total Time1 hour 5 minutes
Servings6
Calories260kcal
AuthorWiley

Ingredients

Ingredients

Instructions

Preparation

  • To start we need to do a few things. First Layout two paper towels. Then put down a frogmat or grill mat. Just make sure it can handle the high temperature of at least 500F.
    grill mat
  • Now lay chicken thighs out with the skin facing up.
    chicken on mat
  • To make this easy we are going to use a pre-made rub. The rub we are using is Grill Mates Tennesee Whiskey Chicken Rub. One teaspoon of rub has only 2 grams of carbs so is safe for those that are on the Keto diet or are pre-diabetic like my self.
    chicken with rub
  • After rub is applied to skin side turn chicken over and then apply on the back side. Please note that when you are done with the rub the chicken is sitting on the grill mat with skin facing down.
    other side with rub
  • Here is the bullseye with the grillgrates in place and on high or knob turn all the way to the right. After preheating for 8 and ½ minutes put chicken it the center of the grillgrates. Now close lid.
    chicken on grill
  • And set a timer for 15 minutes. Check ambient or air temperature inside the grill and it should be 500 F.
    ambient temperature
  • After 15 minutes check skin to see it there are grill marks. Even with the grill mat in the way, the grillgrates will still leave grill marks. With grills marks in place and the skin well rendered, it is time to turn the chicken over. Now you see all that smoke. Well it is not from the pellets. It actually the fat that is being rendered that drips onto the really hot grillgrates. As the fat vaporizes it is creating a wonderful flavor that is going right back into the chicken.
    grill marks
  • After turning the chicken let it cook for another 15 to 20 minutes but you have to start checking the temperature no later than 15 minutes. When all the pieces are a minimum of 175F then it is time to pull the chicken.
    177 temp
  • So how did it come out? The grill rook 8 ½ minutes to warm up and the lichen too a total 34 minutes to cook. That is a total time of 42 and ½ minutes. But is cooked all the way through? You can see the grill marks and the skin is firm. As I cut through there is nothing rubbery about this skin. Also, you can see it is well cooked and cooked all the way through The meat is very moist and very easy to cut. So how does it taste? What can I say? Once you go hot and fast you never want to go back. The Bullseye is a hot and fast searing machine. I challenge anyone to see if the can completely cook chicken thighs in less than 45 minutes and do this without burning the chicken or burning down your house.
    finished chicken

Video

Nutrition

Calories: 260kcal

Chicken Wings with Alabama White Sauce – Keto – HFLC

chicken wings with white sauce

Chicken Wings with Alabama White Sauce - Keto - HFLC

On the Rec Tec Bullseye grill, we will be cooking chicken wings and making a special Alabama white BBQ Sauce. This white sauce is very popular in Alabama but now has a strong following all over the US. Big Bob Gibson gets the credit for making this white sauce in his restaurant in Decatur, Alabama.
Print Recipe
CourseMain Course
CuisineAmerican
Keywordalabama white sauce, bob gibson, chicken wings
Prep Time1 hour
Cook Time1 hour
Total Time2 hours
Servings5
Calories486kcal
AuthorWiley

Instructions

The Setup

  • Bullseye Grill. GrillGrates - 22 inch round. Frogmats or wire rack to insulate from GrillGrates. ThermoPro TP20.
    grillgrate on bullseye grill

The Rub

  • First we will start with a simple but really good rub. Just two ingredients. 1/2 Cup of Montreal chicken seasoning.
    montreal chicken seasoning
  • 1/4 Cup of dry mustard
  • Mix the two ingredients together well. Put off to the side for later.

The Alabama White BBQ Sauce

  • Now it is time to make the sauce. 2 cups of mayonnaise.
  • 1/2 a cup of apple cider vinegar.
    apple cider vinegar
  • 2 tablespoons of lemon juice.
  • 1 teaspoon of prepared horseradish.
  • 2 tablespoons of spicy mustard.
  • 1 big tablespoon of sriracha sauce.
  • 1 teaspoon of onion powder.
  • 1 teaspoon of garlic powder.
  • salt to taste.
  • Whisp till the sauce is smooth with no lumps. Now put the sauce in the refrigerator and let sit for about an hour.

The Cook

  • Here are the chicken wings. Yesterday I lightly salted them and let them sit in the refrigerator for 24 hours. This allows the skin to dry out and hopefully eliminate rubbery chicken skin.
  • Now it is time to apply the rub. Because the wings are small I like to apply the rub with my hands.
  • Preheat Bullseye Grill to 450F.
  • Place wire rack of chicken wings on top of GrillGrates. You could also use frogmats if you prefer. Make sure that the chicken does not overhang the GrillGrates or it could burn.
  • After 20 minutes turn chicken wings over.
  • Ater another 20 minutes chicken wings will be done. Make sure everyone has their own plate of wings with a small dipping bowl with the Alabama white BBQ sauce. Chicken wings will have a brown and firm skin that is not greasy.
  • The chicken meat will be very juicy and should not be hard to take off the bone.

Video

Nutrition

Calories: 486kcal

GrillGrate on the Rec Tec Bullseye Review

GrillGrate Rec Tec Bullseye Review

The Setup

This is my review of the GrillGrate on Rec Tec Bullseye Grill. When I ordered my Rec Tec Bullseye Grill I got the full package that included pellets and a GrillGrate that fits the 22-inch ground grill. At first, I thought the GrillGrate was just some gimmick device that I would use a few time and then never use again. What I found was the Bullseye and the GrillGrate is the perfect marriage if you want to properly sear food. Continue reading “GrillGrate on the Rec Tec Bullseye Review”

Sous Vide BBQ Pulled Pork – Keto – LCHF

sous bide bbq pulled pork

Sous Vide BBQ Pulled Pork - Keto - LCHF

This recipe incorporates sous vide cooking with BBQ smoking. The rub is very easy to do and simplifies the preparation process. I promise you this will be the most tender and moist pulled pork you can ever make.
Print Recipe
CourseMain Course
CuisineSous Vide
Keywordsous vide, sous vide bbq, sous vide pulled pork
Prep Time1 hour
Cook Time22 hours 59 minutes
Total Time23 hours 59 minutes
Servings8
Calories690kcal
AuthorWiley

Instructions

  • Pulled pork comes from the pork shoulder or Boston butt. This part of the pig has both fat and a lot of connective tissue.
    pig diagram

The Rub

  • First step, we will start with the rub. This is simple but very affective rub when doing a sous vide cook. One cup of Montreal Steak Seasoning. One quarter cup of Garlic Salt. Two tablespoons of Cumin. And two tablespoons of dry mustard.
    rub ingredients
  • Mix well in a mixing bowl and try to remember that we need the salt well distributed through the rub. The salt will act like a dry brine helping to not only season the pork but also tenderize it as the pork cooks.
    mix rub

Prepare for the Cook

  • Now go find the ugliest broiler pan you can find. Empty roast into pan keeping the juices from the bag. I roll the roast in the juices so the when I apply the rub the rub will stick to the roast Apply the rub to every inch of the roast. Make sure you use every bit of the rub for you need all the salt so the roast can tenderize.
  • Now here comes the real challenge. How do you get an 8-pound roast into an 11-inch wide bag? Put roast into vacuum bag without rubbing off the rub. This part is important for the bag end has to be clean so you can use the vacuum seal. Also if you have any rub left just put it into the bag.
    put in bag
  • Make sure the sealer is set in liquid or moist mode depending on your unit. Now vacuum seal the roast in the bag.
    seal roast in sous vide bag
  • I always double seal the bag at both ends when using larger pieces of meat. I have never had a bag failure when doing a double seal.
    double seal

Sous Vide Cook

  • Now it is into the bath at 165F for 24 hours.
    pulled port in sous vide bath
  • 24 hours later remove from bath and make sure you have a half size foil pan ready. Now carefully drain juices into the pan and then remove roast from the bag. You will need some of these juices when it comes to shredding the pork Now go get another foil tray and transfer the roast over. Remember to save the juices.
    remove from bag
  • Now it is time to pat down and dry the surface of the roast. I then sprinkle some more Montreal steak Seasoning. This will allow the roast to develop a crust or bark as we say in BBQ.
    pat down pork

The Smoke and Bark

  • Goes into the smoker or grill setup up for indirect cooking at 225F for 2 hours.
    in smoker

The Shred

  • As you can see it has a great bark. Also, it is extremely tender. I could have just used my hand to pull it apart. If you have ever done pulled pork you will know that it does not get any better than this. Not only is it tender but all the excess fat has rendered into the meat or meat juices that we saved.
  • First pass I use the big claws to break the roast into large pieces.
  • Now It is time to add some of the juice back. This is personal preference but I did add some apple cider vinegar and mustard to the juices.
  • Now the final pass and this time you use two forks and shredded it to your liking. Pulled pork is great in sandwiches, with eggs, in enchiladas, burritos and if you add onions and green salsa one of my favorites and that is carnitas.

Video

Nutrition

Calories: 690kcal