Rotisserie Turkey on the Recteq Wyldside using the ThermoWork BlueDOT
This recipe shows how to cook a 12-pound turkey on a rotisserie using herb butter and using a ThermoWorks BlueDot thermometer to monitor the turkey internal temperature.
Print Recipe
Equipment
Ingredients
Cooking Tools
- 15.4 Pound Lump Charcoal
- 1 Bag Hickory Chunks
Cooking Ingredients
- 12 Pound Turkey
- 2 Sticks Unsalted Butter
- 1 Tablespoon Sage
- 1 Tablespoon Rosemary
- 1 Tablespoon Thyme
- 1 Pair Food Preparation Gloves
Instructions
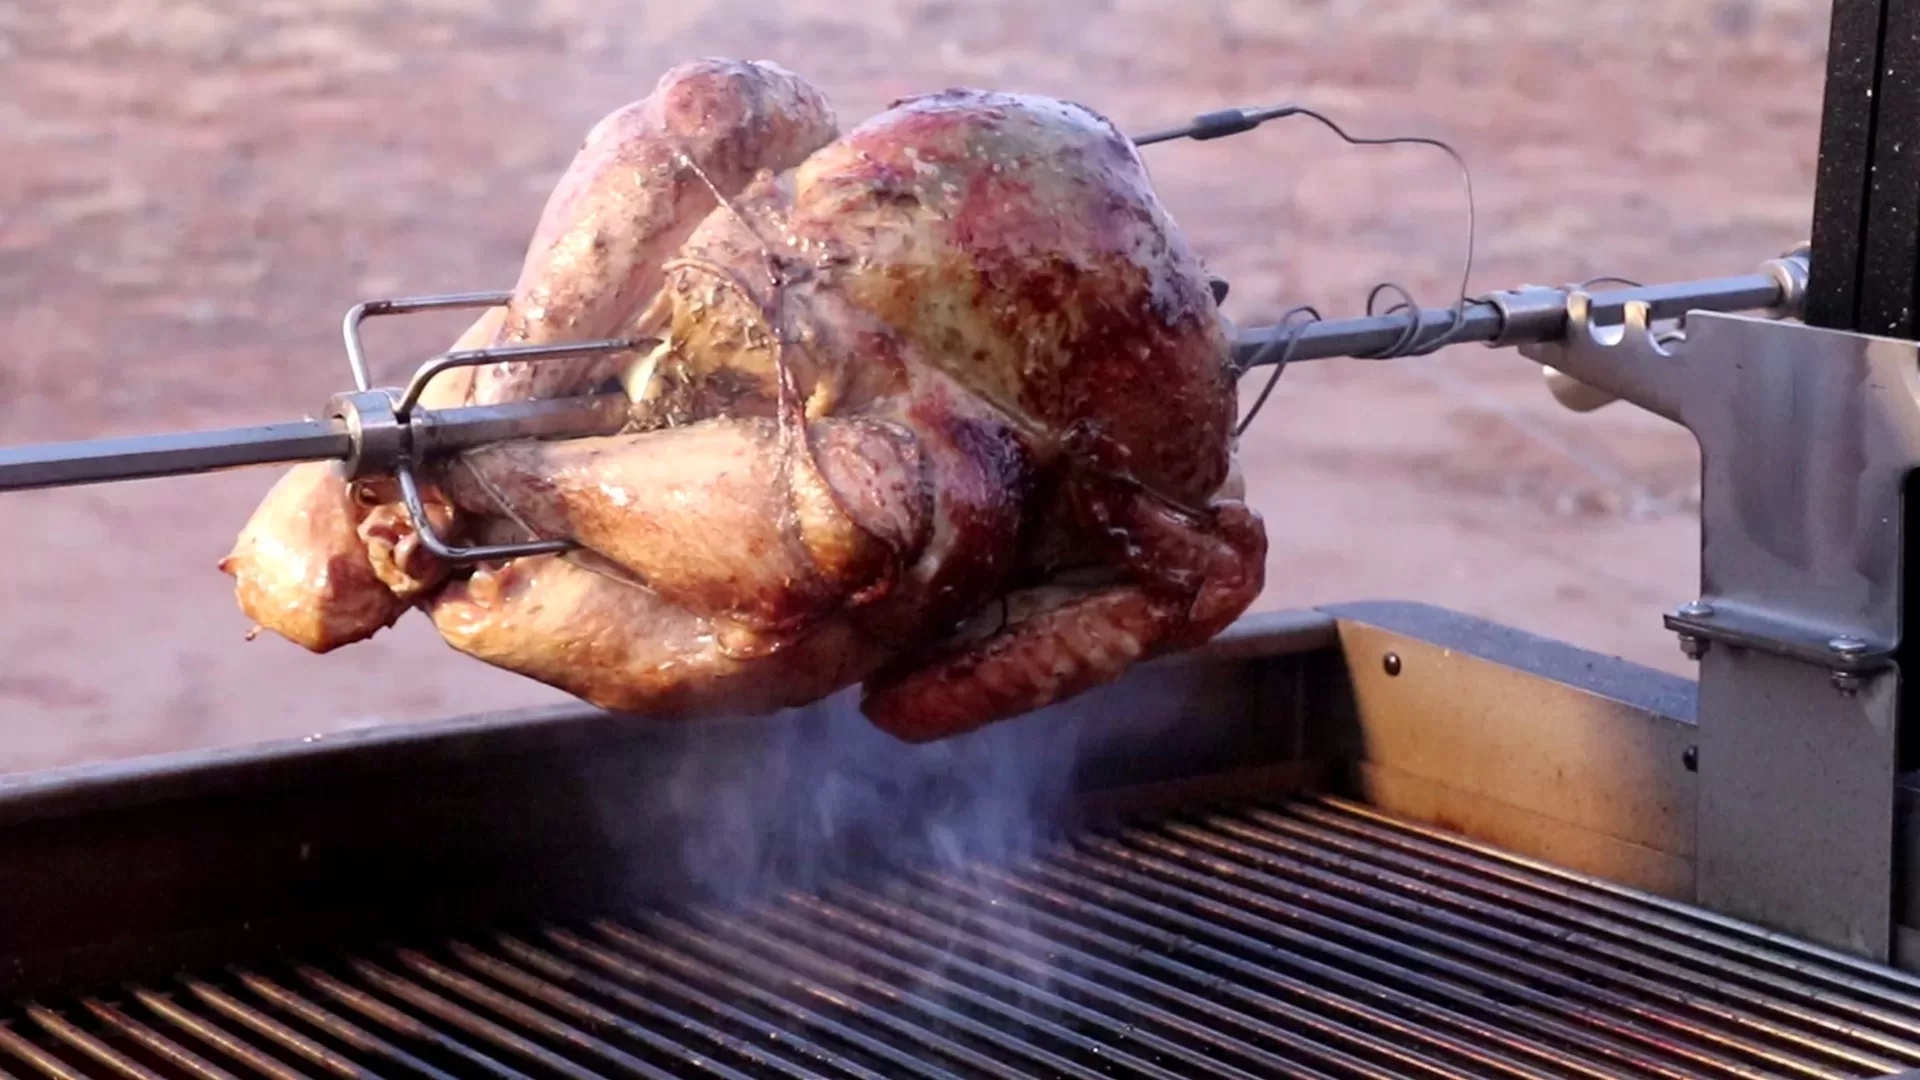
- Here what it looks like when I first put the turkey on. The rotisserie handled this 12-pound turkey like it weighed nothing.

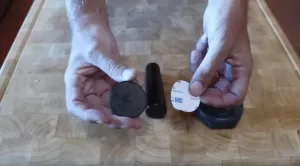
- The ThermoWorks BlueDOT also ran flawlessly and its round design and two powerful magnets in the back made attaching it rather easy.

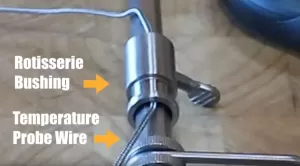
- To attach the BlueDOT all I needed was a round disk used to mount phones magnetically to your dash.To attach the BlueDOT you need to route the BlueDOT temperature probe wire through the rotisserie bushing. This bushing allows the spit to turn freely on the grill.
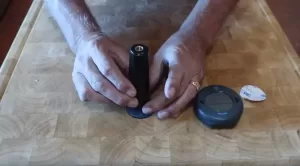
- Wipe the spit handle clean and remove the paper so the adhesive is exposed
- Now center the disk at the end of the handle.I felt it was easier to put the disk on the table and then center the handle.
- With disk attached to handle take the blue dot and test how secure it is. I was amazed at how strong the magnet was and how secure the BlueDOT became on the handle.
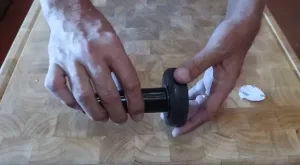
- Now before you attach the handle just make sure the probe cable can be attached to the BlueDOT and also that the temperature probe can be inserted into the turkey.
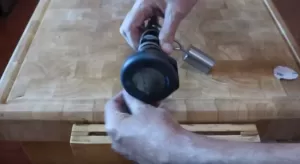
Now screw the handle back on to the spit.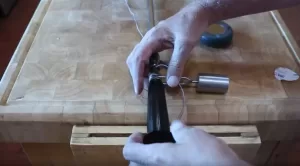
- Because your cable is going to be a lot longer than you need I wrapped the excess cable around the handle before inserting the cable into the BlueDOT.
- Now it is time to prep the turkey.I borrow this recipe from Gordon Ramsey and it is great at keeping a turkey moist.The secret is making an herb butter.Your start with 2 sticks of unsalted butter.
1 Tablespoon of Sage
1 Tablespoon of Rosemary
1 Tablespoon of Thyme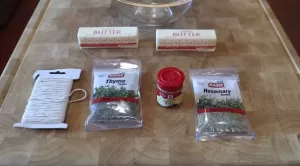
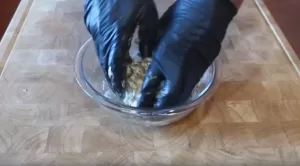
- Now clean your hands and put on a pair of food preparation gloves and go for it. You need to make sure every inch of butter is mixed with the spices.Now put the herb butter in the refrigerator and let all those spices become one with the butter.
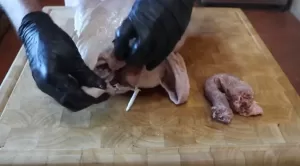
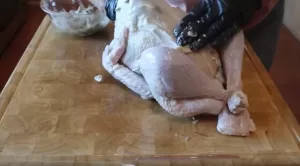
- Now on to the turkey.Got this 12 pound turkey at Sprouts Farmer Market. It is fully natural and has not been injected with salt. If you see the words enhanced when you by a turkey it means they injected salt into the turkey. The only thing that is enhanced is the companies bank account. For the salt makes the turkey weigh more when it is bought.Also, you should never brine an enhance turkey and also an enhanced turkey does mean it is brined. It is not.As you see I am removing all the accessories. You do not need any plastic holding legs or a popup temperature gauge that guarantees an overcooked turkey.Do keep the neck and all the gizzards for they make a great gravy.
- Now its time to tie up this bird. You do not want the legs and wings dangling on the rotisserie.I separate the job into two twines. One twine to hold the wings in tight and then a second twine to secure the leg s and also hold the skin tight.Take twine and loop behind the wings then go around the turkey and secure the wings.Make sure you cut the loose ends of the twine so they do not get close to the fire..
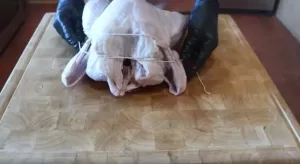
- With the wings tied get a second twine and loop it around the breast bone and follow behind each leg.This will push up the breast and also pull the legs up so the skin will tighten and will cook evenly.Put the legs together with one on top of the other and wrap legs with twine.Flip the bird over and then circles twine over the pope nose and pull twine tight and tie.
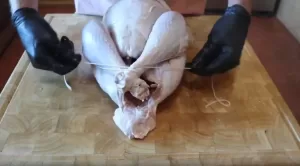
- Now make final adjustments and get ready to apply herb butter.Before the butter can be applied you need to separate the skin from the breast.With your finger push slowly but firmly between the breast meat and the skin.Do this from both sides of the cavity.
- Now go get he herb butter and put it into the microwave for around 20 seconds and soften it up.Now apply butter on every inch of the breast under the skin.As you put more butter in with one hand use the other hand to even out the butter.This butter is going to give you a very moist turkey with a perfectly golden turkey skin and the herbs will add those subtle flavors we all crave when we have thanksgiving turkey.
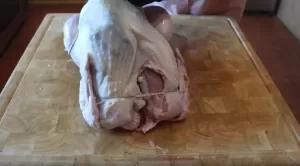
- When you are done covering the breasts then cover every inch of skin on the outside and also in the cavity.More butter means better self-basting as the bird turns on the rotisserie.Now you know where the name Butterball came from.
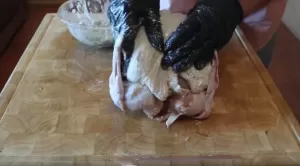
- Make sure you get into all the crevasses and also underneath the twine.Now it is time to put the turkey on the spit rod.With the turkey laying with the breasts facing up put spit rod through the top cavity and then the lower cavity making sure the rod is above the legs.Insert spit rod fork into the upper part of the breastsNow put the other spit rod fork and make sure both legs are secured by the fork.Now using plyers make sure both forks are secured.
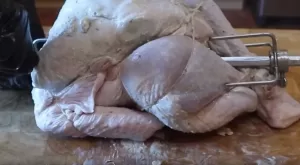
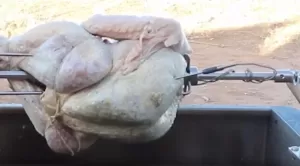
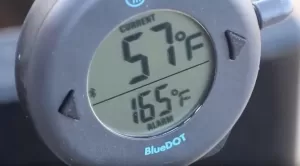
- Now it is time to get this turkey on the grill and as you can see the rotisserie is turning freely without any hesitation and the bird is not flopping around.The BlueDOT temperature probe is also inserted into the thickest part of the breast.Here is the BlueDOT only minutes after I put the turkey on.
- Turkey's temperature is 57 degrees and the alarm is set for 165 degrees. As you can see very easy to read the display.For cooking fuel, I am using Royal Oak lump charcoal and Kingsford hickory smoking chunks.
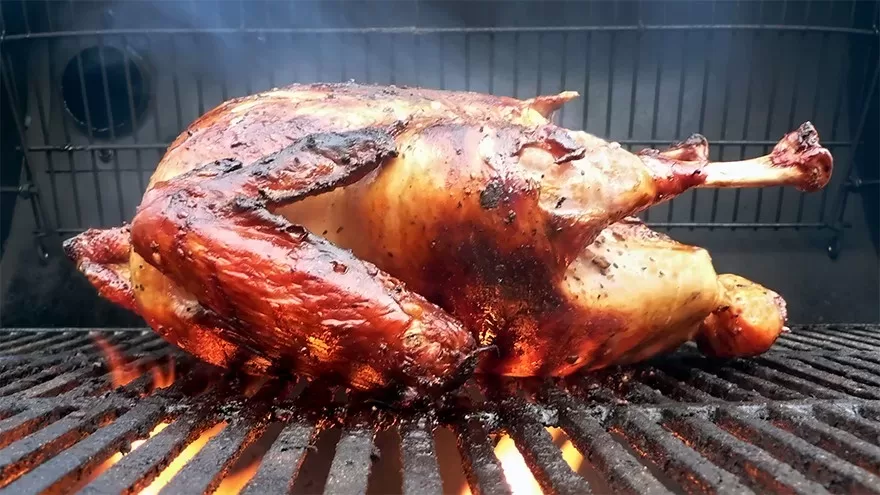
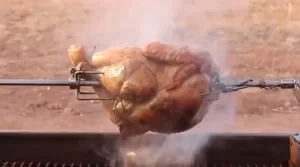
- Here is the turkey a little over halfway through the cook and you see how evenly the bird is cooking.
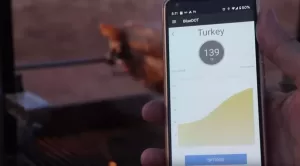
- The Wyldside pit area maintains an even and consistent heat due to the heavy large metal plate at the bottom of the pit.In addition, it has a variable speed blower that acts like bellows giving the fire additional oxygen.Now here is the ThermoWorks app showing not only the turkey temperature but shows the complete graph of the cook.
- When turkey hit 160F I then pulled turkey and covered in foil to rest. Over the next 30 minutes, the turkey temperature raised to 165F and the turkey was ready to be served.
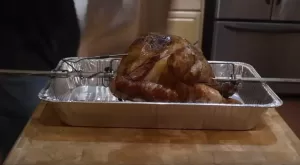
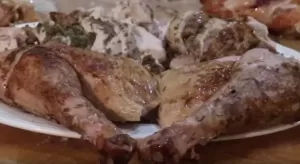
- Cook time before the rest was 1 hour and 53 minutes. The total time from start to finish was 2 hours and 23 minutes. The turkey came out very moist and was full of flavor from the herb butter.
Video
Nutrition
Serving: 3oz | Calories: 170kcal | Protein: 18g | Fat: 4.4g | Saturated Fat: 1.2g | Polyunsaturated Fat: 1.2g | Monounsaturated Fat: 1.5g | Sodium: 96mg