Temperatures and how they can significantly affect your barbecue more than any rub, sauce, or barbecue gizmo you can buy or even make.
Temperature is a fundamental aspect of our world, influencing everything from the taste of food to the safety of our meals. In this video, we’ll explore the Maillard reaction caramelization, food safety temperatures, and the impact of elevation on boiling points.
When heated, the Maillard reaction is a chemical reaction between amino acids and reducing sugars. The Maillard reaction typically occurs between 284F degrees and 330F degrees. This reaction is responsible for the browning and flavor development of many foods, such as seared steaks, roasted vegetables, and baked goods. The Maillard reaction produces hundreds of flavor compounds, contributing to cooked foods’ complex and enticing Aromas and flavors.
Caramelization typically occurs between 320F degrees° and 356F degrees. Caramelization is another essential chemical reaction that occurs when sugars are heated. In this case, the sugars break down into smaller molecules, such as caramel and other flavor compounds. Caramelization is responsible for the rich golden brown color and sweet flavor of caramelized onions, candy, and creme brulee.
In addition to affecting taste, temperature also plays a crucial role in food safety. Bacteria proliferate between 40F and 140F, A Range known as the danger zone. To prevent foodborne illnesses, it’s essential to keep hot foods hot above 140F and foods cold below 40F.
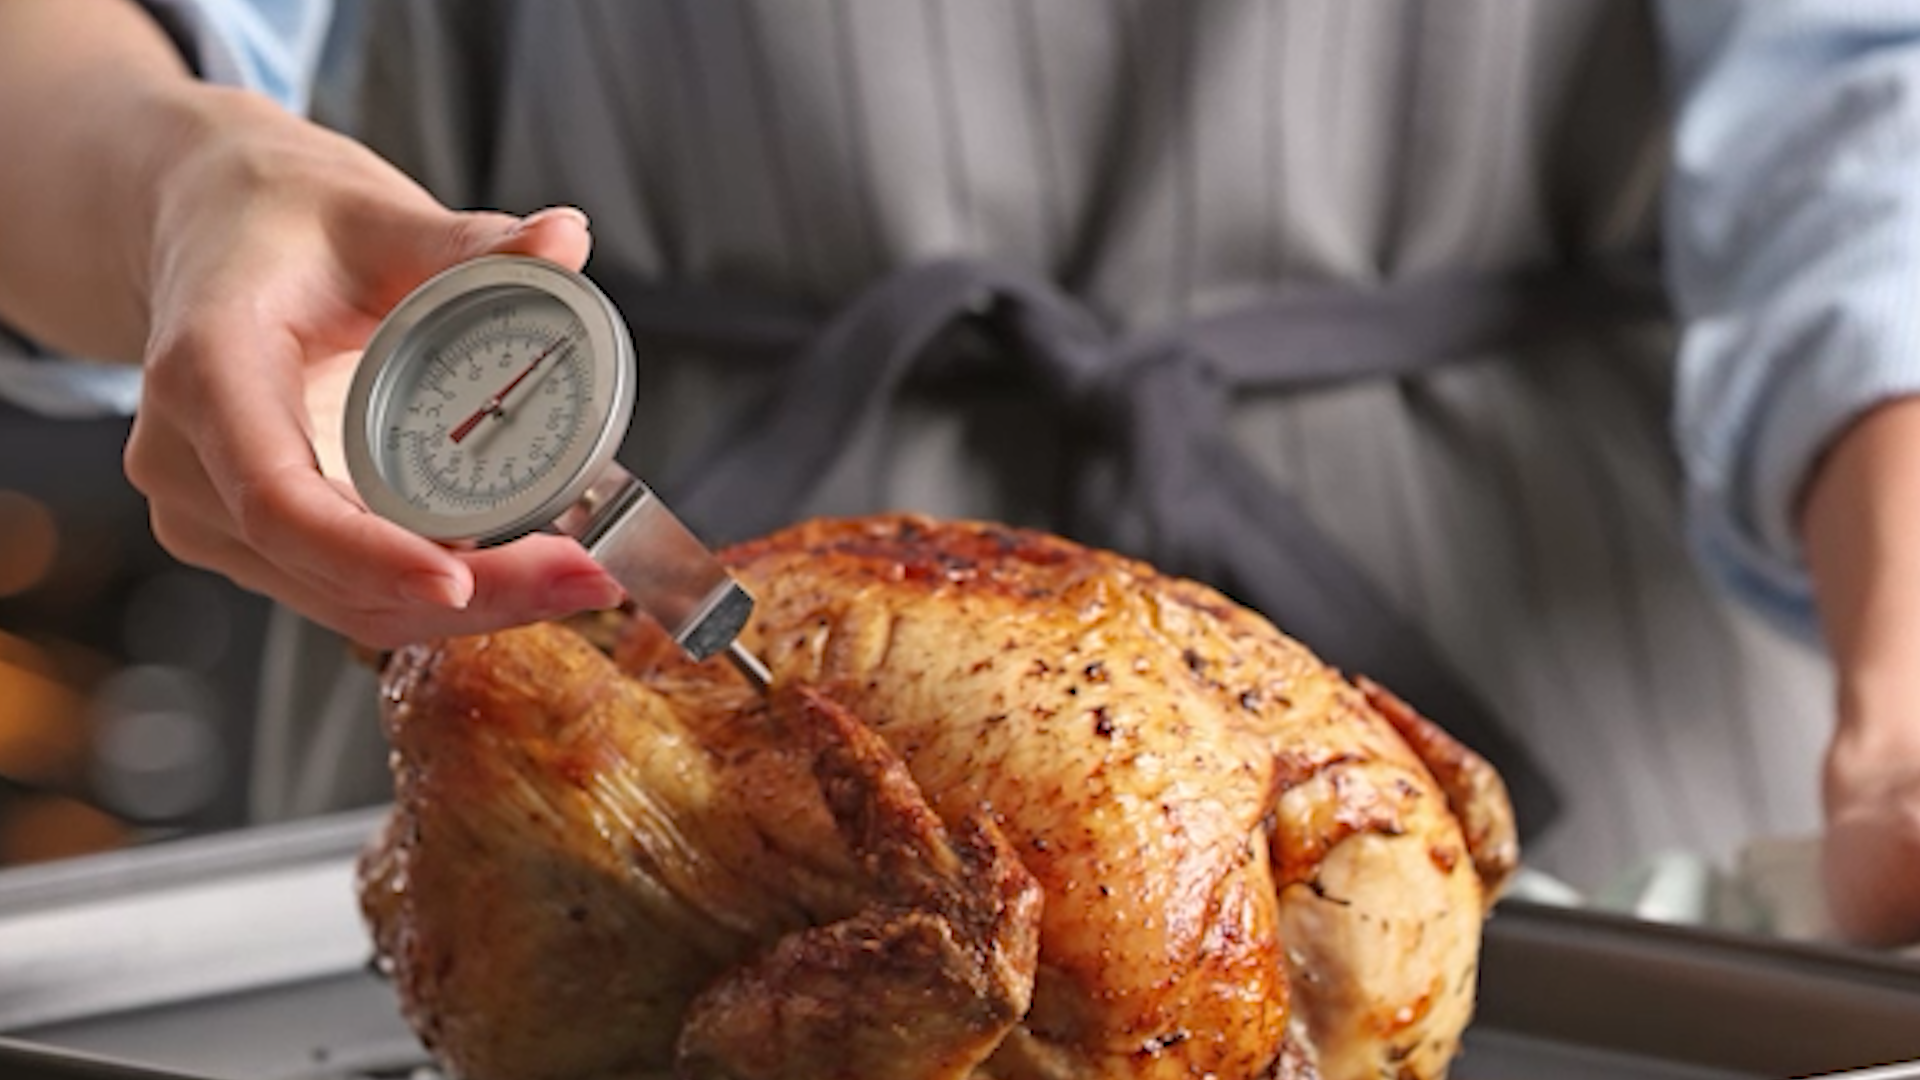
here are some safe minimum internal cooking temperatures for common foods
For beef, pork, lamb, and veal, the minimum temperature is 145F
For ground beef, ground pork, ground lamb, and ground veal, the minimum temperature is 160F
For chicken and turkey, the minimum temperature is 165F
And for seafood, the minimum temperature is 145F
Also, when cooking a large piece of meat like a brisket, the elevation where you are cooking can significantly affect your cook. The same brisket on the same smoker can give you different results.
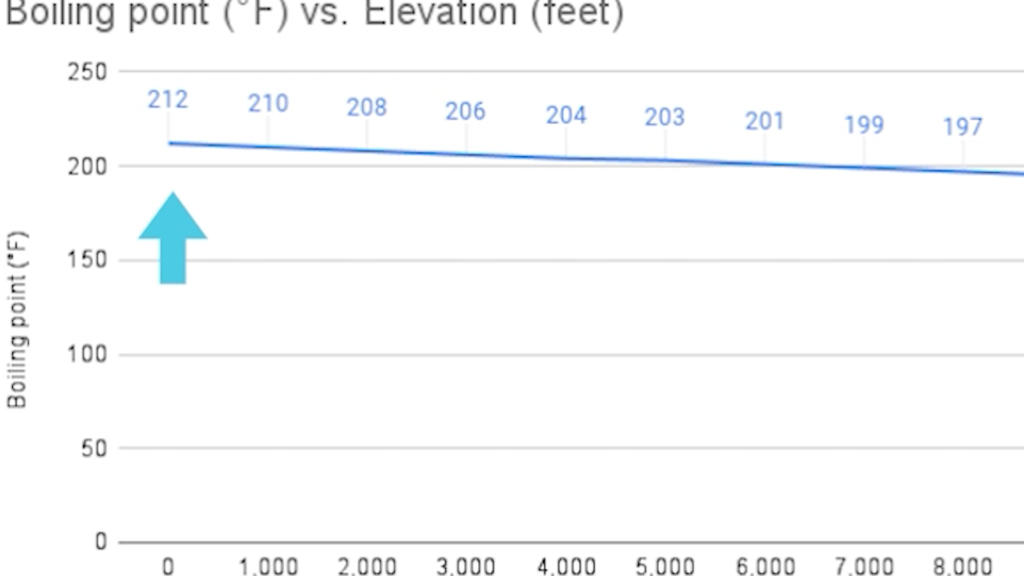
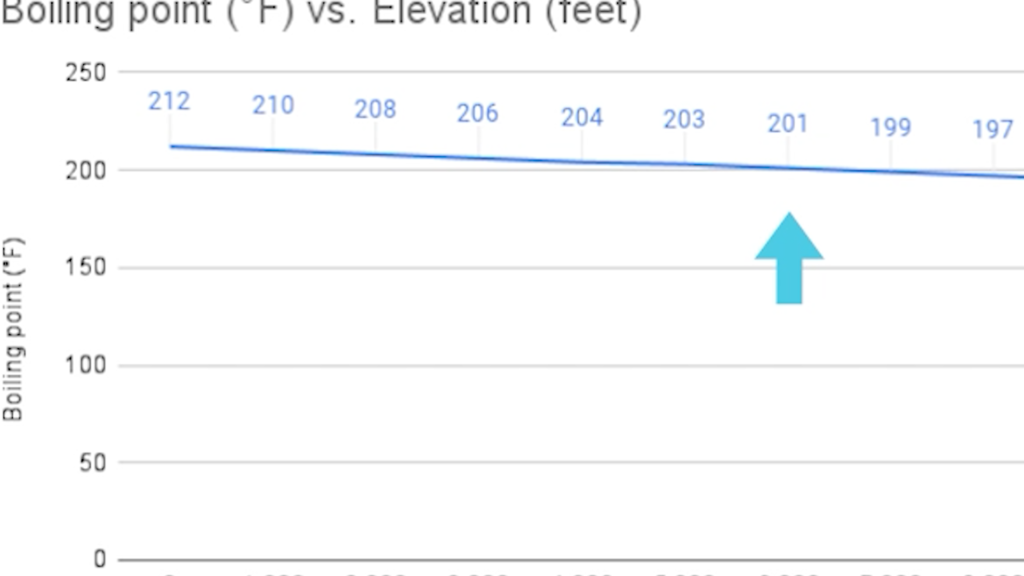
Here is a chart showing the impact of elevation on Boiling Points.
As you may know, the boiling point of water decreases as elevation increases. This is because the atmospheric pressure decreases with altitude at sea level. The boiling point of water is 212F.
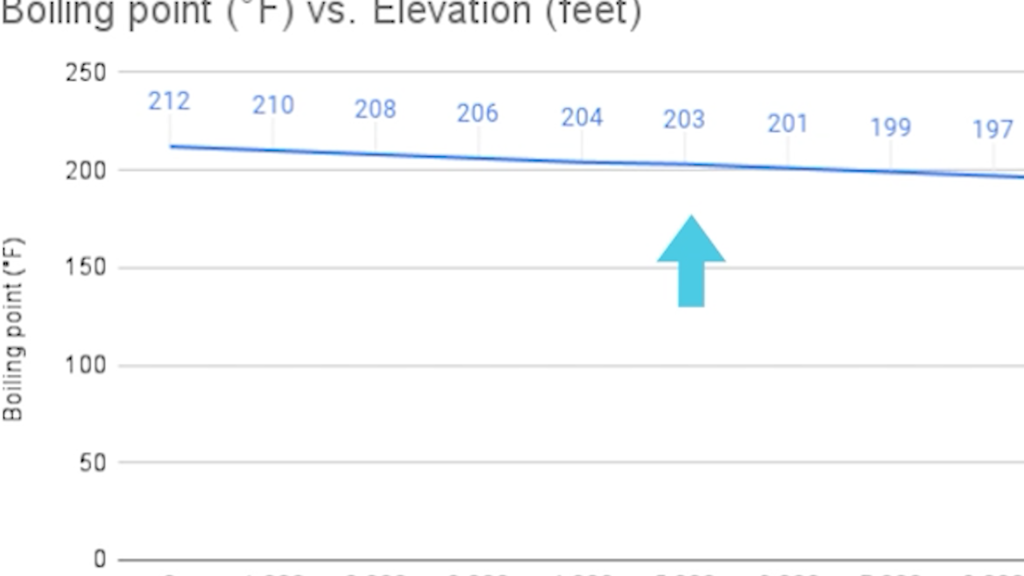
However, at an elevation of 5,000 ft, the boiling point of water is only 203F.
Why is this important? When cooking food and the water in the food starts to boil, it will cause significant evaporation that evaporation will cool the food, causing it to stall and take longer to cook.
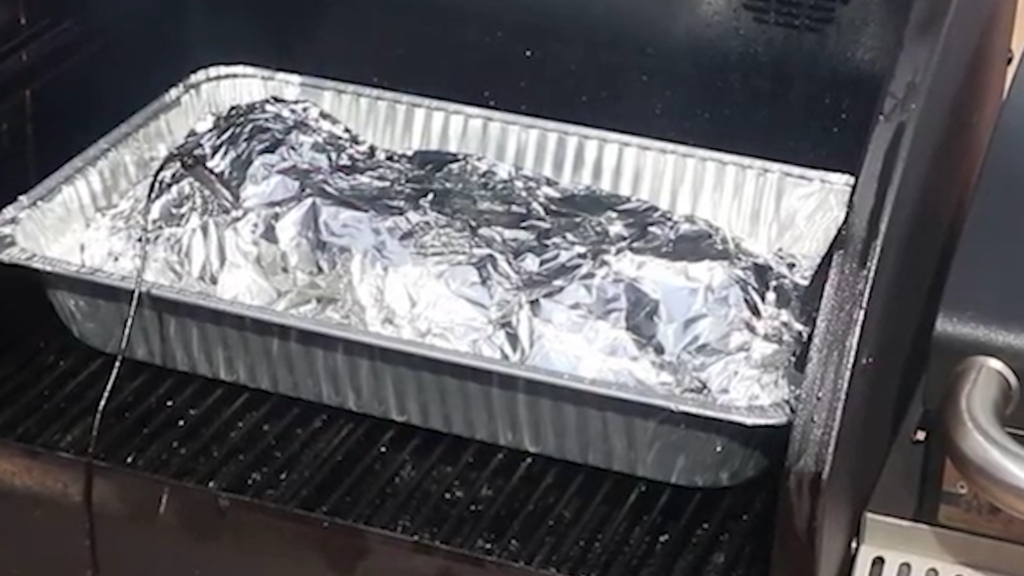
Also, if it stays in the stall too long, it can dry out the food and make it tough. One technique when the food goes into a stall is to foil it and keep the moisture from evaporating.
Also, you might lower the cooking temperature below the boiling temperature, stopping the evaporation and eliminating the stall.
It is hard to believe and seems counterproductive, but lowering the cooking temperature can speed up the cooking temperature is a critical factor in both the taste and safety of food by understanding the Maillard reaction caramelization food safety temperatures and the impact of elevation on boiling points you can cook delicious and safe meals.
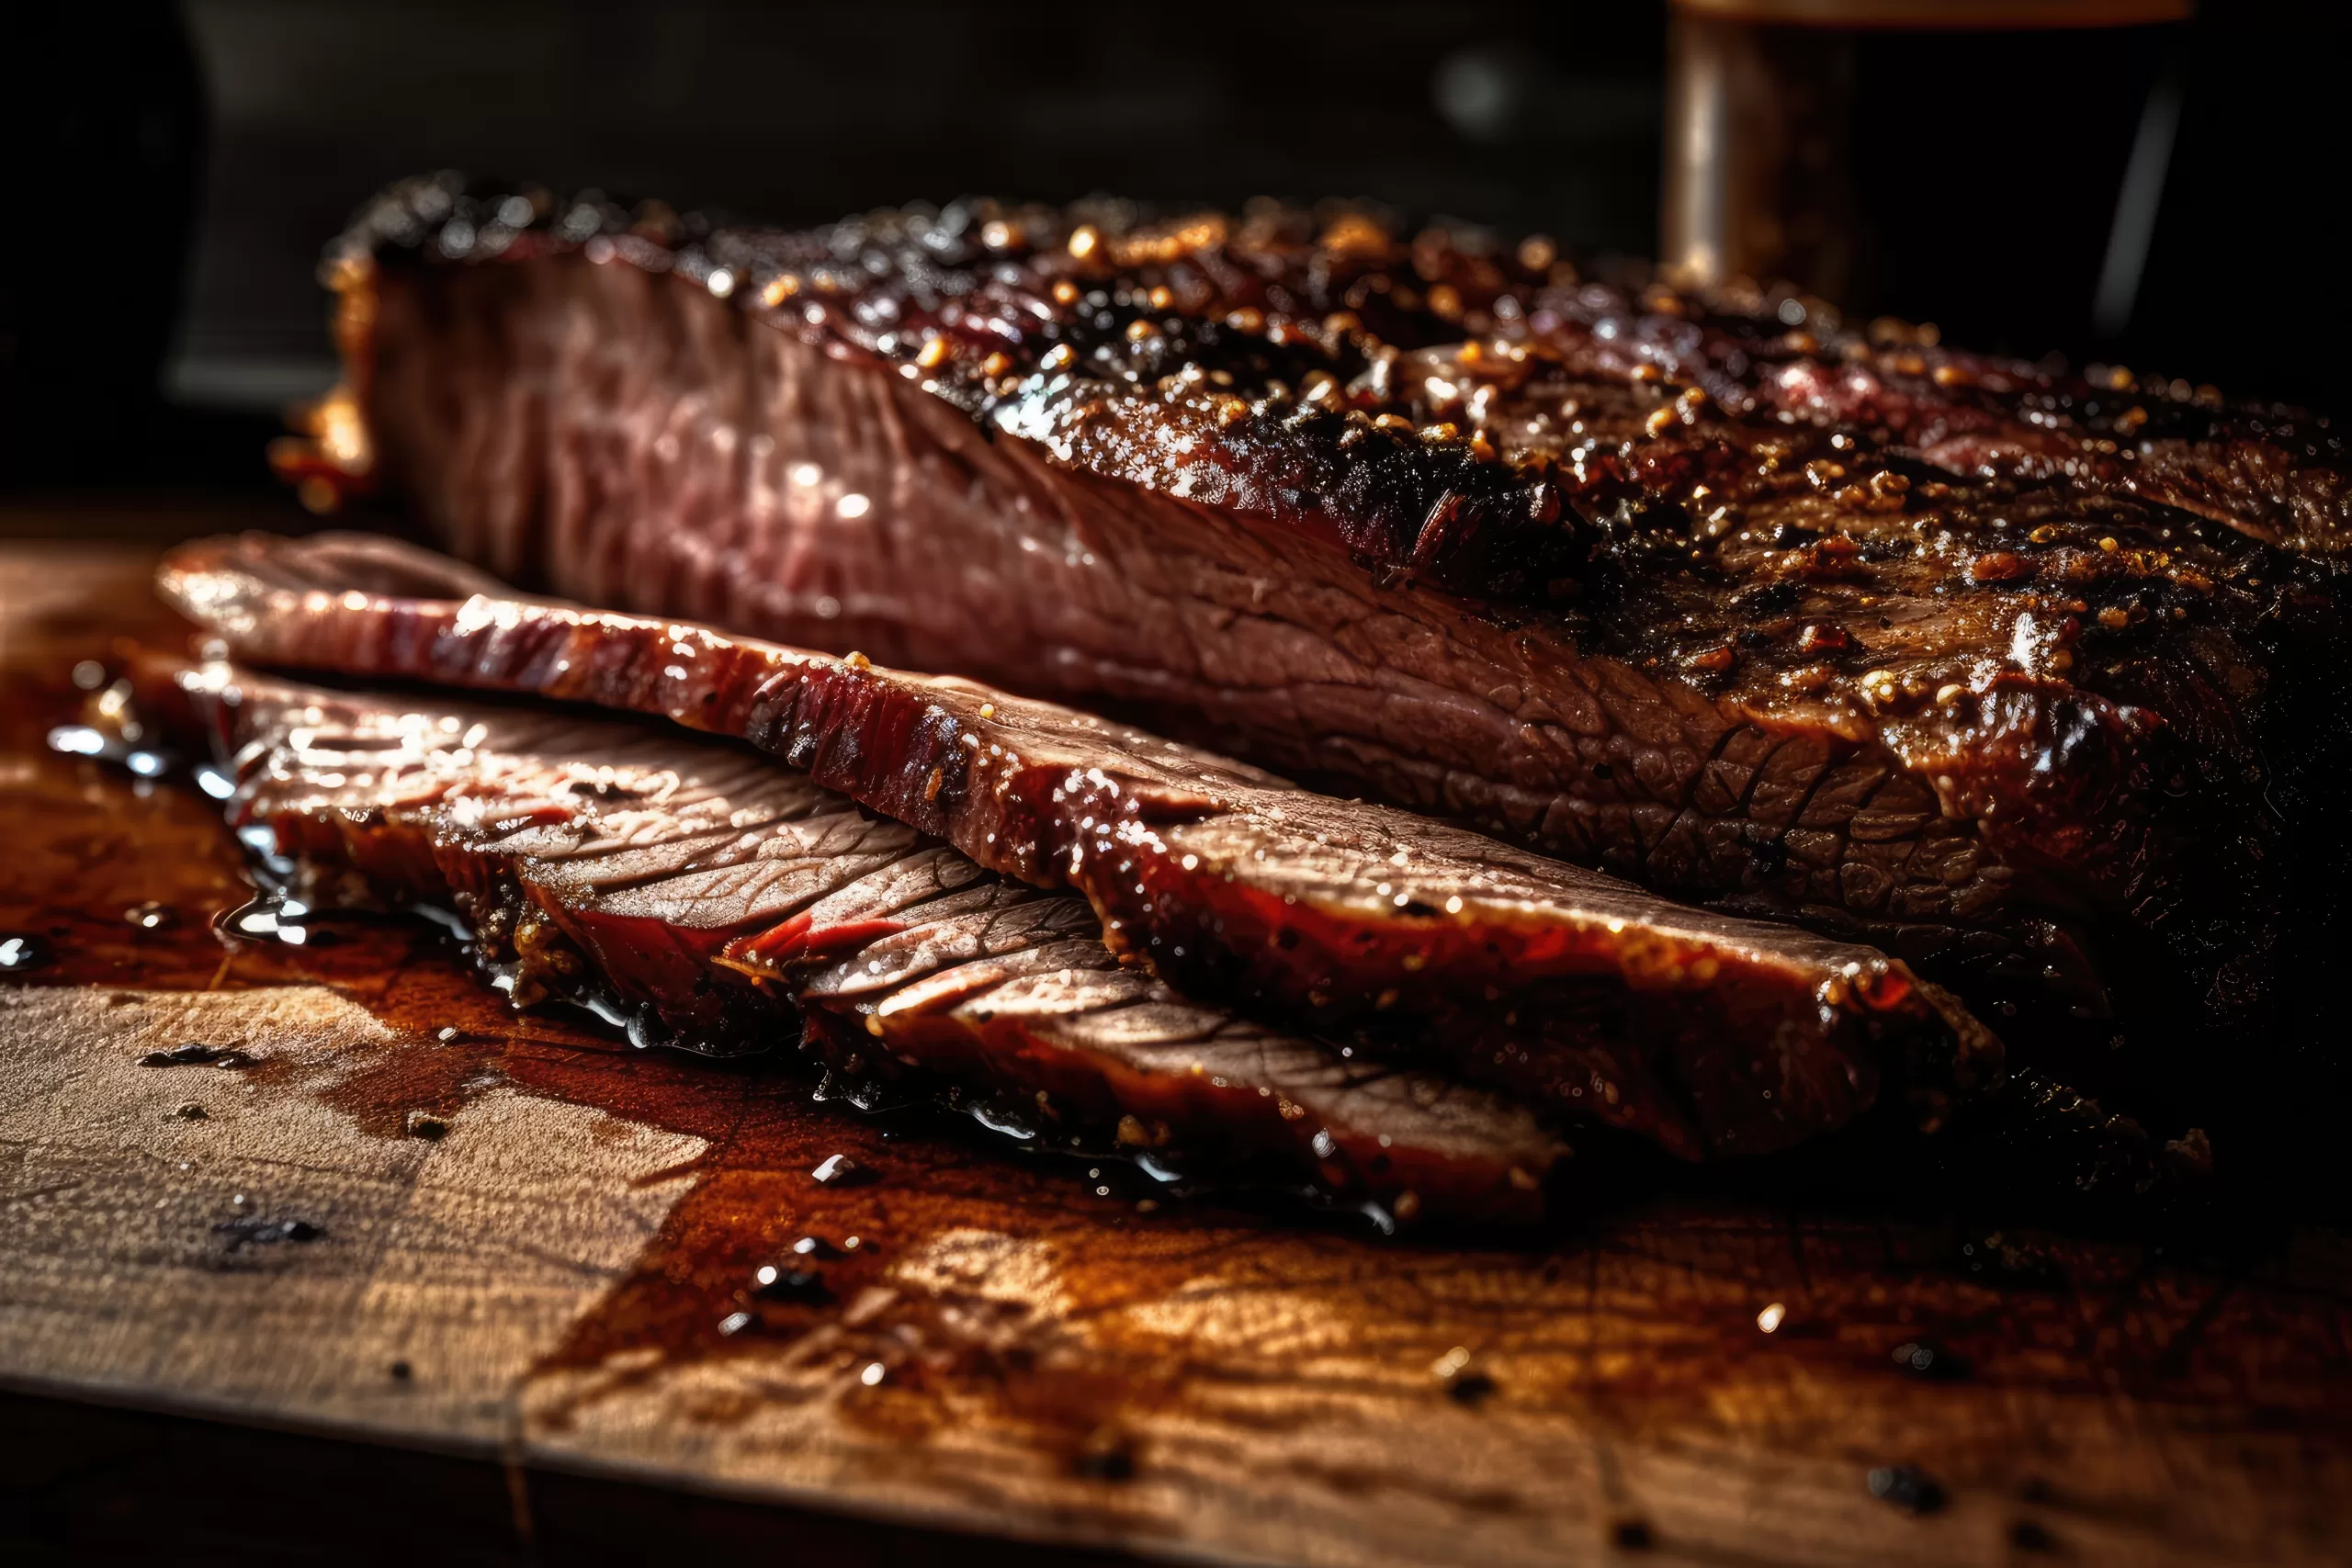
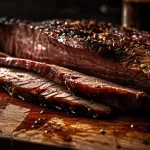
Ah, Gordon Ramsay’s barbecue style slow roasted beef brisket – a dish that promises smoky, tender goodness with a hint of Ramsay’s fiery flair. It’s perfect for impressing your guests or simply indulging in a weekend feast of epic proportions. Here’s what you’ll need to channel your inner Ramsay and conquer this culinary challenge:
Gordon Ramsay’s Barbecue-style Slow-roasted Beef Brisket
Ah, Gordon Ramsay's barbecue-style slow-roasted beef brisket – a dish that promises smoky, tender goodness with a hint of Ramsay's fiery flair. It's perfect for impressing your guests or simply indulging in a weekend feast of epic proportions.Here's what you'll need to channel your inner Ramsay and conquer this culinary challenge:
Prep the brisket: Preheat your oven to 150°C (300°F). Trim off any excess fat from the brisket, leaving a nice layer of about 1/2 inch. Drizzle the brisket with olive oil and season generously with salt and pepper.
Make the rub: Combine the smoked paprika, brown sugar, cayenne pepper, garlic powder, onion powder, smoked coriander, and chili powder in a small bowl. Rub the mixture all over the brisket, ensuring it covers every corner.
Sear the brisket (optional): This step adds an extra layer of flavor but isn’t essential. Heat a large Dutch oven or oven-safe pot over medium-high heat. Sear the brisket on all sides until nicely browned.
Build the braising liquid: Add the chopped onion, carrots, celery, bay leaves, and thyme sprigs to the pot. Pour in the beer (or beef broth), beef broth, water, tomato paste, Worcestershire sauce, and molasses. Stir well to combine.
Slow-roast the brisket: Nest the brisket in the braising liquid, ensuring it’s mostly submerged. Cover the pot tightly with a lid or foil. Transfer the pot to the preheated oven and roast for 4-5 hours, or until the brisket is fork-tender and falls apart easily.
Rest and shred: Carefully remove the brisket from the pot and let it rest for at least 30 minutes, tented with foil, before slicing or shredding. Strain the braising liquid into a saucepan and simmer until reduced slightly for a delicious pan sauce.
Serve and savor: Slice or shred the brisket and serve it with your favorite barbecue sides like baked beans, coleslaw, mac and cheese, and crusty bread. Drizzle the pan sauce over the brisket for extra flavor.
Notes
Use a meat thermometer to ensure the internal temperature of the brisket reaches 95°C (205°F) for optimal tenderness.Baste the brisket with the braising liquid every hour or so for added moisture. If you don’t have a Dutch oven, you can use a roasting pan and tightly cover it with foil. Feel free to adjust the amount of cayenne pepper to suit your spice tolerance.With a little patience and Ramsay-inspired passion, you’ll have a masterpiece of slow-cooked, melt-in-your-mouth brisket that will leave your guests raving.So, fire up the oven, crank up the tunes, and get ready to unleash your inner barbecue beast!
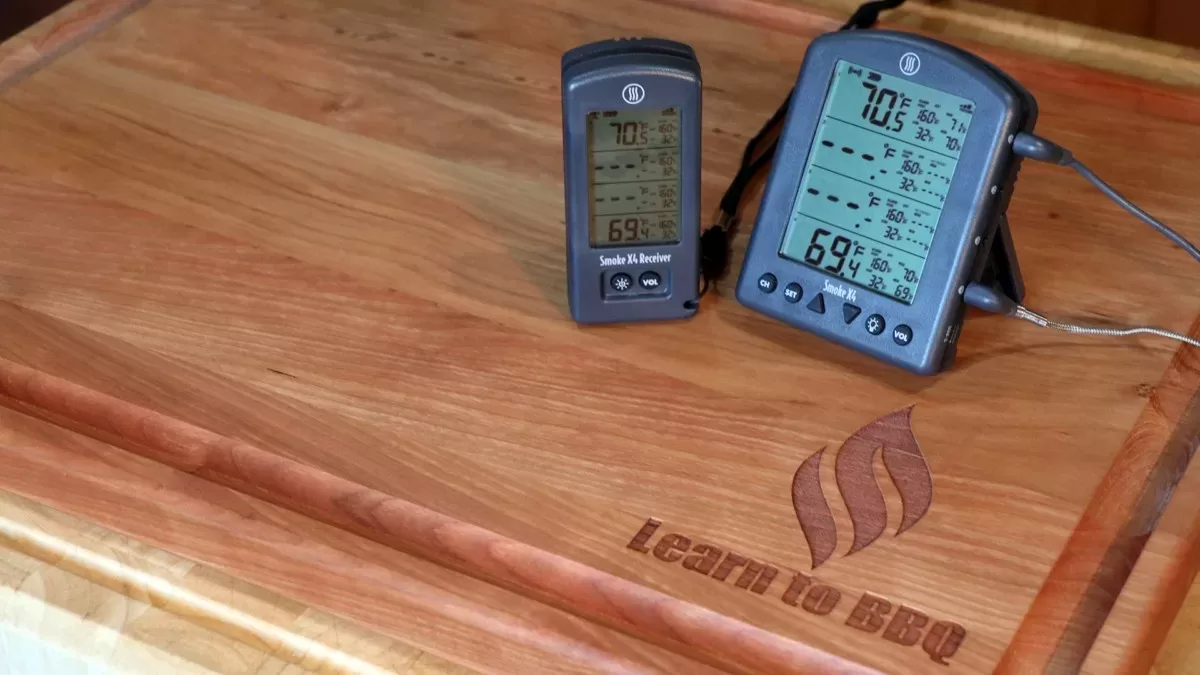
Today we are going to review the ThermoWorks Smoke X4.
Now to answer the obvious question in what does a drone like the Mavic Mini have to do with reviewing the ThermoWorks Smoke X4? Well the Smoke 4X has a transmitter capable of transmitting over a mile and a quarter, as long as nothing is in the way. I live on 4 acres and am surrounded by trees and rolling hills. So I came up with two tests. One is the football field test where I marked 9 spots that were 300 ft or 100 yards (football field) away from my outside BBQ Deck. The circumference of this circle is just under 1,885 feet or over a third of a mile. The Smoke X4 also had to transmit through 6-inch house walls, trees, and even a fifth-wheel travel trailer. The second test was to see how far I could go from the BBQ deck before it stopped transmitting. I will get to that test later in this article.
So why the drone? It has the ability to measure straight line distance from where it takes off. It is very accurate with GPS and ground sensors. It is so precise if you tell it to go home it will fly right back to the place it took off from. If you watch the video review below you can actually see the drone in action.
Now let’s talk features. Or let’s realize that this product is great because it does not have all these features. Actually we are going to talk about what the product does not have.
First The Smoke X4 does not have WiFi
One of the number one complaints I get is my thermometer or grill keeps disconnecting from the wifi. In one extreme case this guy decided to put on a brisket and then went to Home Depot thinking he could monitor his brisket cook from afar. Well the grill disconnected from the WiFi so he had no way to monitor. When he got back his grill had started a grease fire and the grill, the brisket, and part of his deck were on fire.
So the lesson is don’t ever leave an unattended bbq cooker, period. Even if the thermometer was connected to WiFi his grill would have still caught on fire. Stay home and send somebody else to the store.
The next thing that the Smoke X4 does not have is Bluetooth.
Personally except for connecting my phone to my car audio I am not a Bluetooth fan. Why if I walk 25 feet away from a Bluetooth grill or thermometer it justs disconnects. The worst part is Bluetooth devices do not tell you they are disconnected so you think they are working.
Many a chicken has been overcooked or burnt because of Bluetooth disconnect.
Now the other thing the Smoke X4 does not need is AC power.
It is battery powered and can run for hours. So now when you go camping and you bring your smokey Joe and to cook some BBQ chicken well now you can leave the lid on and know when those chicken thighs hit 175F. No AC needed.
So no Wifi, no bluethooth no AC and no problems.
Now there are some things they did add that I really like. The lanyard is such a simple idea and makes it almost impossible to misplace the receiver. When I first put it on it reminded me of another product that has a lanyard.
I’ve fallen and I can’t get up
When running the football field test I walked to every spot and first made sure I was still connected but to really make sure it would work I turned off the receiver and then let it reconnect. In all 9 spots it reconnected in 30 seconds or less.
The next test was how far can I go before the transmitter fails to connect with the receiver.
This test I wanted to make it hard on the unit so I walked to an area that was below the horizon and had plenty of trees. It finally stopped working at 1,053 feet or 2/10 of a mile and this was not close to line of sight. If you want to actually see how far it looks using the drone please watch the video below for the full review. It also will give you instructions on how to program the unit.
In closing if you are looking for a NO PROBLEMS remote thermometer that just works and works well you cannot get any better than the ThermoWorks Smoke X4 or X2.
Please click on the link to learn more or to purchase the great thermometer.
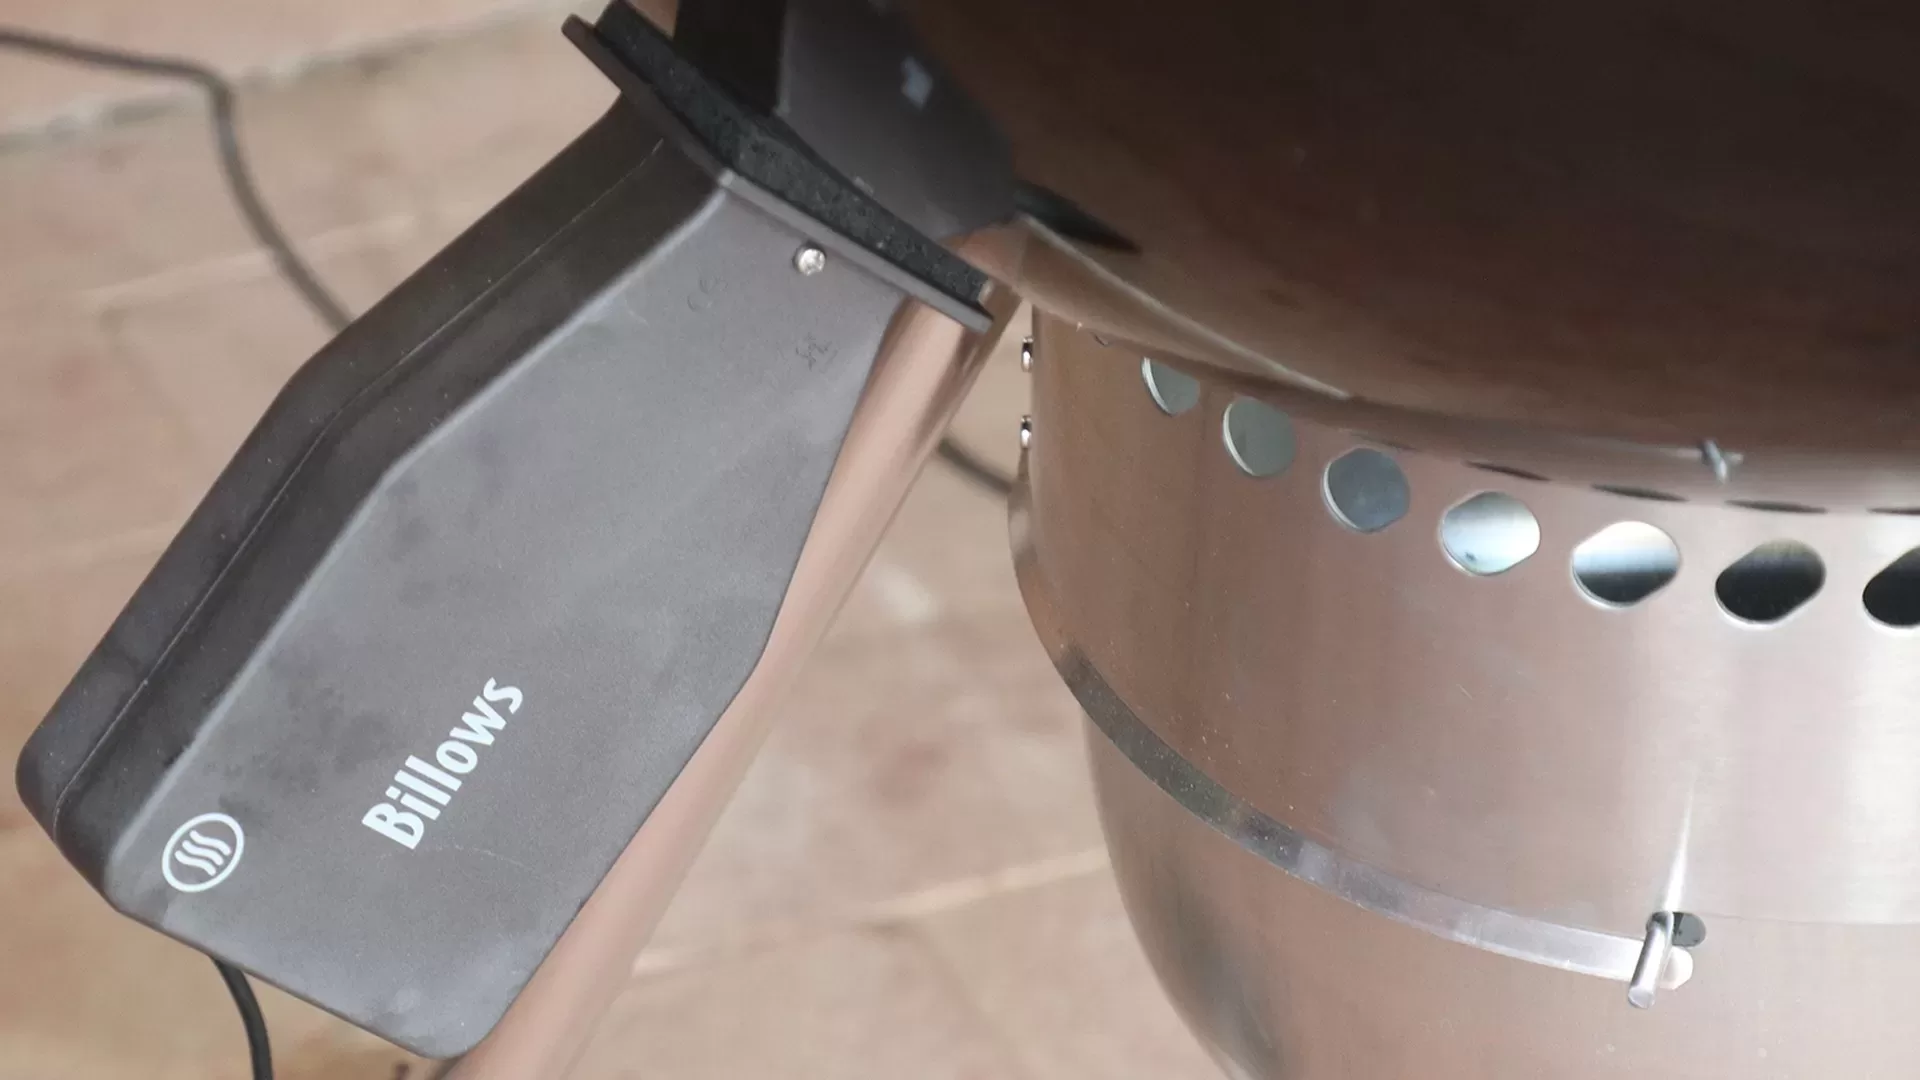
We are going to cover both installation and a full product review of the ThermoWorks Billows BBQ Temperature Control Fan. The Billows is an add-on product for the Signals BBQ thermometer. Here are all the things you will need to complete the installation.
The installation part is going to be installing the billows onto a Weber kettle premium 22 as you can see above a hole has to be drilled but before you panic, it’s a lot easier than you think.
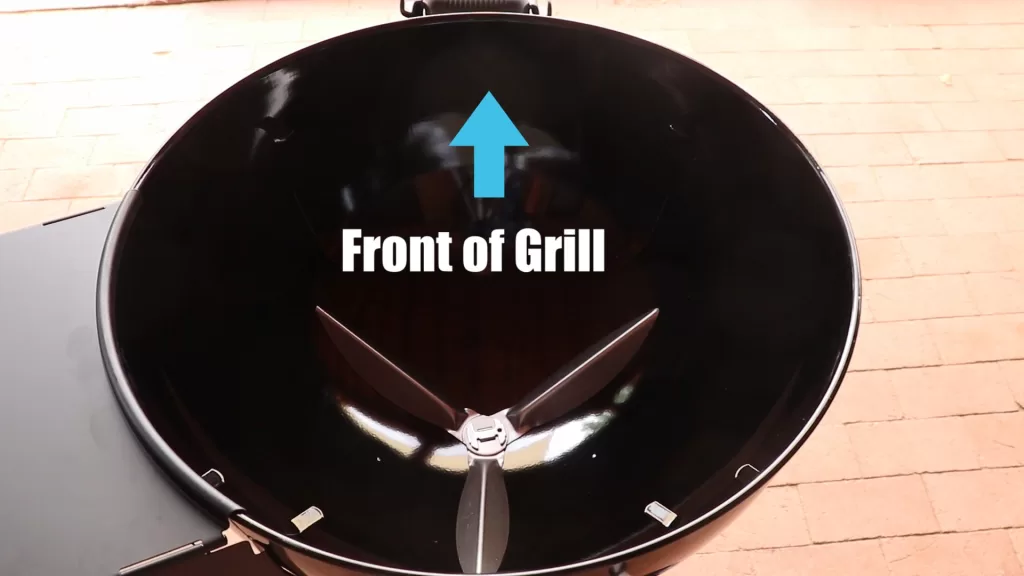
The first thing we need to do is find out where we need to drill the hole. Start by getting behind the grill so the front is facing away from you.
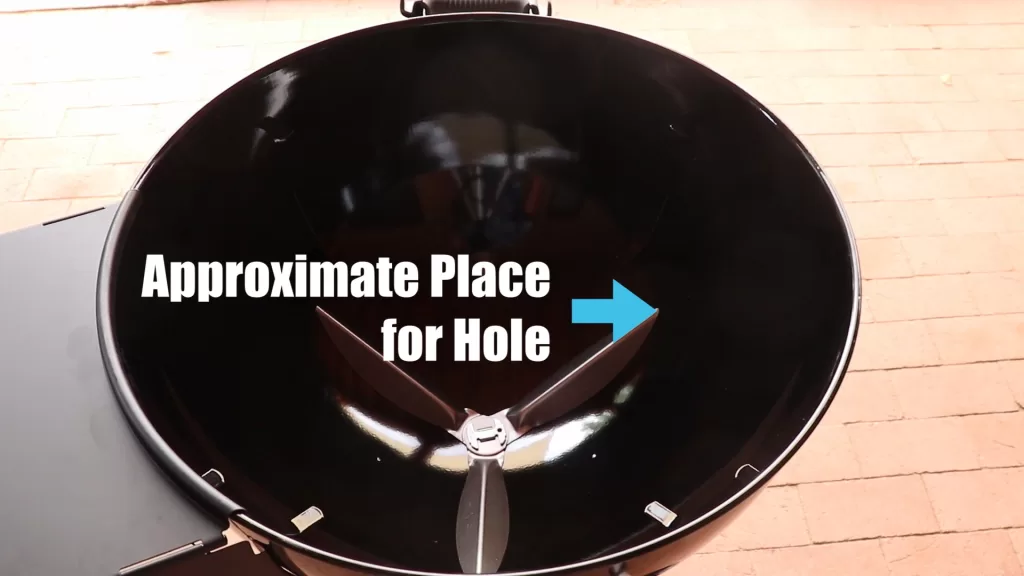
From this viewpoint you will be making the hole on the right side of the grill now there are a few steps we need to do so we can make sure the hole is in the correct place.
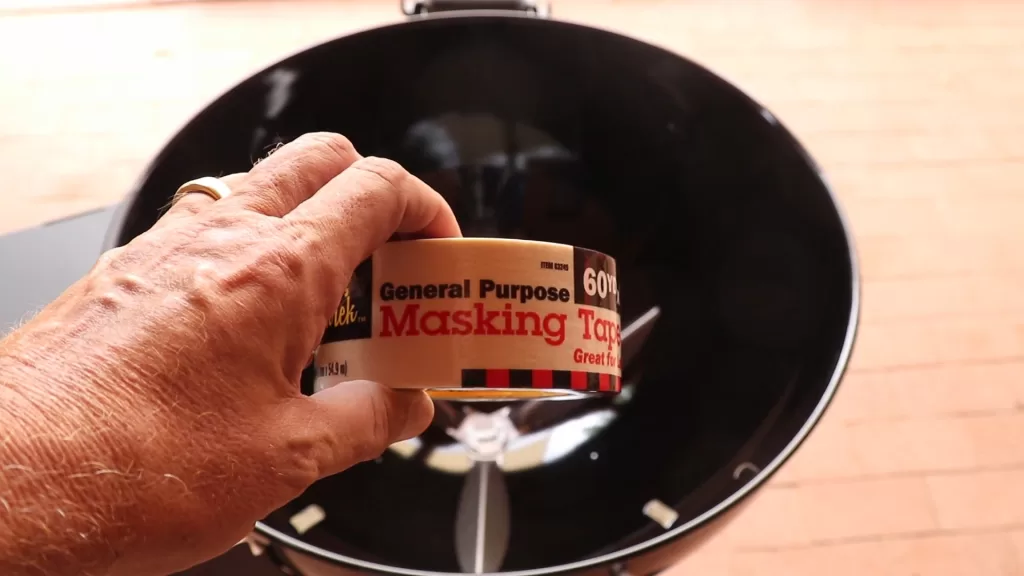
Also, you’re going to need a few tools and some materials. The first material is masking tape.
Don’t use the blue or green tape for it is not strong enough. Also, get the wide version. Now you need to start taping approximately where the hole should be put down long strips of tape and move the ash vents around so you can get underneath them.
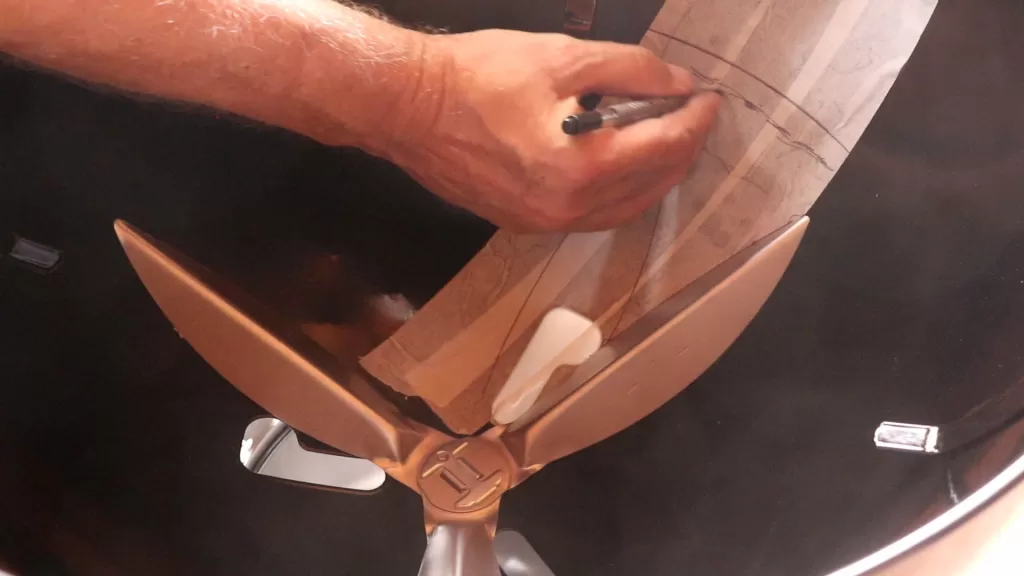
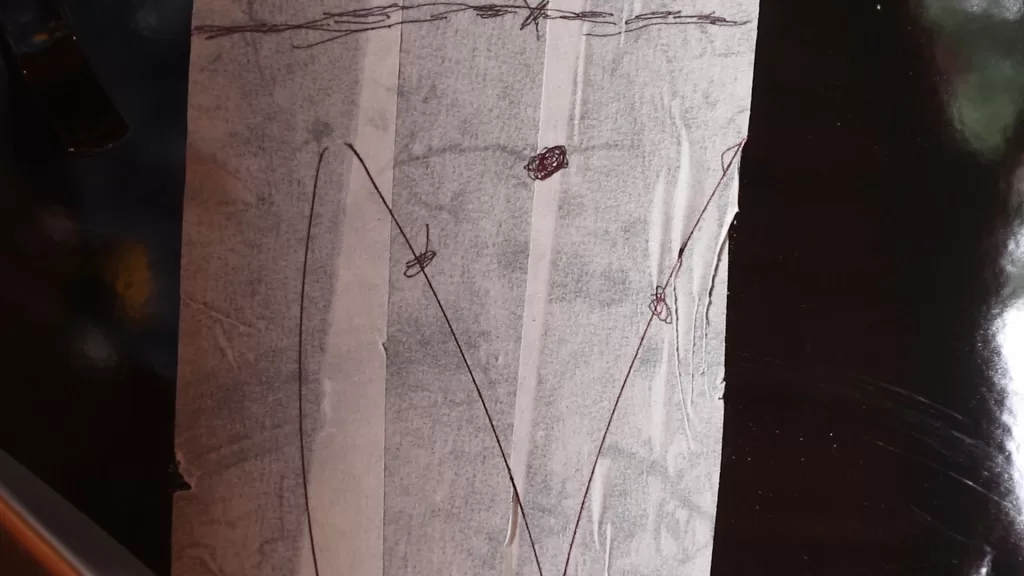
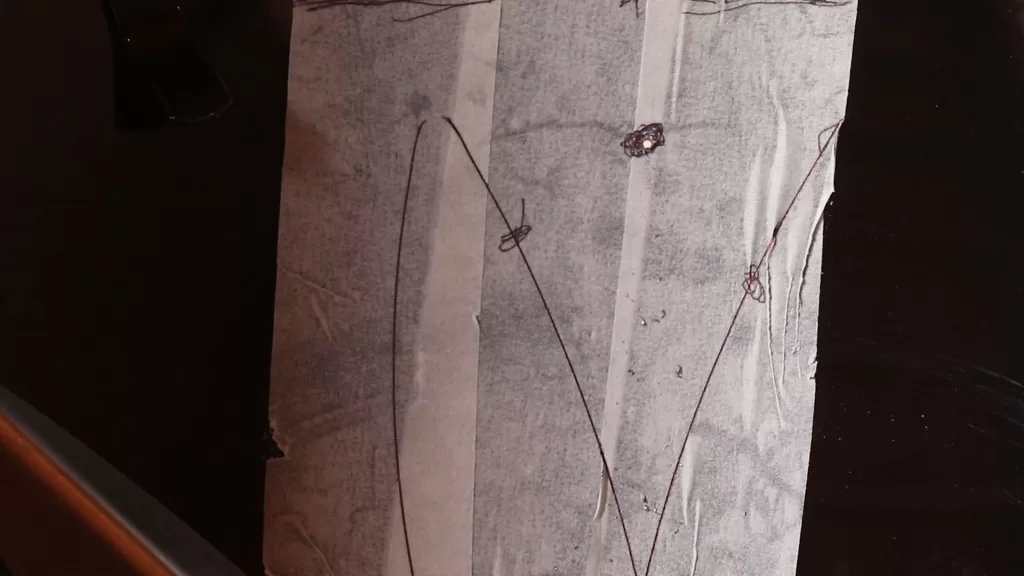
Now rotate the ash vent fully clockwise until they stop. Now trace around the vent using a dark pen or pencil making sure the lines are very visible on the tape.
Now rotate the ash vent counterclockwise until it stops now trace around the new vent over the tape.
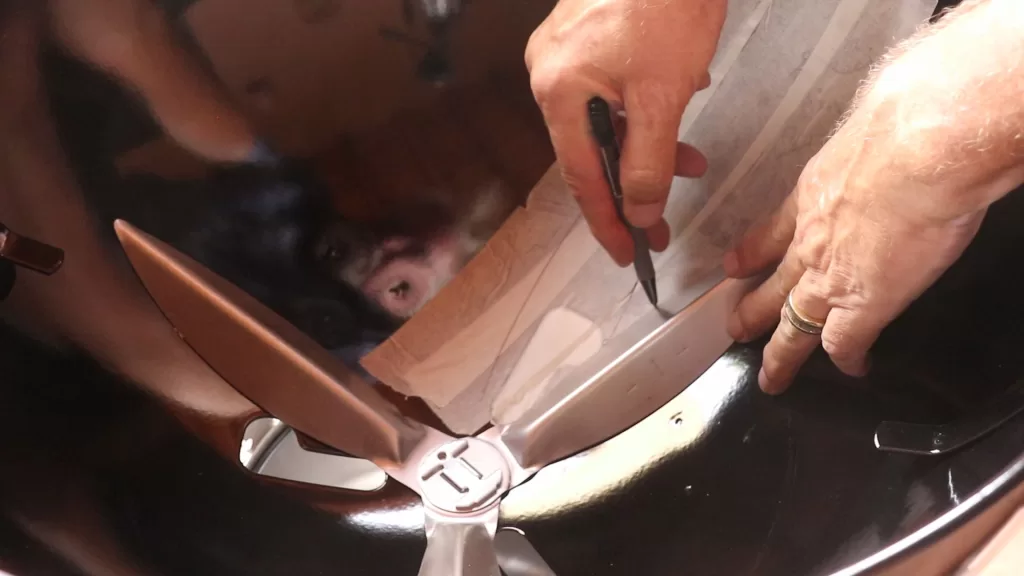
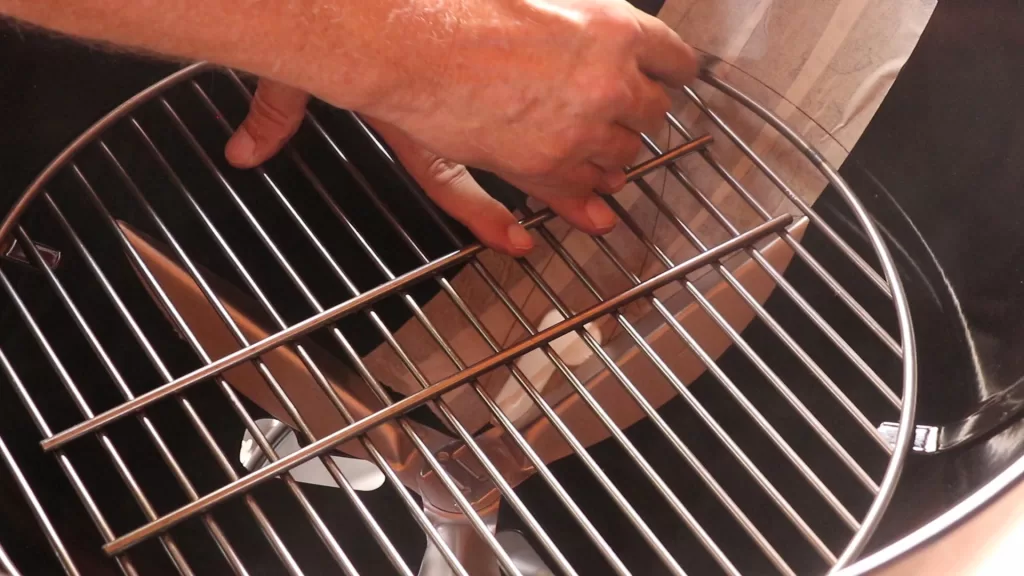
Now go get the charcoal grate and put it in place then trace where the tape is.
Now remove the grate draw a parallel line about a half-inch below your traced line.
To find the spot to drill, you need to see these three points. Look at these three points and then find the middle of the triangle the spot that you have found is clear of the ash vents and also the charcoal grate.
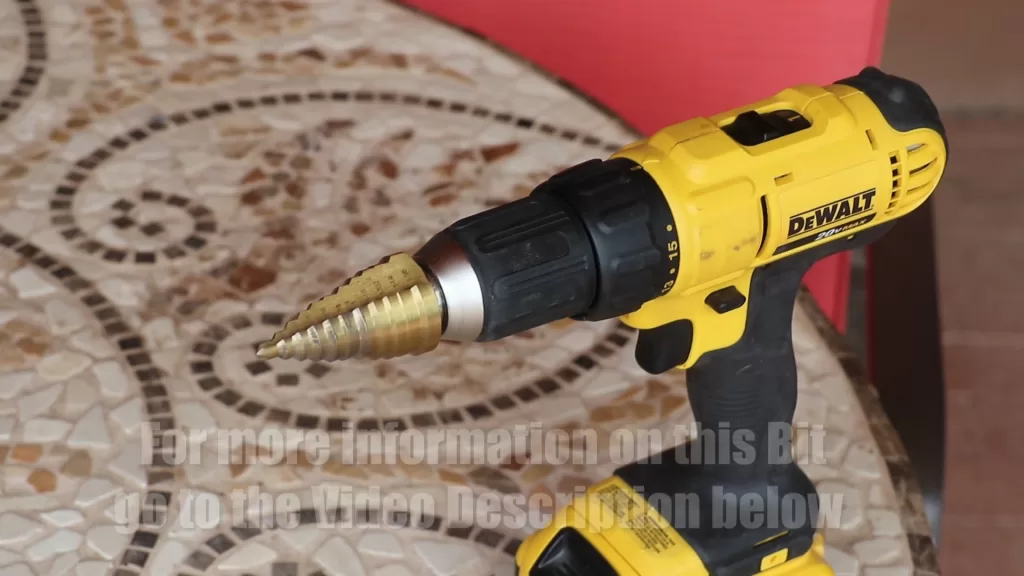
Now, drill a pilot hole; the porcelain enamel on the bowl is really hard to drill, so use a new bit and take your time.
The Drill Bit below is a pretty mean-looking bit but it also gets the job done.
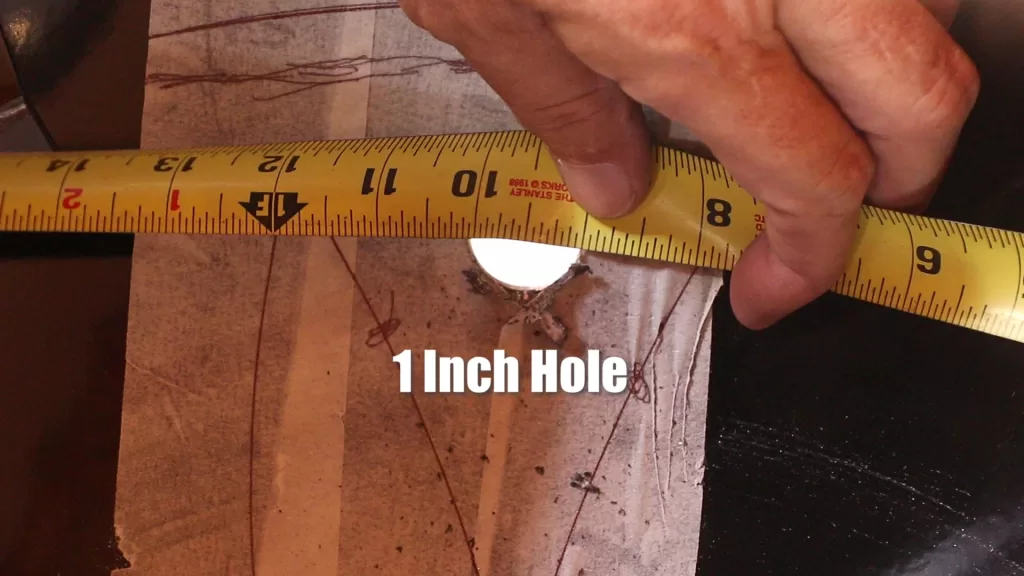
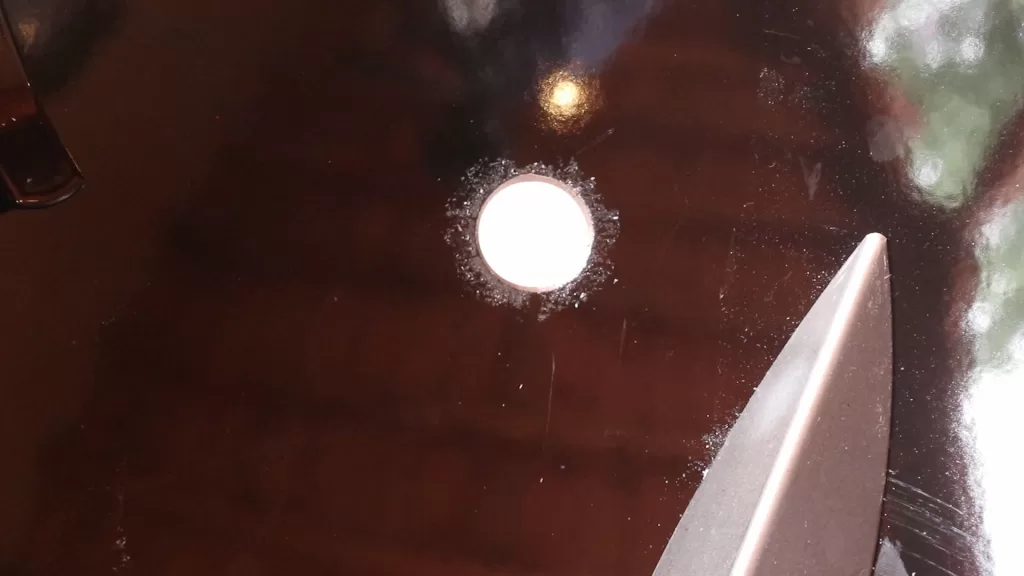
When using this bit you will fill that it pops as it makes the hole larger. In my case, when I felt seven pops, I knew I was done. Oh, I forgot to tell you it makes a sound similar to fingernails on a chalkboard, except it’s about ten times louder. Besides the noise, it does make a perfect hole for when it cuts it also deburrs the metal. Also, it is quite a workout for after a while, the drill motor feels like it weighs about 50 pounds. Then you are done and the hole is exactly one inch wide and perfectly round.
Next you peel off the tape and knock up all the metal debris the tape should come off real easy, but again take your time for a lot of the metal fragments will stick to the tape and not you. Knock off any metal fragments and I recommend you vacuum out the bottom of the bowl now put the charcoal grate back in and rotate the ash vents all the way to the left and then to the right just to make sure everything is clear.
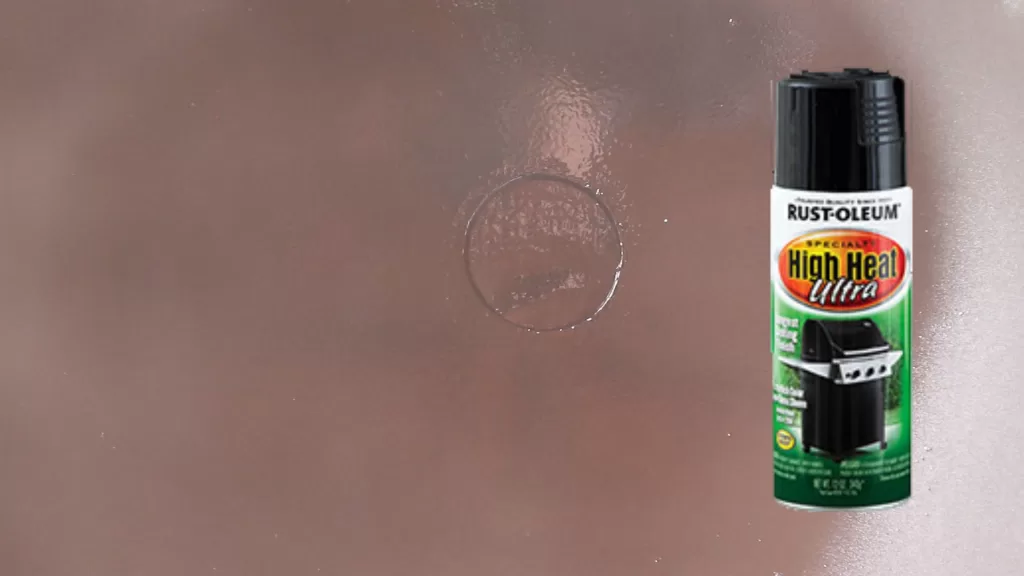
Just one more thing to do to finish this modification and that is the paint the inside of the hole. I did do one final pass with a hole bit just to make sure all the metal birds were gone so I went from the outside in. Wipe the area clean and then put a piece of masking tape over the hole from the outside. Now using a high-temperature paint like Rust-oleum will protect the metal from rusting.
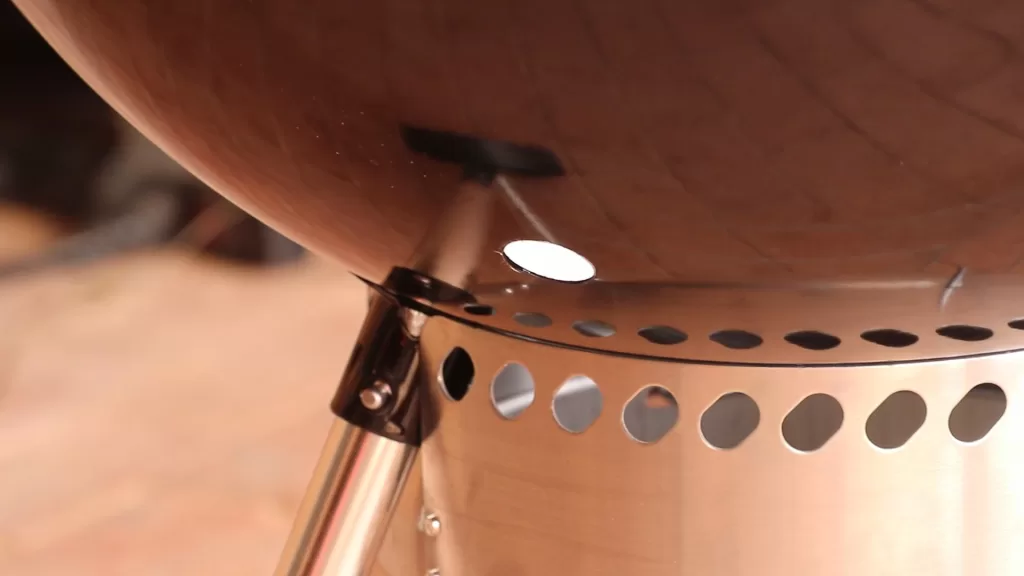
Let the paint completely dry this usually takes at least a few hours peel off the tape and the modification is now complete this is how it looks to the outside.
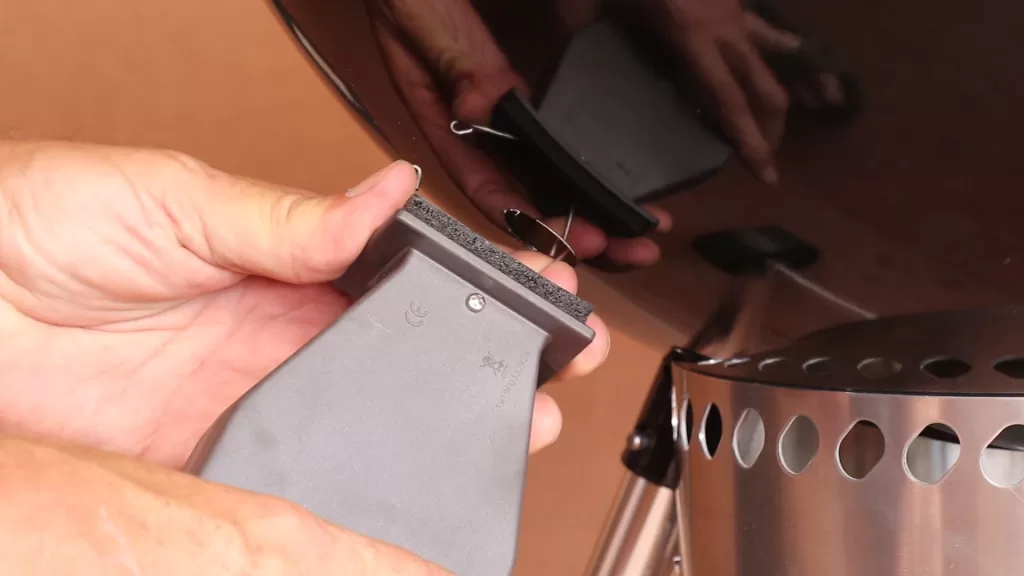
Looks pretty good to me now we can add the billows to the grill there are two springs you need to insert. It is best to secure one in the hole and then follow up by inserting the second spring in the hole. The billows will be held in place by the springs and a soft air silk gasket will keep the grill air tight.
Now we need to add the other parts. Here is the Signals BBQ thermometer. This is the controller for the bellows fan.
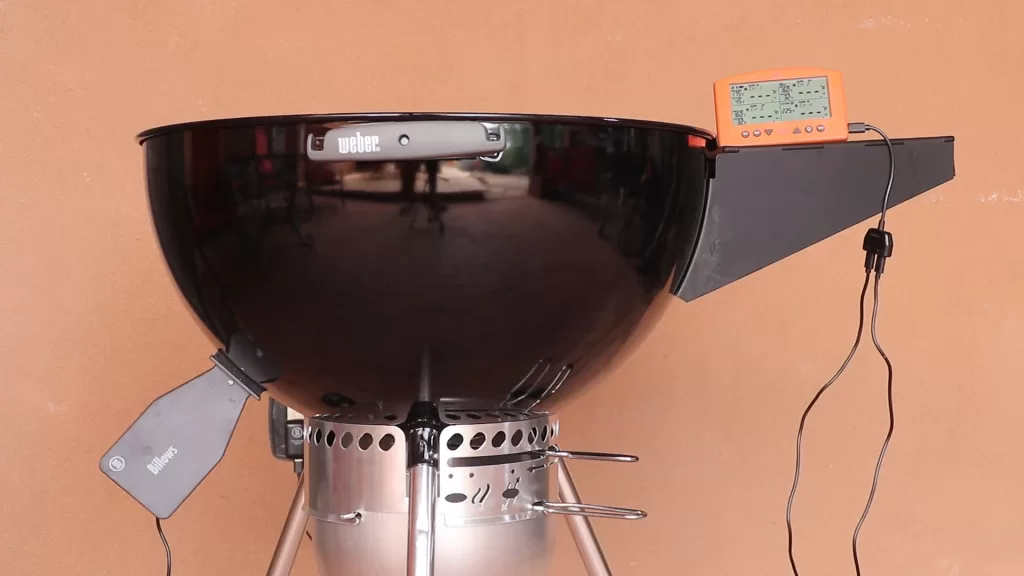
Next we need the splitter cable. This supplies power to the signals unit and also controls the Billows fan.
Now plug in the power line that plugs into an AC power outlet.
Now plug in the billows control cord.
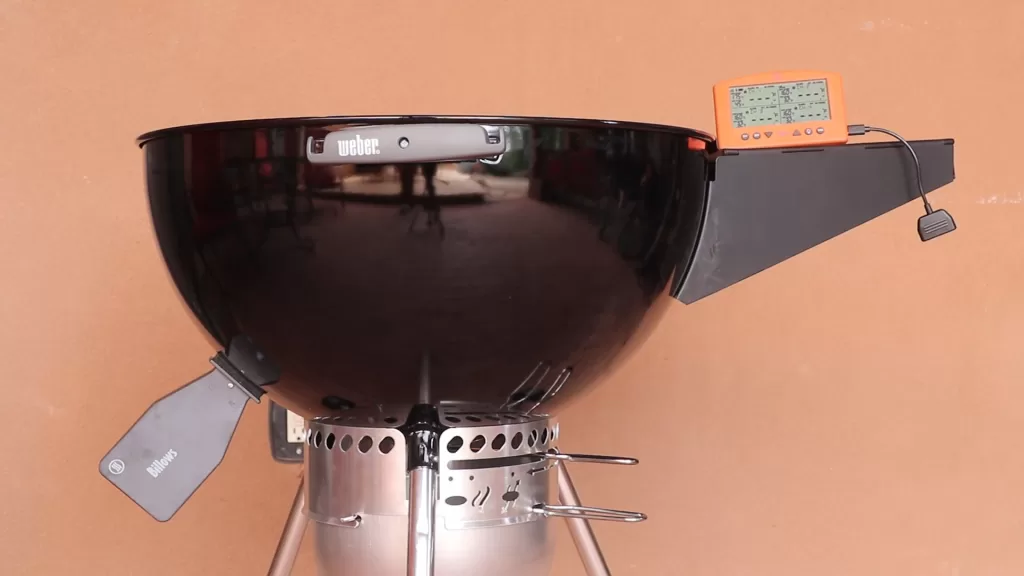
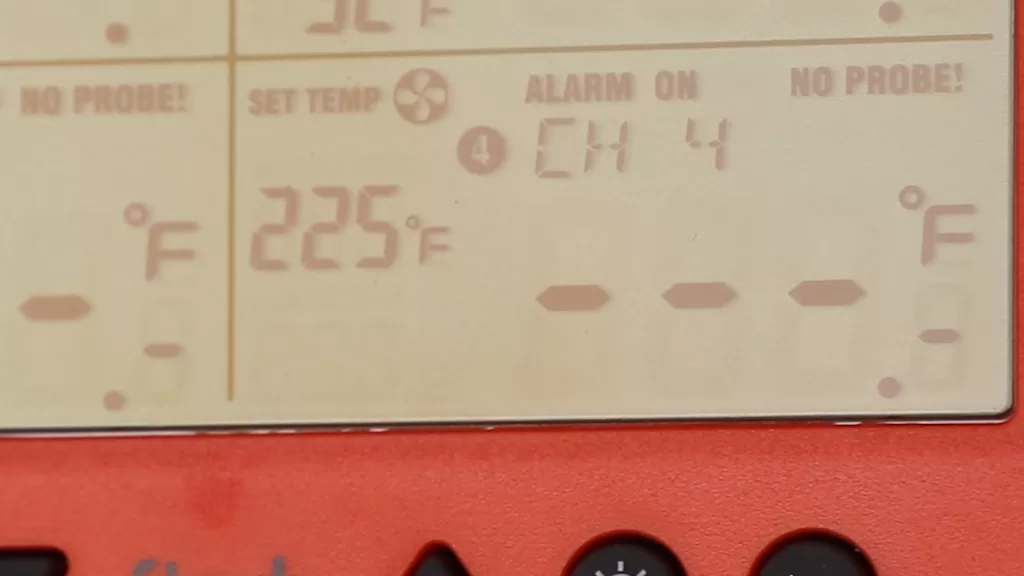
Here’s channel 4 on the Signals unit without the billows plugged in.
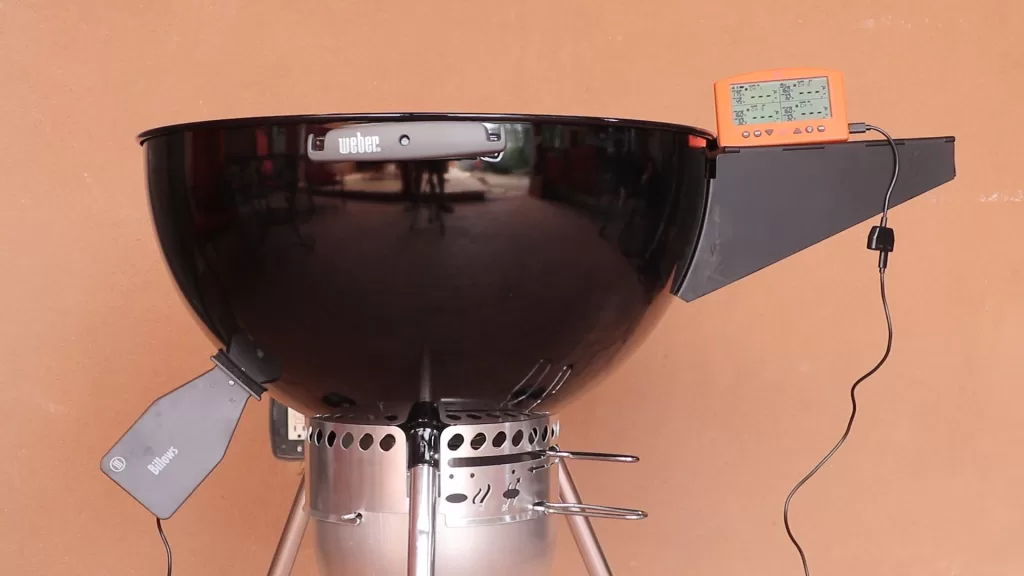
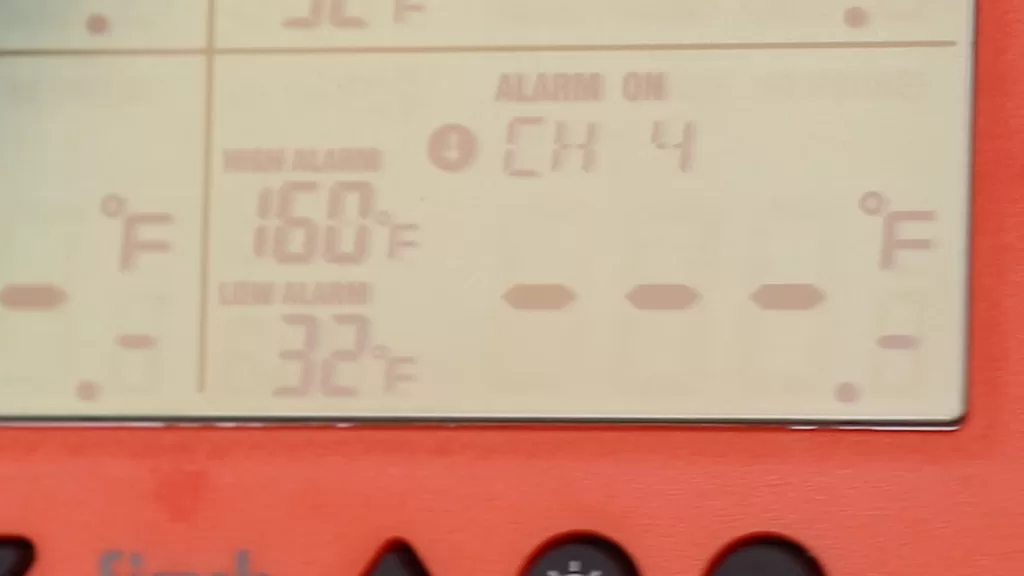
Here is what channel 4 looks like when the billows is plugged in.
Notice there’s now a fan icon and the default temperature is 225 degrees Fahrenheit.
Here are the performance tests that we’ll be running.
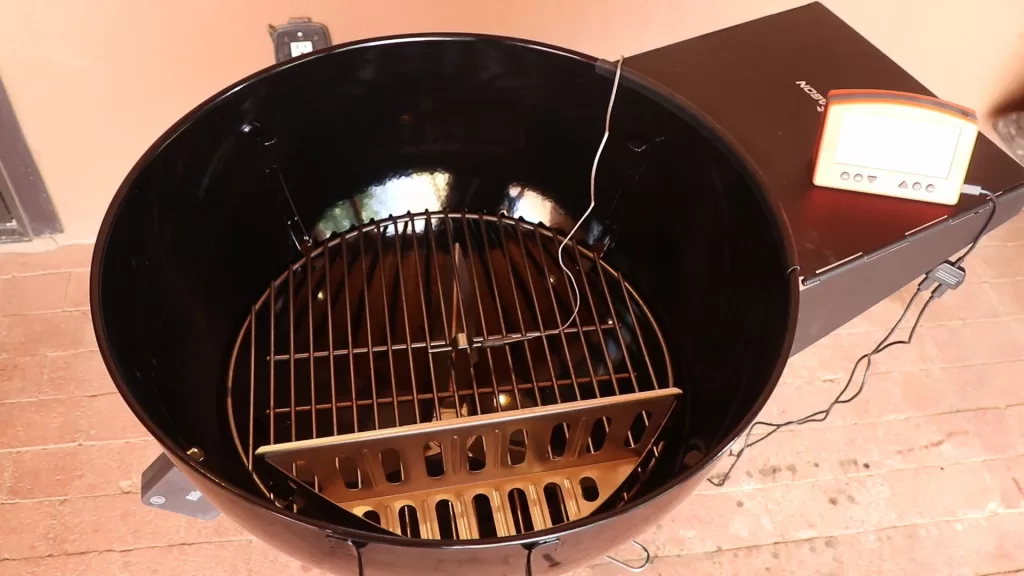
The testbed will be a weber kettle 22-inch setup for indirect cooking. The test is to see how quickly the billows can reach temperature and then maintain temperature. The temperatures that we are going to achieve are 225 degrees Fahrenheit 250 degrees Fahrenheit 300 degrees Fahrenheit and then 350 degrees Fahrenheit, Here’s the grill being set up for test first the air probe is attached to the charcoal grate in the middle of the grill.
A Weber charcoal basket is put on one side.
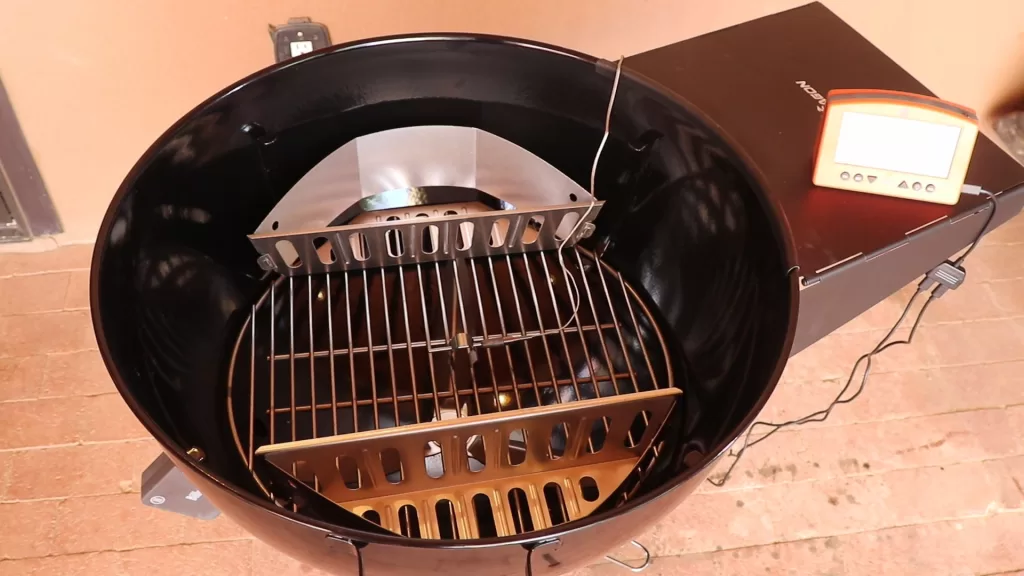
And another Weber basket is put on the other side.
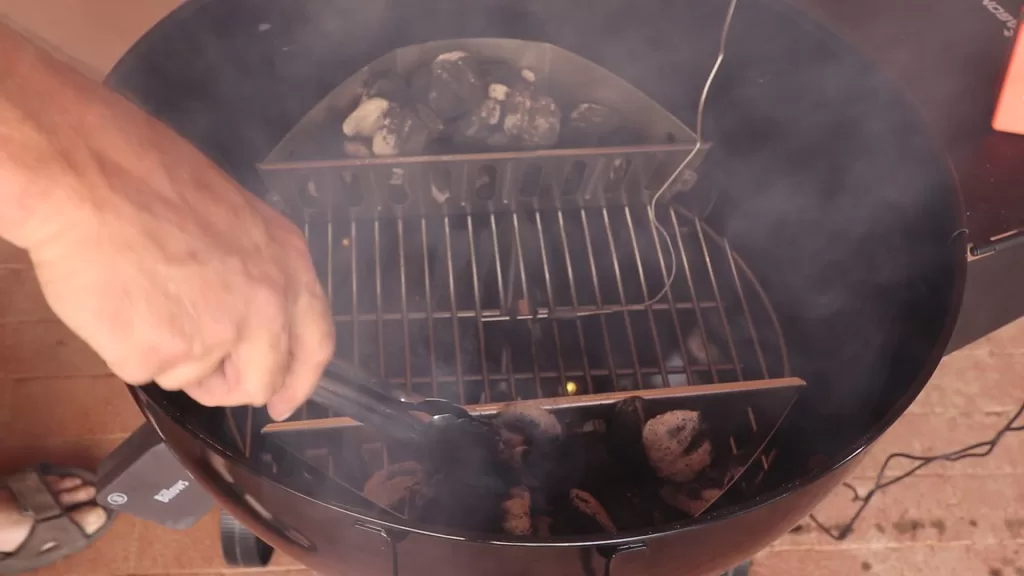
A full chimney of Kingsford original charcoal briquettes that had now burned for 15 minutes. The briquettes are then evenly distributed between the two charcoal baskets. Just the last look to make sure the baskets have equal amounts of coals.
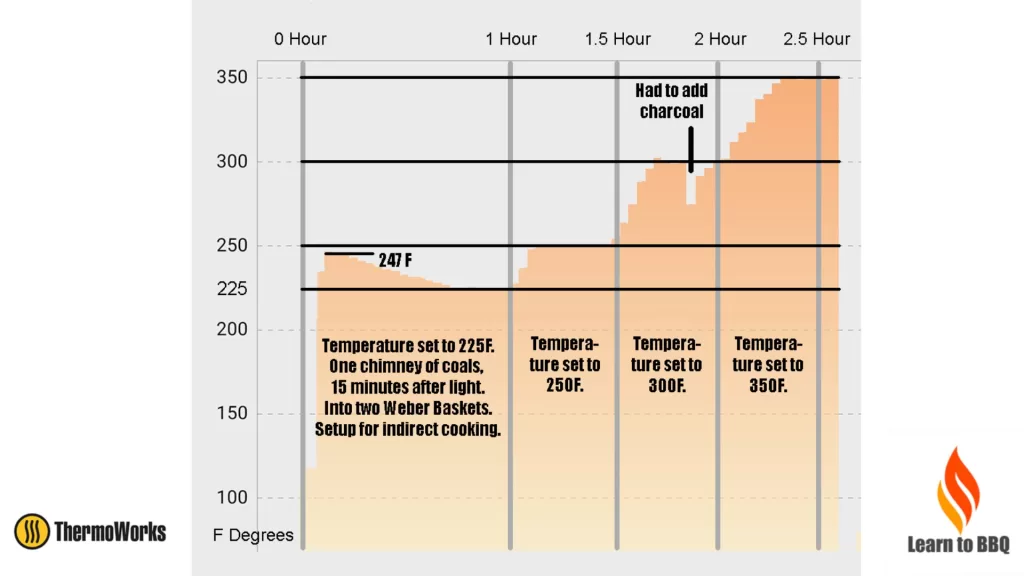
Now put on the cover. The plan is the cover stays on for the whole test unless there’s an issue. Here is the complete temperature chart for our tests.
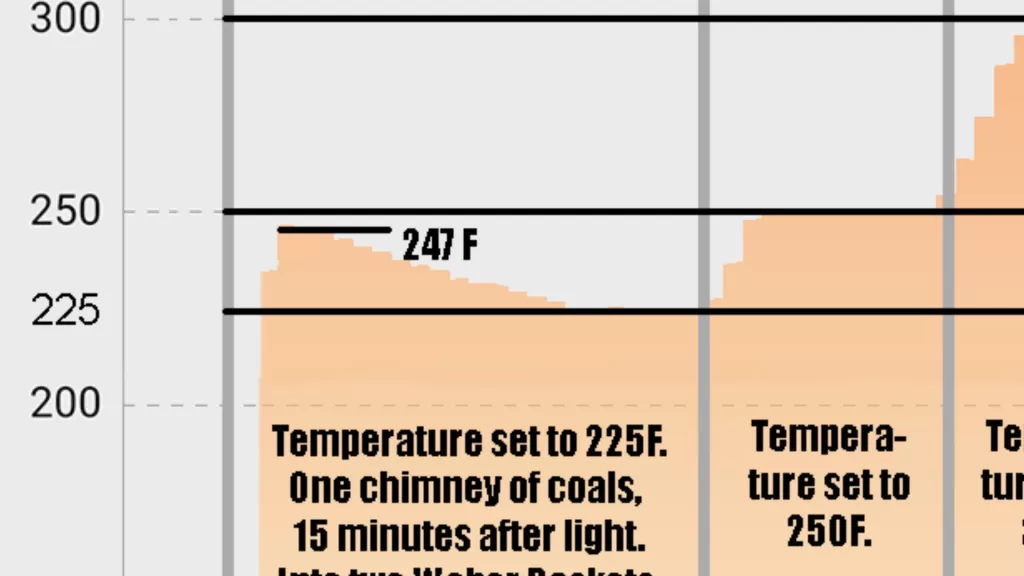
On this first test of 225 degrees the grill overshot and did not stabilize till it hit 247 degrees.
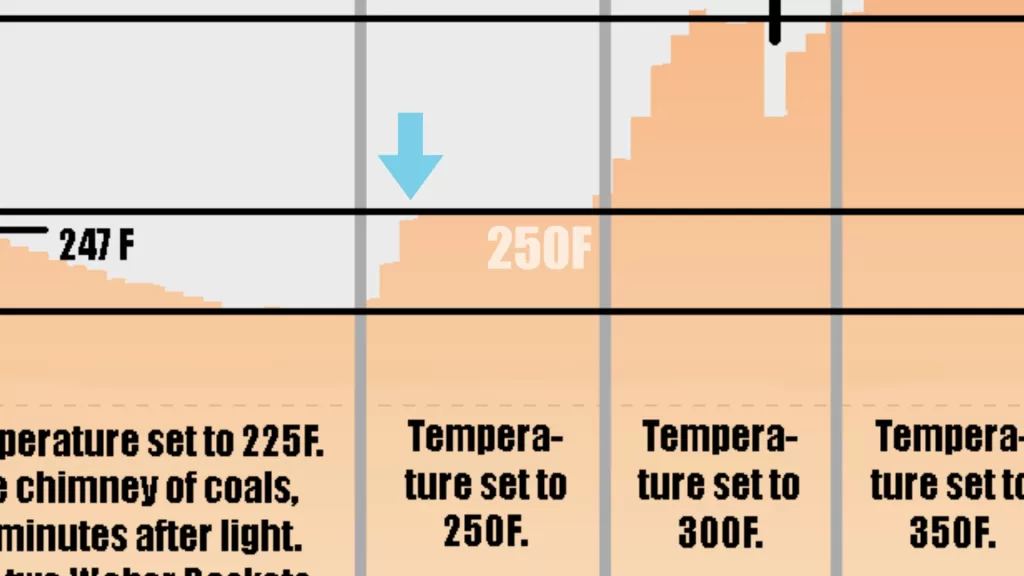
I believe the overshoot was caused by me for not letting the grill stabilize for 10 to 15 minutes before turning on the bellows. I then turned up the Signals thermometer to 250 degrees Fahrenheit. Within eight minutes the billows have brought the grill temperature up to 250 degrees Fahrenheit and there was no overshoot.
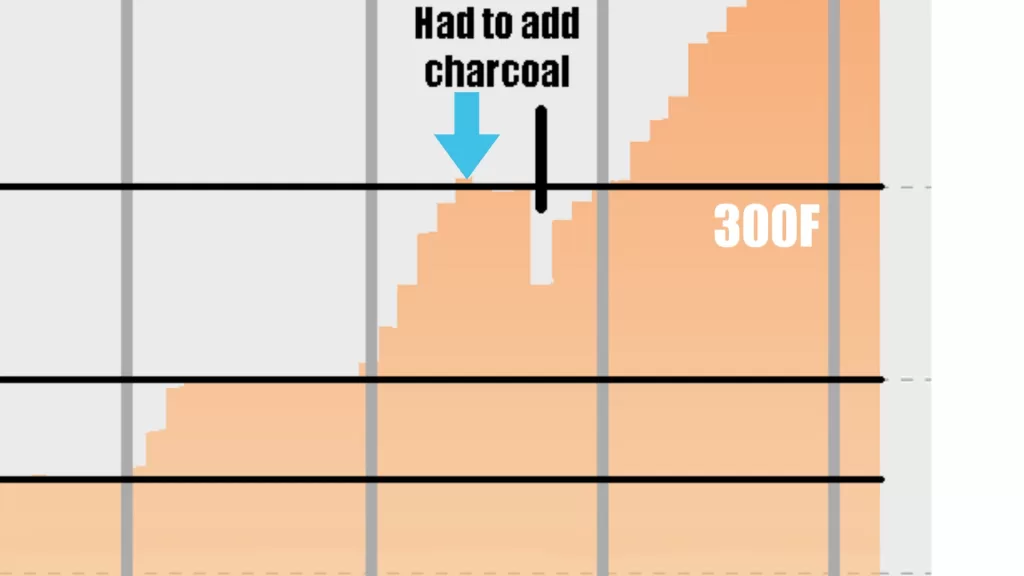
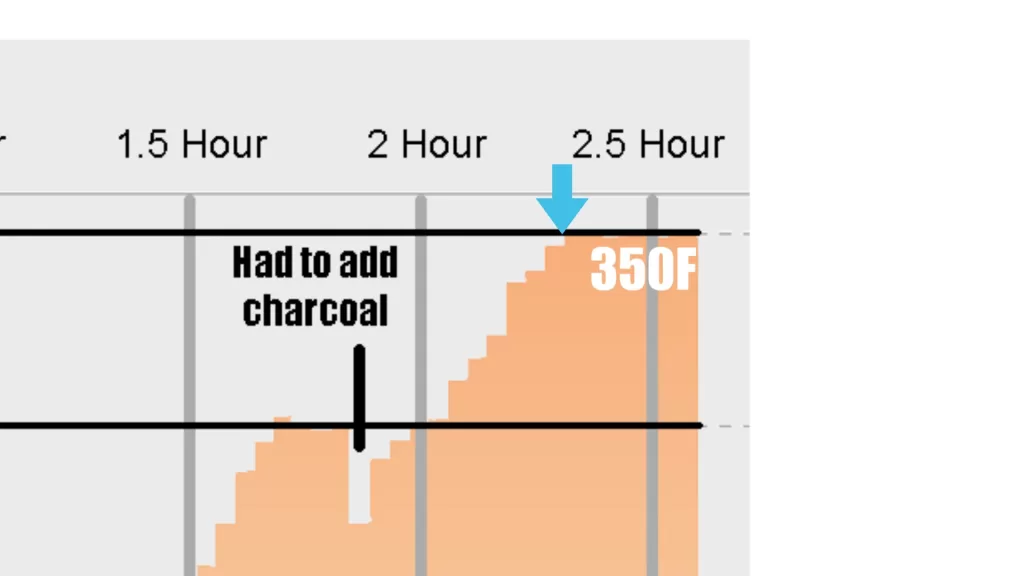
After thirty minutes I then set the signals to 300 degrees within 15 minutes billows had brought the grill temperature up to 300 degrees and there was no overshoot. It also had less than 2 degrees fluctuation. We then had another operator error and that we burned up all our charcoal. I then added a handful of briquettes to each basket and the grill fully recovered to 300 degrees within 10 minutes.
In the final 30 minutes of testing we cranked the signals up to 350 degrees and it took 15 minutes to reach temperature never overshot and at that point never less than three degrees fluctuation.
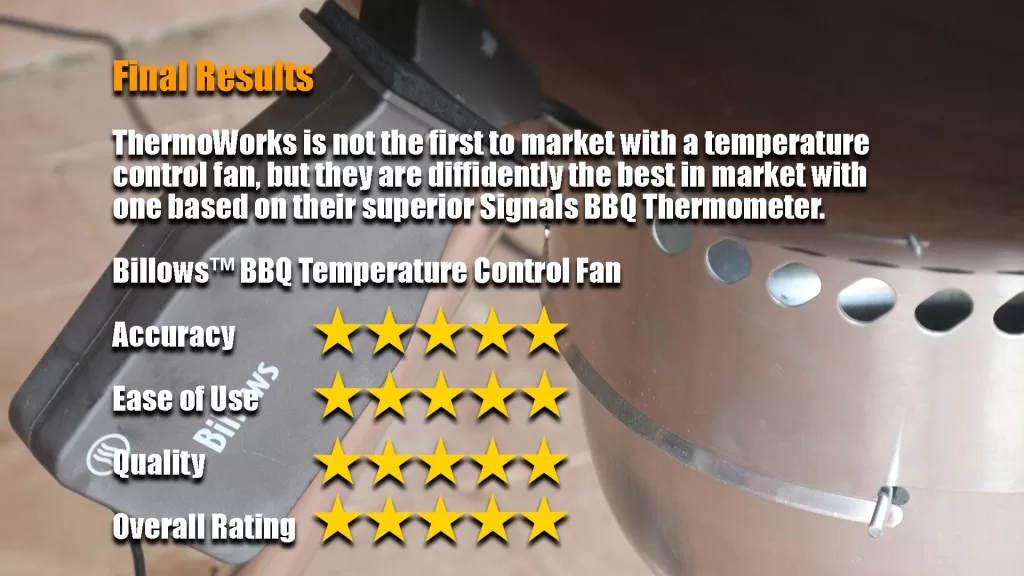
ThermoWorks is not the first to market with a temperature control fan but they are definitely the best in market with one based on the superior Signals BBQ thermometer. We give this product a top five star rating and have now added it to our own outdoor kitchen as a product we will use on all future reviews.
ThermoWorks Billows on a Weber Kettle 22 – Installation and Review Video