Umami Barbecue – Brisket

Umami Barbecue – Brisket

If you want to make a brisket that is over the top. Then this is your recipe. It is also a really easy recipe with just six different ingredients. Total prep and cook time of 8 hours.
Print Recipe
CourseMain Course
CuisineAmerican
Keywordbrisket, umami, umami barbecue, umami bbq, umami brisket
Prep Time1 hour
Cook Time7 hours 8 minutes
Servings10
Calories704kcal
Cost$50

Instructions

  • On large cutting board put the whole packer brisket. Now start by removing all the hard fat.
  • Now flip the brisket over to the fat cap side and trip fat so it is 1/4 inch thick across the fat cap.
  • Now remove the silver skin.
  • After trimming the brisket now we add the rub. The rub is very simple. Montreal Steak Seasoning.
  • In a large foil pan apply two coats of rub. First coat so the salt can penetrate the meat and a second coat so we have a layer of rub to make that crust or bark that any good BBQ brisket should have.
  • Make sure you season both sides of the brisket including the fat cap.
  • In mixing bowl add 1 cup of ketchup.
  • Add 1/2 cup of water.
  • 2 Tablespoons of Tamari sauce.
  • 2 Tablespoons of Worcestershire sauce.
  • 2 Tablespoons of Fish sauce.
  • 1 Tablespoon of Umami Powder.
  • Now mix everything thoroughly and let sit in the refrigerator for about 30 minutes. Set aside about a 1/4 cup of sauce to be used later.
  • With injector inject umami sauce into the brisket making an injection every 2 inches. Think of a 2 inch by 2 inch grid.
  • Preheat pellet grill or charcoal grill to 300F.
  • Put brisket on grill and insert temperature probe into thickest part of the brisket.
  • Check brisket every hour and spritz with water if needed.
  • At 160F pull brisket from grill and foil in a foil pan.
  • Add the 1/4 cup of injection sauce to the brisket to give it an extra umami boost.
  • Now seal up the brisket with another sheet of foil. Remove as much air as you can and make sure it is fully sealed.
  • Put sealed brisket back into grill and reinsert the temperature probe.
  • When brisket reaches 205F pull brisket from grill,
  • If you have a Cambro let brisket rest for at least an hour. No Cambro? Then use a cooler with towels.
  • After resting separate the point from the flat and then slice the flat against the grain.
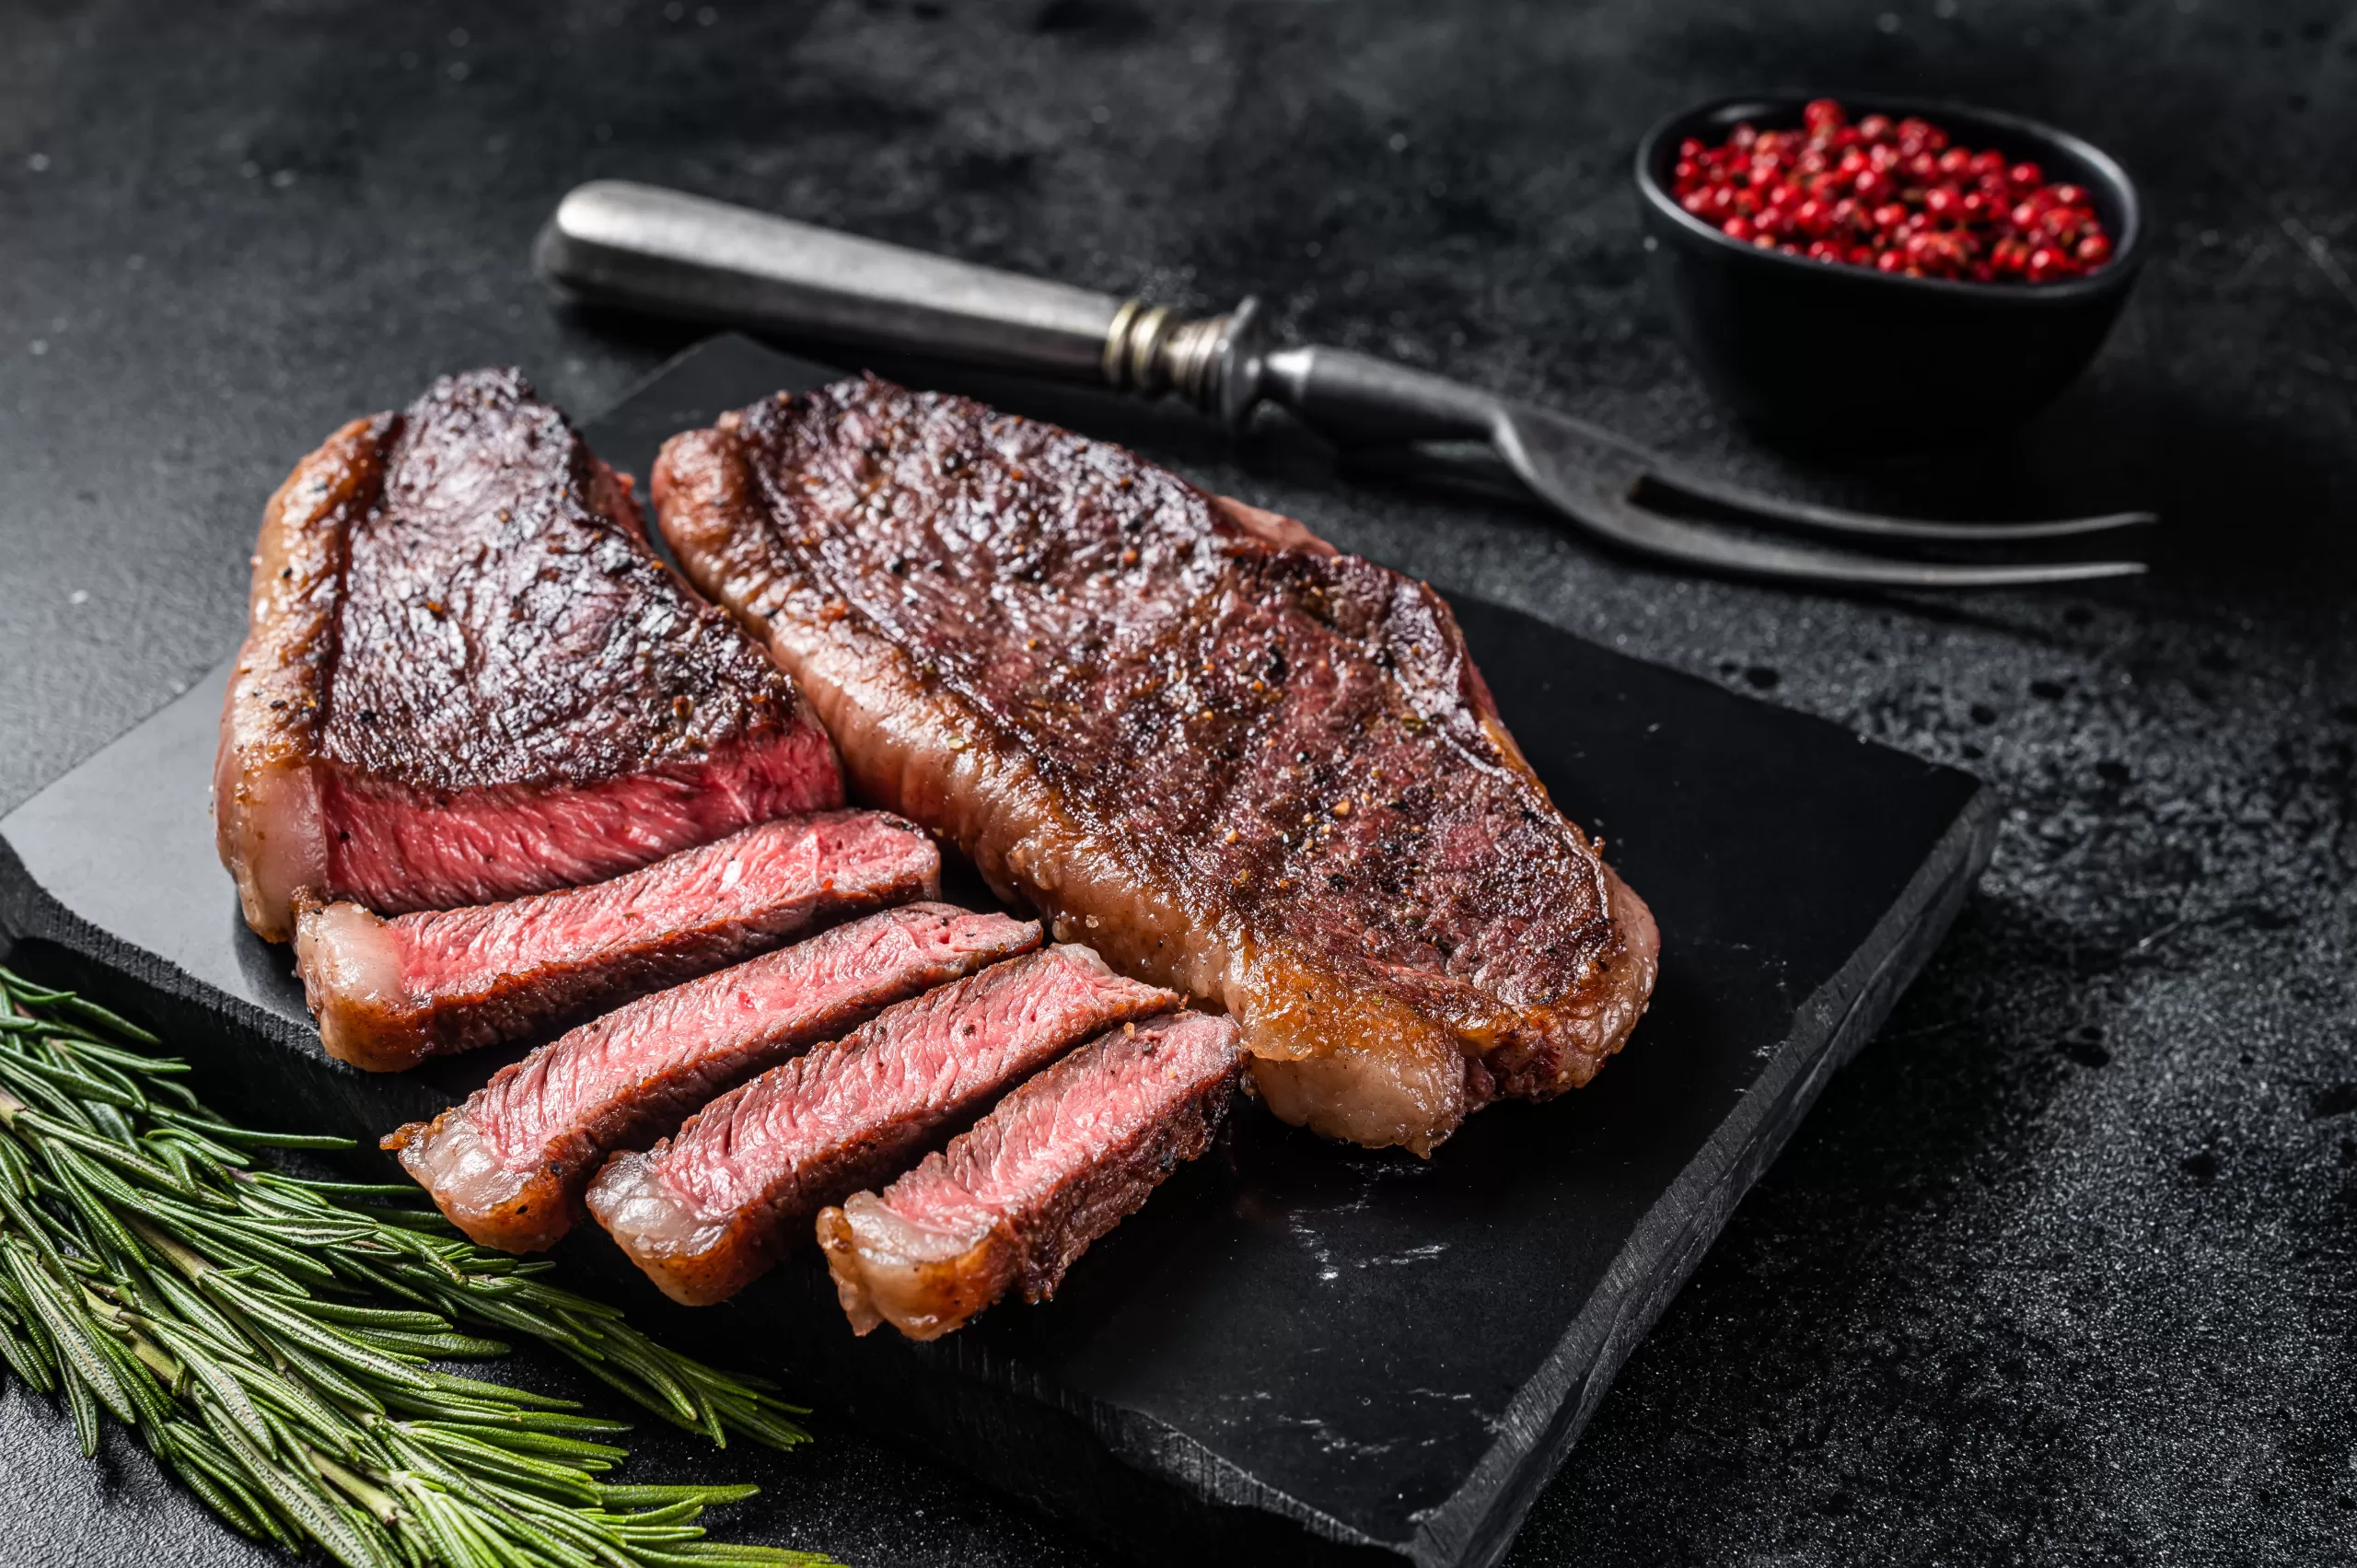
  • Here is the flat sliced and put on a platter. Please note the great smoke ring and how moist the brisket is.
  • Complete 15 pound brisket prepared and cooked in less than 8 hours. Might be my best brisket recipe to date.

Video

Nutrition

Serving: 1lb | Calories: 704kcal

Umami Barbecue – Chicken Thighs

Umami Barbecue – Chicken Thighs

In this recipe, we are going to make a unique Umami enhanced barbecue sauce using the Stubbs Sweet Heat barbecue sauce. We are also going to cook to temperature and not time. In my opinion, these are the best chicken thighs I have ever made..
Print Recipe
CourseMain Course
CuisineAmerican
Keywordchicken thighs, umami, umami barbecue, umami bbq
Prep Time30 minutes
Cook Time47 minutes
Servings4
Calories260kcal
Cost$10

Instructions

  • It really is not a powder but very small piecesof shiitaki musrooms and salt.
    Our rub will only be two ingredients.
    Montreal Chicken seasoning
    And Umami Powder.
  • Pour 1/2 cup of Montreal Chicken Seasoning into bowl.
  • Now pour one tablespoon of Umami Powder into the bowl and mix well.
  • Put rub to the side and now we make the suace that has three ingreidents. Stubb's Sweet Heat Barbecue Sauce, Umami Powder and Fish Sauce.
  • Pour 1/2 cup of Sweet Heat Barbecue Sauce into the bowl.
  • Pour a full tablespoon of Umami Powder into the bowl.
  • Now mix well and let Umami Powder dissolve into the sauce. You need to put this mixture into the refrigerator for about 1/2 hour.
  • Now pour one tablespoon of Fish Sauce into the bowl and mix well. The sauce is now done.
  • Now put the chicken thighs onto a frogmat and peel the skin back leaving the one side still attached to the thigh.
  • Now apply rub liberally to the meat of the thigh.
  • Now fold the skin over on top of the rub making sure the skin is tight and had no wrinkles.
  • Now with the same rub now apply to the skin. The salt in the rub will help dry out the skin and allow it to render so it will not be chewy.
  • Now put chicken thighs into the grill with the grill set at 375F. Also make sure your temperature probe is in the thickest thigh.
  • After about 30 minutes we then apply the sauce to the top of every thigh
  • We then cook until internal temperature is 175F and then we remove from the grill.
  • The chicken thighs will be thoroughly cooked. moist and should taste great.

Video

Nutrition

Calories: 260kcal

Umami Barbecue – Baby Back Ribs

Umami Barbecue – Baby Back Ribs

In this recipe, we are going to make a unique Umami enhanced barbecue sauce. We are also going to cook to temperature and not time. In my opinion, these are the best baby back ribs you can make.
Print Recipe
CourseMain Course
CuisineAmerican
Keywordbaby back ribs, umami, umami barbecue, umami bbq
Prep Time1 hour
Cook Time2 hours 30 minutes
Servings6
Calories669kcal
Cost$40

Instructions

  • Remove packaging on the three baby back rib racks.
  • Remove the membrane from the back of the rib racks.
  • Now season the ribs using Montreal Steak Seasoning.
  • Insert the needle temperature probe into the rib rack making sure we do not touch any bone.
  • Put all three rib racks into a 300F preheated smoker. Then plug in the probe into the Signals thermometer.
  • We are going to cook these ribs uncovered and in the smoke till they reach 160F.
  • As the ribs cook we will now make the barbecue sauce. We get a medium-size mixing bowl.
  • Add one cup of ketchup.
  • Two teaspoons of brown sugar.
  • Two tablespoons of Worcestershire sauce.
  • Four tablespoons of balsamic vinegar.
  • Two teaspoons of garlic powder.
  • Two teaspoons of chipotle sauce
  • One half a teaspoon of ground mustard
  • One half a teaspoon of sea salt.
  • Now if you want you can stop here and use the sauce the way it is. If you want to take it up a big notch then you can add the next three ingredients. I call these the Umami enhancers and the will double the number of glutamates in the sauce.
  • Two large tablespoons of chipotle in adobo sauce.
  • One tablespoon of fish sauce. Please note it is not fishy.
  • One tablespoon of tamari sauce.
  • Now mix well and put into the refrigerator for about 30 minutes.
  • When ribs hit 160F remove and then apply barbecue sauce,
  • Now put ribs into a large foil pan and then cover the top with aluminum foil.
  • Reinsert temperature probe and cook ribs till when they hit 195F.
  • When ribs hit 195F remove foil from the top of the pan and let the sauce turn into a glaze. This is about 30 minutes.
  • Let ribs rest for about 10 minutes then slice and serve.

Video

Nutrition

Calories: 669kcal

Umami Barbecue – Pulled Pork

Umami Barbecue – Pulled Pork

Umami Barbecue Pulled Pork is the first in a series of Umami Barbecue recipes on our site. The secret to this recipe is the sauce. If you try this recipe you will have a hard time going back to regular pulled pork.
Print Recipe
CourseMain Course
CuisineAmerican, Japanese
Keywordfish sauce, imami barbecue, imami bbq, oulled pork, umami, umami pulled pork
Prep Time30 minutes
Cook Time4 hours
Servings8
Calories222kcal
Cost20

Instructions

  • While we work on the Umami Sauce we can preheat the Camp Chef Woodwind Grill with Sidekick. We set the temperature to 300F.
  • Then set the smoke level to 7. So you know 10 is the highest you can set it to maximize smoke.
  • We keep the rub very simple. We use an SPG or Salt, Pepper and garlic rub. Our favorite one is Montreal Steak Seasoning that is SPG but with a little red pepper, onion, and paprika thrown in. We will use about 1 cup of rub.
  • Using a foil pan so we can have an easy clean up add the rub to every inch of the pork shoulder.
  • As I apply the rub I make sure that all sides are covered. The rub not only adds flavor but the salt draws out protein-rich juice that dries on the surface during cooking, creating a crisp,
    deeply seasoned crust.
  • Now before I take the butt out to the smoker I need to find where the blade bone is.
    I need to make sure that I put the temperature probe on the other side so the probe will not make contact with the bone. Now it is off to the smoker.
  • Here the woodwind grill and as you can see it has the sidekick option. That side burner is going to allow us to prepare everything on this grill. No need to do any cooking in the kitchen. Here I place the roast fat cap down and then insert the temperature probe opposite of the blade bone. So while the pork shoulder is cooking it is time to prepare the umami sauce.
  • Here are the five ingredients. Each one is loaded with Glutamates and should take our pork shoulder over the top.
  • We start with ¼ cup of Worcestershire sauce. This sauce is made with fermented anchovies and is full of glutamates or Umami.
  • Now we add ½ a cup of balsamic vinegar.
  • Then we add a ¼ cup of tamari sauce.
  • Now a ¼ cup of fish sauce. Don’t worry it is not fishy.
  • Finally a can of diced tomatoes. 20 to 28 oz can.
  • Now mix it all up. Now we have to wait until the pork reaches 160F so we can add this sauce.
  • It took 3 hours and 10 minutes to bring this roast up to 161 from a very cold 44 degrees.
    Now we move the roast to a foil pan and then add our special umami sauce.
  • With the sauce added we need to seal the foil with heavy-duty foil and we need the pan to be airtight. At this time we are actually brazing the roast in the umami sauce. We now come to the final part where we add even more umami but we are also going to add texture that will complement the pork.
  • One large sweet onion and shitake mushrooms. We want the onion to be diced but rather large pieces so that they can hold up to the pork. You could use any large onion but I like the sweet ones for we are adding no sugar to this pulled pork.
  • These onion pieces might look large but they will cook down and will be about half this size when done. So why onions? When slow cooked they give off a lot of free glutamates making just about everything they touch taste better.
  • Now my favorite ingredient for this pulled pork. Shitake mushrooms are king in the world of umami. I bought these frozen and already sliced. All I had to do was put them in the bowl with the onions. Before we can go cook these mushrooms and onions we need to salt them.
    By salting the mushrooms before cooking will help draw out moisture allowing them to cook firm and not become rubbery.
  • Here is the cooking set up. Using a 12 inch Camp Chef cast iron skillet and set the burner to medium. I monitor the skillet temperature for I want to cook the mushrooms and onions slow enough so they will not burn or have the butter burn. When outside and it is windy and cold it is hard to know how hot the skillet is. I add the butter when the skillet hits 180F. We want to cook the onions and mushrooms but we do not want to overcook or burn them.
  • Time to put the onions and mushrooms on the grill box. One thing I really liked about the grill box is I can lower the cover over the skillet and get the food out of wind. Actually, felt I could cook about anything on this grill box. At 30,000 BTUs you could easily sear steaks but you could saute onions and mushrooms without overcooking them..
  • Well back to the cook. We now take our cooked onions and mushrooms and add them directly to the pork shoulder. Also, I highly recommend some BBQ gloves like these BBQ Dragon extreme temperature gloves. Best extreme temperature gloves I have ever used.
    After transferring the onions and mushrooms leave the foil pan uncovered and then wait till the internal temp hits 195F.
  • Now it is time to pull and let the roast rest for about 15 minutes. Now get another clean foil pan and then transfer the pork should to the new pan. I use a spatula but you can use a slotted spoon and transfer all the onions and mushroom over to the new pan.
  • Now let the shredding begin. I start with the bear claws and brak it into 4 or 5 large pieces. Then I remove the blade bone. Should come out clean with no meat sticking to it. I then use 2 forks and then I put the gloves on and shed it by hand. After shredding I then mix it all together so that the onions and mushrooms are all intertwine with the pork
  • First, you notice how moist it is. Second, you see the bark and the great smoke ring.
    But the most important is how does it taste. I took a small piece with some bark on it and gave it a try. Om my god. The best I have even made and the best I have ever eaten.
    In review, Umami Barbecue is for real and will take your barbecue to the next level.

Video

Nutrition

Serving: 84g | Calories: 222kcal | Carbohydrates: 1g | Protein: 20g | Fat: 15g | Saturated Fat: 6g | Sodium: 670mg

Rotisserie Turkey on the Wyldside using the ThermoWork BlueDOT

Rotisserie Turkey on the Rec Tec Wyldside using the ThermoWork BlueDOT

This recipe shows how to cook a 12-pound turkey on a rotisserie using herb butter and using a ThermoWorks BlueDot thermometer to monitor the turkey internal temperature.
Print Recipe
CourseMain Course
CuisineAmerican
Keywordbarbecue turkey, herb butter, rotisserie, rotisserie turkey, wyldside grill
Prep Time30 minutes
Cook Time1 hour 50 minutes
Servings8
Calories170kcal
Cost25

Instructions

  • Here what it looks like when I first put the turkey on.
    The rotisserie handled this 12-pound turkey like it weighed nothing.
  • The ThermoWorks BlueDOT also ran flawlessly and its round design and two powerful magnets in the back made attaching it rather easy.
  • To attach the BlueDOT all I needed was a round disk used to mount phones magnetically to your dash.
    To attach the BlueDOT you need to route the BlueDOT temperature probe wire through the rotisserie bushing. This bushing allows the spit to turn freely on the grill.
  • Wipe the spit handle clean and remove the paper so the adhesive is exposed
  • Now center the disk at the end of the handle.
    I felt it was easier to put the disk on the table and then center the handle.
  • With disk attached to handle take the blue dot and test how secure it is.
    I was amazed at how strong the magnet was and how secure the BlueDOT became on the handle.
  • Now before you attach the handle just make sure the probe cable can be attached to the BlueDOT and also that the temperature probe can be inserted into the turkey.

    Now screw the handle back on to the spit.
  • Because your cable is going to be a lot longer than you need I wrapped the excess cable around the handle before inserting the cable into the BlueDOT.
  • Now it is time to prep the turkey.
    I borrow this recipe from Gordon Ramsey and it is great at keeping a turkey moist.
    The secret is making an herb butter.
    Your start with 2 sticks of unsalted butter.
    1 Tablespoon of Sage
    1 Tablespoon of Rosemary
    1 Tablespoon of Thyme
  • Now clean your hands and put on a pair of food preparation gloves and go for it.
    You need to make sure every inch of butter is mixed with the spices.
    Now put the herb butter in the refrigerator and let all those spices become one with the butter.
  • Now on to the turkey.
    Got this 12 pound turkey at Sprouts Farmer Market. It is fully natural and has not been injected with salt.
    If you see the words enhanced when you by a turkey it means they injected salt into the turkey. The only thing that is enhanced is the companies bank account.
    For the salt makes the turkey weigh more when it is bought.
    Also, you should never brine an enhance turkey and also an enhanced turkey does mean it is brined. It is not.
    As you see I am removing all the accessories. You do not need any plastic holding legs or a popup temperature gauge that guarantees an overcooked turkey.
    Do keep the neck and all the gizzards for they make a great gravy.
  • Now its time to tie up this bird. You do not want the legs and wings dangling on the rotisserie.
    I separate the job into two twines. One twine to hold the wings in tight and then a second twine to secure the leg s and also hold the skin tight.
    Take twine and loop behind the wings then go around the turkey and secure the wings.
    Make sure you cut the loose ends of the twine so they do not get close to the fire..
  • With the wings tied get a second twine and loop it around the breast bone and follow behind each leg.
    This will push up the breast and also pull the legs up so the skin will tighten and will cook evenly.
    Put the legs together with one on top of the other and wrap legs with twine.
    Flip the bird over and then circles twine over the pope nose and pull twine tight and tie.
  • Now make final adjustments and get ready to apply herb butter.
    Before the butter can be applied you need to separate the skin from the breast.
    With your finger push slowly but firmly between the breast meat and the skin.
    Do this from both sides of the cavity.
  • Now go get he herb butter and put it into the microwave for around 20 seconds and soften it up.
    Now apply butter on every inch of the breast under the skin.
    As you put more butter in with one hand use the other hand to even out the butter.
    This butter is going to give you a very moist turkey with a perfectly golden turkey skin and the herbs will add those subtle flavors we all crave when we have thanksgiving turkey.
  • When you are done covering the breasts then cover every inch of skin on the outside and also in the cavity.
    More butter means better self-basting as the bird turns on the rotisserie.
    Now you know where the name Butterball came from.
  • Make sure you get into all the crevasses and also underneath the twine.
    Now it is time to put the turkey on the spit rod.
    With the turkey laying with the breasts facing up put spit rod through the top cavity and then the lower cavity making sure the rod is above the legs.
    Insert spit rod fork into the upper part of the breasts
    Now put the other spit rod fork and make sure both legs are secured by the fork.
    Now using plyers make sure both forks are secured.
  • Now it is time to get this turkey on the grill and as you can see the rotisserie is turning freely without any hesitation and the bird is not flopping around.
    The BlueDOT temperature probe is also inserted into the thickest part of the breast.
    Here is the BlueDOT only minutes after I put the turkey on.
  • Turkey's temperature is 57 degrees and the alarm is set for 165 degrees. As you can see very easy to read the display.
    For cooking fuel, I am using Royal Oak lump charcoal and Kingsford hickory smoking chunks.
  • Here is the turkey a little over halfway through the cook and you see how evenly the bird is cooking.
  • The Wyldside pit area maintains an even and consistent heat due to the heavy large metal plate at the bottom of the pit.
    In addition, it has a variable speed blower that acts like bellows giving the fire additional oxygen.
    Now here is the ThermoWorks app showing not only the turkey temperature but shows the complete graph of the cook.
  • When turkey hit 160F I then pulled turkey and covered in foil to rest. Over the next 30 minutes, the turkey temperature raised to 165F and the turkey was ready to be served.
  • Cook time before the rest was 1 hour and 53 minutes. The total time from start to finish was 2 hours and 23 minutes. The turkey came out very moist and was full of flavor from the herb butter.

Video

Nutrition

Serving: 3oz | Calories: 170kcal | Protein: 18g | Fat: 4.4g | Saturated Fat: 1.2g | Polyunsaturated Fat: 1.2g | Monounsaturated Fat: 1.5g | Sodium: 96mg

Tri Tips Seared in Duck Fat on the Rec Tec Wyldside Grill

Tri Tip Seared in Duck Fat

Trip Tips Seared in Duck Fat on the Wyldside Grill

A recipe showing how to cook on the Rec Tec Wyldside Grill. This one is all about Tri-Tips using duck fat to sear. This recipe will also work if you have a Santa Maria Style Grill or even an Argentinian Grill.
Print Recipe
CourseMain Course
CuisineAmerican
Keywordargentinian grill, rec tec wyldside, santa maria style bbq, santa maria style grill, tri tip, wyldside grill
Prep Time20 minutes
Cook Time45 minutes
Servings8
Calories500kcal
Cost30

Instructions

  • In this recipe, we will be cooking and searing Tri-Tip roasts
    on the Rec Tec Wyldside Grill.
    The Wyldside grill is an Argentinian or some would say a
    Santa Maria style BBQ.
    The cooking fuel will be lump charcoal and hickory wood
    chunks.
  • We will need a very hot fire and it all starts with the BBQ Dragon Chimney Starter.
    First, we fill the starter all the way with lump charcoal.
    Then using a tumbleweed starter I light and then push the starter to the middle of the chimney using the access port on the side of the BBQ Dragon chimney.
    To help with the lighting, the Wyldside has vent holes that part powered by a fan, all around the base of the fire pit.
  • To help with the lighting, the Wyldside has vent holes that part powered by a fan, all around the base of the fire pit.
    Here I show the port and how I am pointing it towards the vents at the base.
  • We now turn on the fan to high and let the chimney and charcoal come up to temperature.
    As you can see the charcoal is well on its way. So while the charcoal is lighting we move into the kitchen to prepare our Tri Tips.
  • Here are the ingredients we will be using.
    Duck Fat and Montreal Steak Seasoning
  • And two 2.5 pound tri tip roasts
    A little trivia. The Tri Tip was created by Bob Schultz in Santa Maria, CA in the 1950s. Before Mr Schultz this cut of meat was used to make hamburgers.
    As you can see the roast has three points like a triangle. Hence the name Tri Tip.
    Before cooking, we need to remove external fat and silver skin.
  • Because this is not a big piece of meat I take small cuts until I can see the outside is mainly meat.
  • After trimming you can see that the outside of this roast should really sear well.
    Now it is time to season the meat. I put the meat into a foil pan so cleanup is easy.
    Now with the Montreal steak seasoning, I liberally put the seasoning on.
    Montreal Steal seasoning is your standard SPG, salt pepper and garlic with few extras added.
    With the meat totally cover in rub it is now off to the grill.
  • We now lay the coals in the middle of the fire pit.
    Now add the hickory wood chunks
    As the wood chunks are added you can see the wood starts to smoke and the fire becomes very hot.
    Also, the vents and fan are adding even more oxygen to the fire.
  • We then add another layer of lump charcoal.
    The wood is already producing flame and now we want to move
    wood and coals so we have a focused cooking area.
    Using the rack we try and equally distribute the
    wood among the coals.
  • With coals and wood ready we now lower the grate into the grill.
  • Here you can see my favorite thermometer. Signals by Thermoworks.
    Here is the fire with both flame and smoke. Perfect for cooking these tri-tips.
  • In the grate, up position, the tri-tips are placed on the grate.
    The temperature probes from the signals thermometer are inserted into the two tri-tips.
  • The grate is then lowered to the point that the flames just kiss the meat but do not char the meat.
    The tri-tips are turned about ever 2 to 3 minutes.
    The tri-tips will be ready to sear when they reach an internal temperature of 120F.
  • Here you can see one tri-tip is at 118F and just about ready to pull.
  • With the one tri-tip done we move it off to the side, so it can stay warm.
    Then as the second tri-tip hits 120F we also move it off the heat too.
    I highly recommend some real good BBQ gloves like the BBQ Dragon Extreme Heat Resistant BBQ Gloves
    By far the best BBQ gloves I have ever used.
  • Now it is time to get a large 15 inch cast iron skillet. This one is a Lodge.
    Now the duck fat.
    Why duck fat? It does not burn at high temperature so no free radicals so it stays healthy for you. It also has a neutral taste so it doe not change the taste of the meat.
    Pour duck fat into skillet and let the oil come up to temperature.
  • Coat the bottom of the skillet and the lower the grate so it is very close to the coals.
    Remove meat temperature probes and then start monitoring the skillet temperature using an inferred thermometer.
  • The correct searing temperature is 360F.
    Now do not do this unless you have extreme temperature gloves on.
    As I seared these tri-tips I noticed how the meat actually became more pliable and the color became even in color like a well-cooked steak.
    Total searing time was around 2 minutes
  • The nice thing about the gloves is you could actually feel when the meat was done.
    They looked perfect and it was time to pull.
  • Always cut against the grain and in a tri-tip that means you change the cut when you reach the middle.
    Tri-tip cut easy and it tasted great.

Video

Nutrition

Serving: 8oz | Calories: 500kcal | Protein: 60g | Fat: 12g | Iron: 8mg

ThermoWorks Billows on a Weber Kettle 22 – 3 Hour Ribs

ThermoWorks Billows on a Weber Kettle 22 – Baby Back Ribs in 3 Hours

This recipe is part of a series that incorporates the ThermoWorks Billows on a Weber Kettle 22. This time we are cooking Baby Back Ribs in 3 Hours. If you would like to know more on how to install a ThermoWorks Billows on your Weber Kettle please check out this installation video – https://youtu.be/Da0gHrkINSo
Print Recipe
CourseMain Course
CuisineAmerican
Keywordbaby back ribs
Prep Time30 minutes
Cook Time2 hours 30 minutes
Total Time3 hours
Servings4
Calories248kcal
Cost20

Instructions

  • Setup kettle with 2 Weber baskets full of Kingsford blue briquettes. Put one charcoal starter in each basket and then light.
  • Let the charcoal burn for 10 to 15 minutes and then put grill on with the pit probe attached. Plug pit probe into the Signals Thermometer and then set the Billows for 300F.
  • Put the cover on and make sure the vents are set at 1/4 to 1/6 open depending on your elevation.
  • Now time to prepare ribs. Take ribs out of the packaging and put on the preparation area. Find the dullest butter knife you can find. Now on the narrow side of the ribs take your knife and find the end of the membrane. Free the end up so you can grab it with a paper towel and then slowly pull it off.
  • Now put one of the rib racks into a large foil pan and then add the rub. The rub we are using is Montreal Steak Seasoning. Here is the label and as you can see you can use it on pork. Actually all it is salt, pepper, and garlic with a few extra things thrown in. It is great on ribs
  • Now put the rub on the ribs. Make sure you do both sides and I use about 1/2 cup of run on each rack.
  • Put the rib on to the SOLIGT Extra Large Stainless Steel Rib Rack that fits perfectly between the weber baskets then put lid on and let cook for 1 hour.
  • After 1 hour ribs should have a dark mahogany color and need to be foiled.
  • Take a large sheet of Heavy Duty foil and put ribs in middle and fold up around the rib. Add 1/2 of pineapple juice and then seal up the foil around the ribs.
  • Put foiled rib into a large foil pan and then put back on the grill. So it will fit you might have to push in the corners. Now cook for another hour.
  • Remove ribs from foil and lay ribs with meat side up in the bottom of the foil pan but leave foil pan on the grill. Now with a silicon brush to paint on Stubbs Heat and Sweet sauce but only do it on the top side of the ribs. Put kettle lid back on and cook for 30 more minutes.
  • Remove ribs from the grill and let them rest for 10 minutes. After resting slice ribs and eat.

Video

Nutrition

Serving: 3oz | Calories: 248kcal | Protein: 20g | Fat: 18g

ThermoWorks Billows on a Weber Kettle 22 – Jerk Chicken

ThermoWorks Billows on a Weber Kettle 22 – Jerk Chicken

This is a real easy jerk chicken recipe that only requires 4 ingredients and that includes the chicken.


Print Recipe
CourseMain Course
CuisineJamaican
Keywordbillows, jamaican chicken, jerk chicken, thermoworks, weber kettle
Prep Time1 day
Cook Time1 hour 30 minutes
Total Time1 day 1 hour 30 minutes
Servings4 people
Calories206kcal
Cost8

Ingredients

Ingredients

Instructions

Marinade

  • Badia Jerk Seasoning.
  • Tamari Sauce.
  • Extra Virgin Olive Oil.
  • Put 1/2 cup of Tamari Sauce into mixing bowl.
  • Add 2 tablespoons of Jerk Seasoning. If you like more heat you can and up to 2 more tablespoons.
  • Add 4 tablespoons of Extra Virgin Olive Oil. The oil allows some of the jerk seasoning to mix for they are oil-based and not water-based.
  • Now wisp it all together.
  • Now get 8 chicken thighs with both skin and bones.
  • get a 1-gallon zip lock bag.
  • Using food preparation disposable gloves put the chicken into the zip lock bag.
  • Pour marinade into the zip lock bag.
  • Remove as much air from the bag as possible.
  • Now mix it all up.
  • Put into refrigerator for 10 to 24 hours.

The Cook

  • Here is were the ThermoWorks Billows is positioned on the Weber Kettle.
    ThermoWorks Billows
  • Here is where you place the Weber Baskets. They are on both sides of the Billows.
    Weber Baskets
  • Add even amount of briquets so each basket is full.
    Weber Baskets with Briquets
  • Add foil or drip pan.
  • Program ThermoWorks Signals BBQ Thermometer to 275F for pit temperature (channel 4) and 175F for meat temperature (channel 1).
  • Attach pit temperature probe to cooking grate as close to the food as possible.
  • Put 6 briquets into a starter chimney and ignite.
  • 19 minutes later.
  • Put lit briquets into each Weber Basket. 3 in each.
  • Plug pit temperature probe into channel 4 on the Signals BBQ Thermometer.
  • Open lid vents to 1/4 open.
  • Put the lid back on the kettle grill.
  • In the food prep area put down paper towels for easy cleanup.
  • Now put frogmat or grill mat on top of paper towels.
  • Remove chicken from zip-lock bag and place on frogmat.
  • Pull skin tight and with the skin facing up.
  • Off to grill.
  • Place frogmat between the two Weber Baskets. The chicken is now set up for indirect cooking.
  • Insert meat thermometer probe into a larger thigh that is in the middle of the frogmat. Make sure probe is plugged into channel 1 on the Signals BBQ Thermometer.
  • Put the lid back on the kettle grill.
  • Here is the complete cooking chart from start to finish.
  • Here shows the pit temperature at 275F and that during this part of the cook the pit alternated between 275F and 290F.
  • Meat probe was set for 175F when the thighs would be finished.
  • We put the meat on about 15 minutes after lighting the Weber Baskets.
  • At 50 minutes the pit temperature was turned up to 375F so we could render the skin.
  • At 70 minutes we had to add briquets to both of the Weber Baskets.
  • At 90 minutes when the meat temperature reached 175F we pulled the chicken.
  • Here are the results. The chicken was cooked all the way through and the skin was rendered so it was easy to cut and eat. It also had enough heat from the jerk seasoning and also a nice smoky taste you can only get on a charcoal grill.

Video

Nutrition

Serving: 116g | Calories: 206kcal | Protein: 26g | Fat: 10g | Saturated Fat: 2.6g | Polyunsaturated Fat: 1.9g | Monounsaturated Fat: 3.9g | Cholesterol: 157mg | Sodium: 101mg | Potassium: 321mg | Calcium: 1mg | Iron: 71mg

ThermoWork Billow Insiders Facebook Group

Jalapeno Poppers with Sriracha and Bacon

Jalapeno Poppers with Sriracha and Bacon – Capela’s Jalapeno Poppers Stuffer

One of the most popular appetizers at any BBQ party is Jalapeno Poppers. Why are these better for they have Sriracha and Bacon? Everything is better with Sriracha and Bacon.

Print Recipe
CourseAppetizer
CuisineAmerican
Keywordbacon poppers, jalapeno poppers, sriracha poppers
Prep Time1 hour
Cook Time30 minutes
Total Time1 hour 30 minutes
Servings12
Calories155kcal
Cost15

Ingredients

Ingredients

  • 2 8 oz package Cream Cheese
  • 2 package Real Thin Bacon – Cheap
  • 2 cloves Garlic Cloves
  • 4 tbsp Sriracha
  • 1 tsp Salt

Instructions

  • Prepare your work area so that everything you need is in front of you. Make sure you have your rack to hold the peppers, a sharp knife and a coring tool.
  • Take your first pepper and cut off the top.
  • Now take your coring tool and insert into the pepper and slowing turn COUNTER CLOCKWISE. The direction you use to REMOVE a screw. The natural thing to do is turn clockwise but the tool is designed to be turned COUNTER CLOCKWISE Slowly turn the tool till it reaches the bottom of the pepper.
  • Now pull the tool out and the pith (seeds and membrane) will come out. A few seeds might remain but most of the heat is in the membrane so a few seeds are not going to make much of a difference.
  • In the picture you can see how well this coring tool works.
  • Here you can see what your work area will look like when you are down to your last 6 peppers.
  • Now it is time to pull out the food processor. First add two large and peeled garlic cloves. Run processor until garlic is like a paste.
  • Now add two 8 oz packages of cream cheese and one teaspoon of salt and run the processor till the cheese is smooth.
  • Now add four tablespoon of sriracha. Please use your own discretion on the amount based on your tolerance to sriracha. Most people will not think this is to hot but your call.
  • Now run the processor till the color of the cheese is a light orange and the color is consistent.
  • Now the fun part. Get your Capela Jalapeno Poppers Stuffer. Looks like a caulking gun but is design to stuff peppers.
  • Take of the top of the stuffer and now load the cream cheese mixture into the stuffer.
  • This is what it looks like when it is loaded.
  • Insert nozzle into the opening of the pepper and slowing pull the trigger. Take your time for it can easily overfill a pepper.
  • This is what it looks like when filled.
  • Now take that same pepper and using real cheap and thin bacon start wrapping the pepper starting at the top and working yourself down. Leave the last inch unwrapped so it can fit back in the rack.
  • Here is what a peeper should look like when done.
  • Here is all 24 poppers in the rack and ready to be cooked.
  • Preheat oven or pellet grill to 375F and place the rack of poppers in the middle of the cooking are. Now cook for at least 30 minutes. I usually pull them when the bacon looks thoroughly cooked. The rack will keep the peppers upright and will make sure they do not blacken like when you try and cook them on a grill.
  • Here is a fully cooked popper. You will notice that the bacon is pink and not dark. This was cooked on a pellet grill and the same effect that gives ribs a pink smoke ring made the bacon look pink. It was well cooked and even crisp.
  • When I cut the popper in half you can see the cheese does not run and the bacon stays in place. Makes these poppers very easy to eat and they will be the hit of the party.
    Bon Appetit

Video

Nutrition

Serving: 1popper | Calories: 155kcal | Carbohydrates: 15.5g | Protein: 4.3g | Fat: 8.7g | Saturated Fat: 3.1g | Cholesterol: 12mg | Sodium: 508mg | Fiber: 1.2g

Baby Back Ribs – GoSun Sport Solar Cooker Review

Baby Back Ribs – GoSun Sport Solar Cooker Review

This recipe is one of a series that features the GoSun Sport Solar Cooker.

The Challenge – 10 baby back ribs cooked in 2 hours with outdoor temperatures of 45F on a sunny day.


Print Recipe
CourseMain Course
CuisineAmerican
Keywordbaby back ribs, solar cooking
Prep Time30 minutes
Cook Time2 hours 9 minutes
Servings2
Calories669kcal
Cost12

Ingredients

Instructions

Preparation

  • Select a medium or smaller rack of Baby Back Ribs.
  • Remove the membrane from the back of the ribs.
  • Now cut the ribs into two rib sections. Each session will be two ribs.
  • We will be using Weber KC BBQ Rub.
  • Cover both sides with the rub and then let the ribs sit in the refrigerator for 1 hour. This will allow the salt in the rub to permeated the meat.
  • Now insert the ribs into the GoSun Sport cooking tray.
  • It will be a tight fit but ou should get 10 ribs into the tray.
  • Now we add the liquid smoke. Liquid smoke is nothing more than smoke that has been reduced and liquified.
  • Just a few drops on each 2 rib section.
  • We will be cooking by temperature and not time se we now insert a micro food probe in the middle between the two ribs. Make sure you do not hit the bone.
  • Now slowly load the cooking tray ino the solar cooker. making sure that the seal is completely closed.

The Cook

  • This day the sun was out but the air temperature was 45F. The Sport solar cooker is not affected by the outside temperature.
  • The ribs reached the internal temperature of 200F in a little over an hours but we allowed the ribs to cook for 2 hours and 3 minutes.
  • We then removed the ribs from the cooking tray. They looked well cooked.
  • We then sliced the 2 rib sections so that we had 10 separate ribs.
  • The sauce we used was Stubs Sweet Heat and we applied a then coat of sauce on each rib.
  • We took a bite and the rib had the perfect tug. Not fall off the bone for that is overcooked but just a small tug and the meat comes clean from the bone.
  • I gave these ribs a huge thumbs up. Bob Appetit.

Video

Nutrition

Serving: 5ribs | Calories: 669kcal