Great Ideas and Plans for Thanksgiving

Turkey on the Grill

Thanksgiving is a time for family, friends, and of course, food! Here are some recommendations for making your Thanksgiving feast the best ever:

Main Course

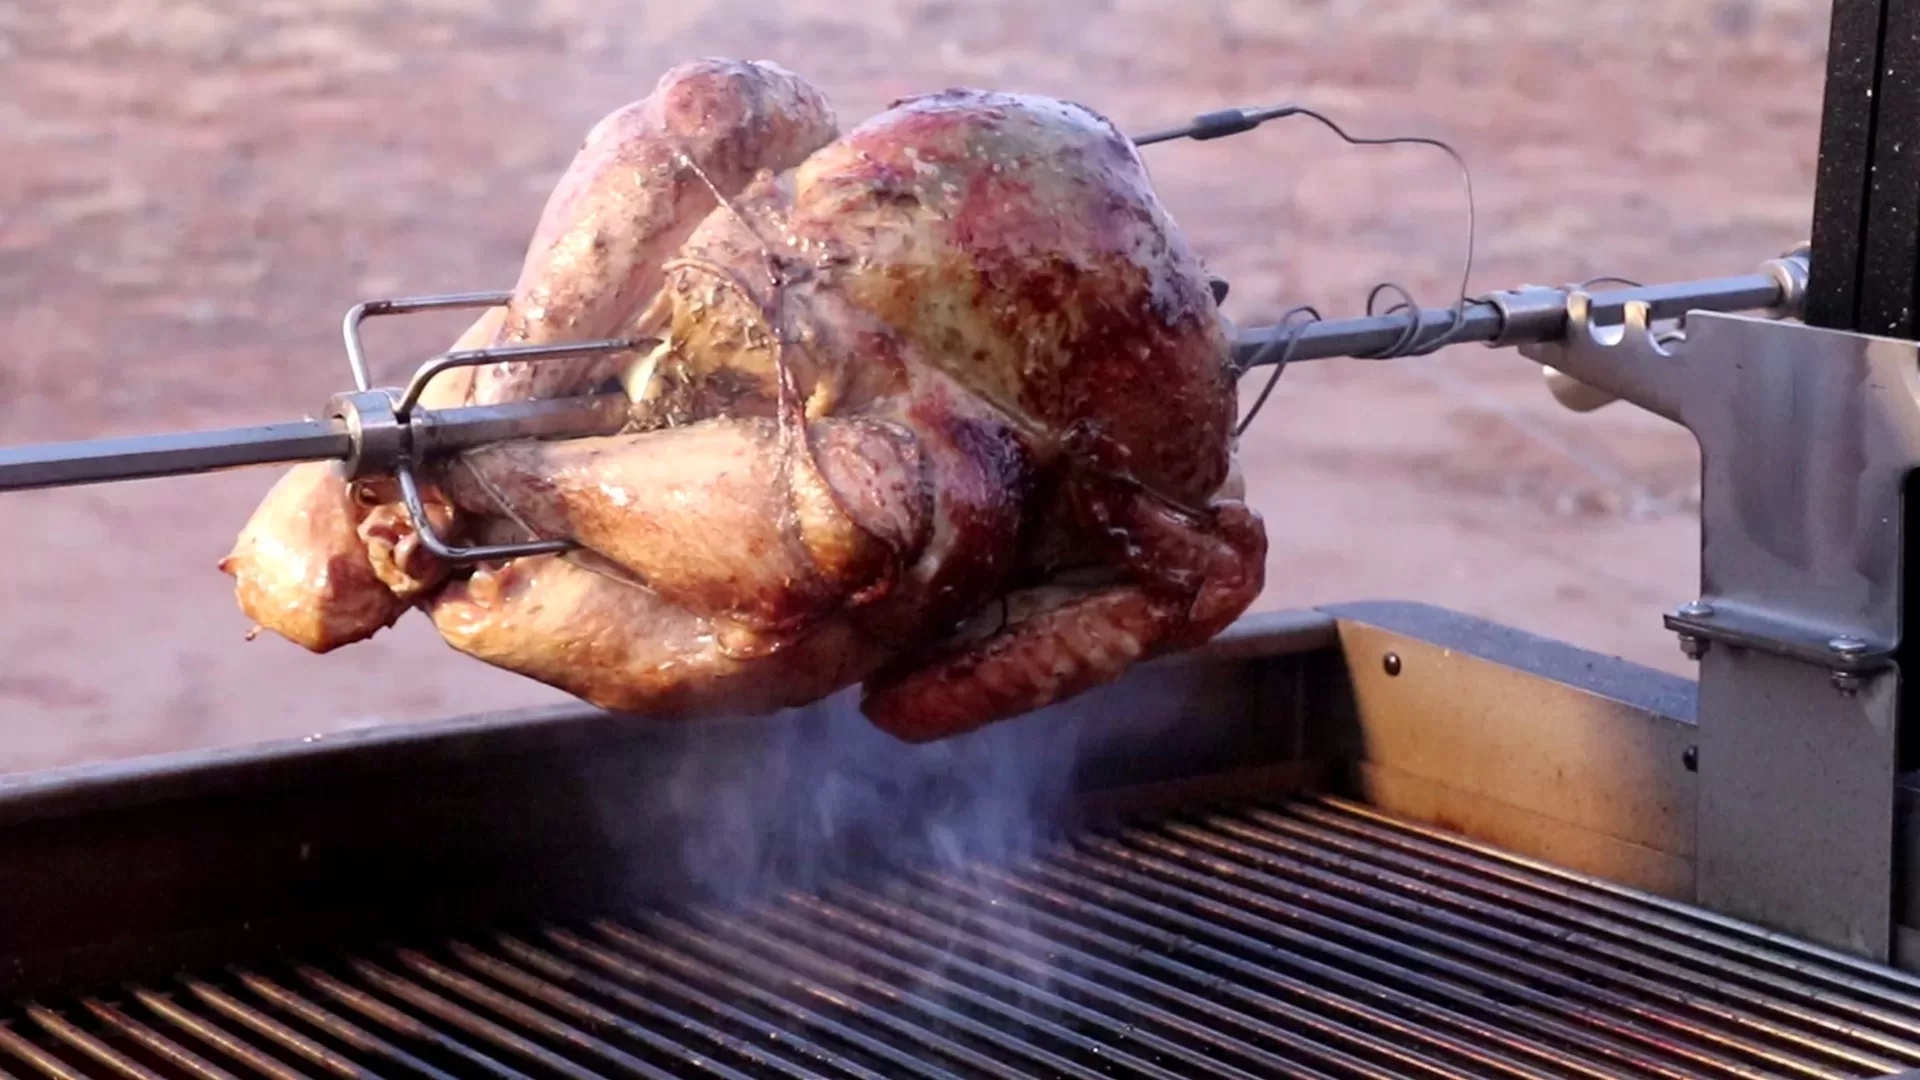
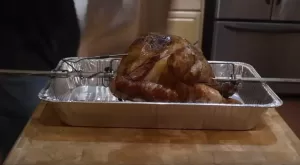
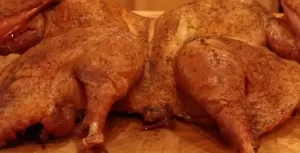
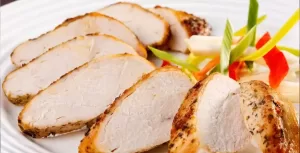
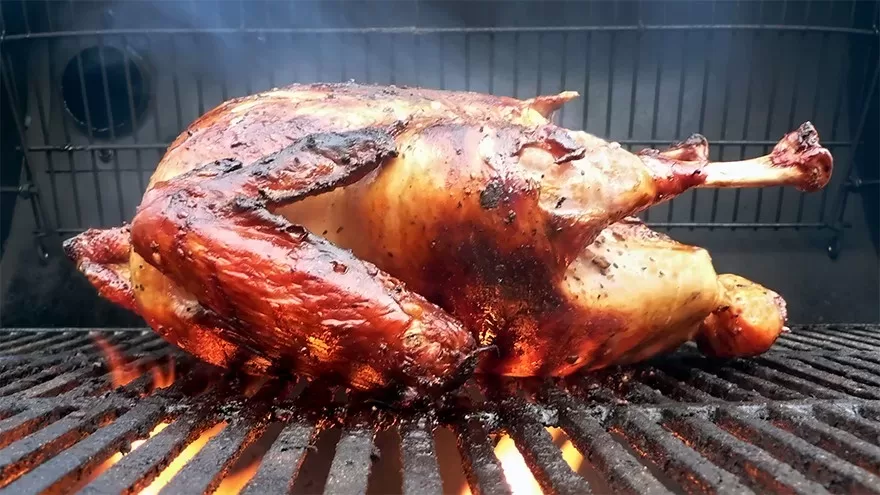
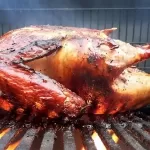
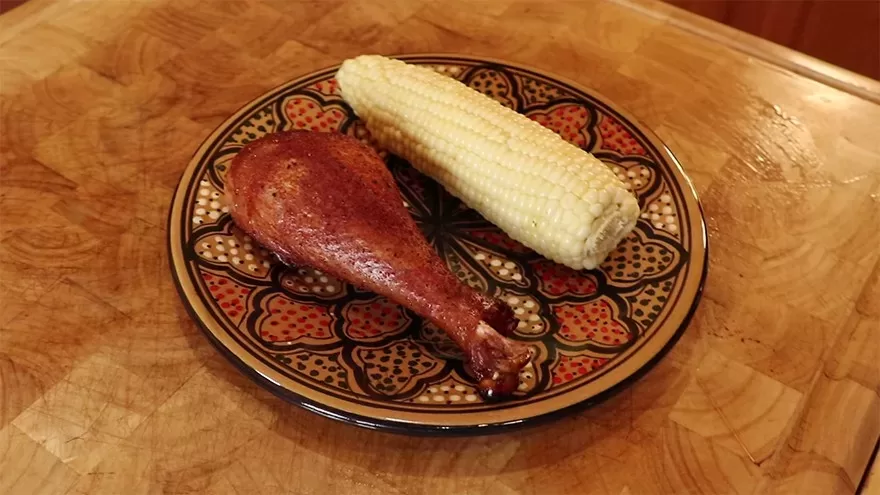
  • Roasted Turkey: The traditional centerpiece of any Thanksgiving table, a roasted turkey is always a crowd-pleaser. Be sure to brine your turkey in advance for the best flavor and moisture.
  • Ham: If you’re not a fan of turkey, ham is a delicious alternative. It’s easy to cook and can be glazed with a variety of flavors, such as honey, pineapple, or maple.
  • Prime Rib: A decadent option for the meat lovers in your family, prime rib is an exceptional treat. It’s best cooked slowly and low to ensure a tender and flavorful roast.

Sides

  • Mashed Potatoes: Creamy and comforting, mashed potatoes are a must-have side dish for Thanksgiving. For a richer flavor, use Yukon Gold potatoes and add a generous amount of butter, milk, and cream.
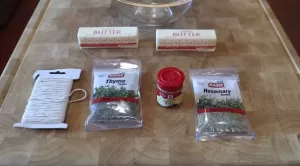
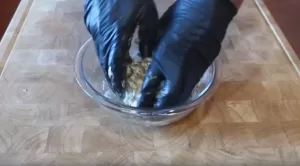
  • Stuffing: Whether you prefer it savory or sweet, stuffing is always a welcome addition to the Thanksgiving table. For a classic savory stuffing, use bread cubes, sausage, onions, and celery. For a sweet stuffing, use apples, cranberries, and walnuts.
  • Green Bean Casserole: A classic Thanksgiving side dish, green bean casserole is easy to make and always a hit. Be sure to top it with crispy fried onions for a delicious crunch.
  • Cranberry Sauce: Tart and tangy, cranberry sauce is the perfect complement to the rich flavors of the Thanksgiving table. For a homemade cranberry sauce, simply combine cranberries, sugar, and orange juice in a saucepan and simmer until the cranberries are softened.
  • Sweet Potato Casserole: A decadent and flavorful side dish, sweet potato casserole is a must-have for any Thanksgiving feast. For a classic sweet potato casserole, combine mashed sweet potatoes, spices, and pecans in a baking dish and top with marshmallows before broiling until golden brown.

Dessert

  • Pumpkin Pie: The quintessential Thanksgiving dessert, pumpkin pie is a classic for a reason. For a truly delicious pumpkin pie, use homemade pumpkin puree and a rich custard filling.
  • Apple Pie: Another popular Thanksgiving dessert, apple pie is always a crowd-pleaser. For a classic apple pie, use Granny Smith apples and a flaky crust.
  • Pecan Pie: A Southern favorite, pecan pie is a decadent and delicious dessert. For a classic pecan pie, combine pecans, brown sugar, and corn syrup in a pie crust and bake until the filling is set.

Tips for a Successful Thanksgiving

  • Plan ahead: Start planning your Thanksgiving menu early so you can have all the ingredients on hand. Make a list of what you need to buy and make a timeline for when you will prepare each dish.
  • Delegate tasks: Don’t try to do it all yourself! Ask your family and friends to help you with tasks such as setting the table, cooking sides, and cleaning up.
  • Use a meat thermometer: The best way to ensure that your turkey is properly cooked is to use a meat thermometer. The internal temperature should reach 165 degrees Fahrenheit.
  • Don’t overcook your dishes: Overcooked dishes can be dry and tasteless. Be sure to follow the cooking times carefully and check your dishes for doneness often.
  • Make sure everything is hot: Serve your Thanksgiving dinner hot so that your guests can enjoy it at its best. Preheat your oven and platters before serving, and keep your food warm in a chafing dish or slow cooker.
  • Most importantly, relax and enjoy the time with your loved ones! Thanksgiving is a time to celebrate and be thankful for the blessings in your life. So don’t stress about making everything perfect, just focus on enjoying the company of your family and friends.

The Ultimate Barbecue Cutting Board

Ultimate Barbecue Cutting Board

The three issues

After many years of barbecuing and teaching others to barbecue (my site is https://LearntoBBQ.com), I ran into the three issues with cutting boards. The first is size. If you are barbecuing a couple of full rack of ribs, brisket, or turkey you need at least 16 inches and that is in both width and height. The smaller board just means you have to move your meat to plates so you can have room to carve. The second issue is it needs to fit on a standard kitchen counter (24 inches). If it is bigger than 22 inches then you will have a hard time finding a place to put it in your kitchen. The third issue is meat juice. If it cannot handle a lot of meat juice you are only going to spill the juice all over your deck or patio and if in the kitchen your kitchen counters and floors.

So after much research and design time, I came up with, I believe, the Ultimate Barbecue Cutting Board.

The first is size

It is 17 inches by 17 inches. Large enough to hold a 15-pound brisket, 20-pound turkey, or 4 racks of ribs. The cutting part of the board is 1.25 inches thick and is made from A Grade Hard Maple wood. The board is also up off the counter using rubber feet that keep the board in place when cutting a large piece of meat.

The second is to fit on a kitchen counter

The board can fit on all kitchen counters, even if they have other stuff on the counter. at 17 inches you still have 7 inches for other stuff like can openers, utensil holders, and more. The board also weighs 8 pounds so you do not need to be a bodybuilder to haul your food around.

Last it has a pan reservoir that can hold two cups or a full pint of juice

Also, the pans are disposable for they are the standard weber grease pans you can buy on Amazon https://amzn.to/2DM9EEx for less than a dollar a pan. The pans come in real handy if you want to make gravy using the meat juices. You also can switch pans if you want to cut up a brisket and then carve a turkey by keeping the juices separate. The juice hole can also be used as a handle making it easy to carry the empty cutting board.

cutting board handle

Each cutting board is handmade by me. The wood alone costs me a little over $50 for this is Grade A Hard Maple. The best wood you can buy for a cutting board. Each piece of wood is handpicked for the cutting surface. It takes me a full day to cut, assemble, sand, and oil just one board. I will also engrave on the bottom of the board “Made for “your name” on “the date it was made”. No two cutting boards are the same and my objective is to make you a cutting board that will stay in your family for generations. Makes a fantastic house warming gift or a gift to that barbecue fanatic that wants to take his or her barbecue to the next level.

made in the USA

To learn more please go to our Wiley Santa Fe Store.

Rotisserie Turkey on the Wyldside using the ThermoWork BlueDOT

Rotisserie Turkey on the Recteq Wyldside using the ThermoWork BlueDOT

This recipe shows how to cook a 12-pound turkey on a rotisserie using herb butter and using a ThermoWorks BlueDot thermometer to monitor the turkey internal temperature.
Print Recipe
CourseMain Course
CuisineAmerican
Keywordbarbecue turkey, herb butter, rotisserie, rotisserie turkey, wyldside grill
Prep Time30 minutes
Cook Time1 hour 50 minutes
Servings8
Calories170kcal
Cost25

Ingredients

Cooking Tools

  • 15.4 Pound Lump Charcoal
  • 1 Bag Hickory Chunks

Cooking Ingredients

Instructions

  • Here what it looks like when I first put the turkey on.
    The rotisserie handled this 12-pound turkey like it weighed nothing.
  • The ThermoWorks BlueDOT also ran flawlessly and its round design and two powerful magnets in the back made attaching it rather easy.
  • To attach the BlueDOT all I needed was a round disk used to mount phones magnetically to your dash.
    To attach the BlueDOT you need to route the BlueDOT temperature probe wire through the rotisserie bushing. This bushing allows the spit to turn freely on the grill.
  • Wipe the spit handle clean and remove the paper so the adhesive is exposed
  • Now center the disk at the end of the handle.
    I felt it was easier to put the disk on the table and then center the handle.
  • With disk attached to handle take the blue dot and test how secure it is.
    I was amazed at how strong the magnet was and how secure the BlueDOT became on the handle.
  • Now before you attach the handle just make sure the probe cable can be attached to the BlueDOT and also that the temperature probe can be inserted into the turkey.

    Now screw the handle back on to the spit.
  • Because your cable is going to be a lot longer than you need I wrapped the excess cable around the handle before inserting the cable into the BlueDOT.
  • Now it is time to prep the turkey.
    I borrow this recipe from Gordon Ramsey and it is great at keeping a turkey moist.
    The secret is making an herb butter.
    Your start with 2 sticks of unsalted butter.
    1 Tablespoon of Sage
    1 Tablespoon of Rosemary
    1 Tablespoon of Thyme
  • Now clean your hands and put on a pair of food preparation gloves and go for it.
    You need to make sure every inch of butter is mixed with the spices.
    Now put the herb butter in the refrigerator and let all those spices become one with the butter.
  • Now on to the turkey.
    Got this 12 pound turkey at Sprouts Farmer Market. It is fully natural and has not been injected with salt.
    If you see the words enhanced when you by a turkey it means they injected salt into the turkey. The only thing that is enhanced is the companies bank account.
    For the salt makes the turkey weigh more when it is bought.
    Also, you should never brine an enhance turkey and also an enhanced turkey does mean it is brined. It is not.
    As you see I am removing all the accessories. You do not need any plastic holding legs or a popup temperature gauge that guarantees an overcooked turkey.
    Do keep the neck and all the gizzards for they make a great gravy.
  • Now its time to tie up this bird. You do not want the legs and wings dangling on the rotisserie.
    I separate the job into two twines. One twine to hold the wings in tight and then a second twine to secure the leg s and also hold the skin tight.
    Take twine and loop behind the wings then go around the turkey and secure the wings.
    Make sure you cut the loose ends of the twine so they do not get close to the fire..
  • With the wings tied get a second twine and loop it around the breast bone and follow behind each leg.
    This will push up the breast and also pull the legs up so the skin will tighten and will cook evenly.
    Put the legs together with one on top of the other and wrap legs with twine.
    Flip the bird over and then circles twine over the pope nose and pull twine tight and tie.
  • Now make final adjustments and get ready to apply herb butter.
    Before the butter can be applied you need to separate the skin from the breast.
    With your finger push slowly but firmly between the breast meat and the skin.
    Do this from both sides of the cavity.
  • Now go get he herb butter and put it into the microwave for around 20 seconds and soften it up.
    Now apply butter on every inch of the breast under the skin.
    As you put more butter in with one hand use the other hand to even out the butter.
    This butter is going to give you a very moist turkey with a perfectly golden turkey skin and the herbs will add those subtle flavors we all crave when we have thanksgiving turkey.
  • When you are done covering the breasts then cover every inch of skin on the outside and also in the cavity.
    More butter means better self-basting as the bird turns on the rotisserie.
    Now you know where the name Butterball came from.
  • Make sure you get into all the crevasses and also underneath the twine.
    Now it is time to put the turkey on the spit rod.
    With the turkey laying with the breasts facing up put spit rod through the top cavity and then the lower cavity making sure the rod is above the legs.
    Insert spit rod fork into the upper part of the breasts
    Now put the other spit rod fork and make sure both legs are secured by the fork.
    Now using plyers make sure both forks are secured.
  • Now it is time to get this turkey on the grill and as you can see the rotisserie is turning freely without any hesitation and the bird is not flopping around.
    The BlueDOT temperature probe is also inserted into the thickest part of the breast.
    Here is the BlueDOT only minutes after I put the turkey on.
  • Turkey's temperature is 57 degrees and the alarm is set for 165 degrees. As you can see very easy to read the display.
    For cooking fuel, I am using Royal Oak lump charcoal and Kingsford hickory smoking chunks.
  • Here is the turkey a little over halfway through the cook and you see how evenly the bird is cooking.
  • The Wyldside pit area maintains an even and consistent heat due to the heavy large metal plate at the bottom of the pit.
    In addition, it has a variable speed blower that acts like bellows giving the fire additional oxygen.
    Now here is the ThermoWorks app showing not only the turkey temperature but shows the complete graph of the cook.
  • When turkey hit 160F I then pulled turkey and covered in foil to rest. Over the next 30 minutes, the turkey temperature raised to 165F and the turkey was ready to be served.
  • Cook time before the rest was 1 hour and 53 minutes. The total time from start to finish was 2 hours and 23 minutes. The turkey came out very moist and was full of flavor from the herb butter.

Video

Nutrition

Serving: 3oz | Calories: 170kcal | Protein: 18g | Fat: 4.4g | Saturated Fat: 1.2g | Polyunsaturated Fat: 1.2g | Monounsaturated Fat: 1.5g | Sodium: 96mg

Spatchcock Turkey on a Pellet Grill using a Almazan Knife

Spatchcock Turkey on a Pellet Grill using a Almazan Knife

The Challenge – Spatchcock Turkey on the GMG pellet grill. Total cook time less than 3 hours and 15 minutes.
Print Recipe
CourseMain Course
CuisineAmerican
Keywordbarbecue turkey, butterfly, flatten, spatchcock, turkey, whole turkey
Prep Time30 minutes
Cook Time3 hours 7 minutes
Total Time3 hours 37 minutes
Servings8
Calories756kcal
Cost25

Ingredients

Cooking Ingredients

Instructions

  • Unwrap turkey and remove the neck and the giblets and place in stock pot.
  • Cutoff extra skin using poultry shears.
  • Flip turkey over so the backbone is facing up.
  • Using your poultry shears cut down both sides of the back bone until you can completely remove it. Then cut of the Pope Nose and put the backbone and Pope Nose into the stock pot.
  • Break rib cage using a heavy and sharp knife like this Almazan Knife. Make sure you do not cut all the way through the turkey but enough so the turkey can lay flat.
  • Now cut off wing tips. This is the part of the bird that always burns so best to remove and add to stock pot.
  • Flip turkey over and put on roasting rack and pan so the skin is facing upward and then season with SPG (Salt, Pepper and Garlic).
  • Now spay all the skin with olive oil. Always do this last so the no oil gets between the skin and the salt.
  • Now insert meat probes into each breast. Best to cook by temperature and not time.
  • Now put turkey on rack and pan into the barbecue grill set for 350F.
  • Cook turkey till internal temperature in the middle of the breast reaches 165F. Then remove turkey from grill. The cooking time on this turkey was 3 hours and 7 minutes.
  • While still on rack and pan rest the turkey for 30 minutes.
  • Now slice turkey and serve.

Video

Nutrition

Serving: 16ounces | Calories: 756kcal | Carbohydrates: 10.8g | Protein: 91.8g | Fat: 37.8g | Saturated Fat: 10.8g

How to Smoke a Turkey on a Pellet Smoker – Keto – LCHF

To brine or not to brine. Then if you decide to brine, is it a wet brine or a dry brine? Having cooked Turkey all three ways I now do a dry brine. Here is a great article, “The Quick and Dirty Guide to Brining Chicken or Turkey” that will explain the whole subject. https://www.seriouseats.com/2014/11/quick-and-dirty-guide-to-brining-turkey-chicken-thanksgiving.html

I have done Turkey on my pellet smoker for the last four years. It always turns out perfect. Only a couple of things to remember when buying a Turkey. Buy fresh if you can but more importantly, try to buy one that has not had salt added to it.

When looking at the label at the bottom, you might see ” Contains up to 4% of a solution of Water, Salt, and Spices to enhance tenderness and juiciness”. If you see this on the label move on. Just know it is difficult to find a Turkey that has not been enhanced. I had to order mine from Whole Foods for they were the only one with a fresh, unsalted bird.

How to Smoke a Turkey on a Pellet Smoker

A easy to do recipe that gets into brining and the correct way to do it.
Print Recipe
CourseMain Course
CuisineAmerican
Keywordbarbecue turkey, turkey, whole turkey
Prep Time30 minutes
Cook Time3 hours 30 minutes
Total Time4 hours
Servings18
Calories680kcal

Instructions

Dry Brine Turkey

  • Combine 6 tablespoons Morton’s kosher salt with two tablespoons of baking powder in a bowl. Carefully pat your turkey dry with paper towels.
  • Generously sprinkle it on all surfaces with the salt mixture by picking up the mixture between your thumb and fingers, holding it six to ten inches above the bird and letting the mixture shower down over the surface of the turkey for even coverage. The turkey should be well-coated with salt, though not completely encrusted. Leave in refrigerator for 24 hours.

The Cook

  • Prepare the smoker loading it up with either Apple or Cherry wood pellets but use whatever you think will work for you.
  • Make sure you have a water pan full of water the whole time you are smoking the Turkey. Prepare an 8 to 18 lb. thawed or fresh turkey by removing the giblets and neck, draining the juices, and drying with paper towels. The turkey should be completely thawed for even, safe cooking. Do not stuff your turkey. Brush the skin with olive oil and insert an oven-safe meat thermometer deep into the lower thigh.
  • Preheat the smoker to 275F degrees. Place the turkey breast side up on the grill. Place an oven thermometer alongside the turkey to monitor its temperature. I use a remote thermometer so you can monitor the temperature and also set an alarm when it hits 165 degrees (done). Try to plan for about 15-18 minutes per pound when you smoke at around 275F-300F degrees. If you like the skin to be crispy raise temperature to 300F.
  • Check the temperature of your turkey after 3½ hours. Your turkey must pass through a critical range of 40F to 140F in 4 hours or less. If the internal temperature is low after 3½ hours, take your turkey off the smoker and finish it in the oven. When done, remove the turkey from the smoker, protecting your hands with BBQ Gloves, and let stand for 15 minutes before carving.
  • If you want to speed things up and actually have a better-cooked turkey watch the video below on how to Spatchcock a turkey. Also here is the Blog recipe – https://learntobbq.com/spatchcock-turkey-on-a-pellet-grill-using-a-almazan-knife/

Video

Nutrition

Serving: 1g | Calories: 680kcal | Protein: 84g | Fat: 36g | Saturated Fat: 12g | Cholesterol: 260mg | Sodium: 800mg | Potassium: 1072mg | Iron: 7.2mg

Secret Recipe for Disney Turkey Legs

Turkey Leg with Corn

Secret Recipe for Disney Turkey Legs. If you go to Disneyland, Disney World, or Frontierland, you will find a long line where they sell turkey legs. Some people go to the Magic Kingdom for the turkey legs. This is a simple recipe, but it does take 24 hours to cure the turkey drumsticks properly before cooking.

Turkey Leg with Corn

Secret Recipe for Disney Turkey Legs – Keto – LCHF

Secret Recipe for Disney Turkey Legs. If you go to Disneyland or Disney World and go to Frontierland you will find a long line where they sell turkey legs. There are people who go to the Magic Kingdom for the turkey legs. This is a simple recipe but does take 24 hours to properly cure the turkey drumsticks before cooking.
Print Recipe
CourseMain Course
CuisineAmerican
Keyworddisney turkey leg
Prep Time1 hour
Cook Time1 hour
Total Time2 hours
Servings4
Calories1174kcal

Ingredients

Ingredients – This is for 4 Turkey legs. Please adjust based on the number of turkey legs you need to cook.

Instructions

Make Marinate

  • In a container add two cups of distilled water with kosher salt, Prague powder, and dark brown sugar. Stir till fully dissolved. Place two turkey legs into each 1 gallon Ziploc bag and then add one cup of marinating to each bag. Remove air from the bag by folding bad around turkey leg. Put both bags into a large just in case the bags leak and put into the refrigerator for 24 hours.

Prepare for Grill or Smoker

  • Remove turkey legs from bags and wash ALL of marinating off of turkey legs. This is very important due to getting all of the Prague powder off the skin. Using a paper towel pat dry the turkey legs. Spray the turkey legs with cooking oil so rub can stick to the skin. Apply rub so every inch is covered. I usually do this in a casserole dish so clean up is easy. Preheat grill or smoker to 325F.

The Cook

  • Place turkey legs on the grill away from direct heat. That means using an indirect heat source like a smoke or on the grill away from the flame. Cook till turkey leg hit 175F internal temperature. Should take around an hour but always cook to temperature and not by time.
  • When done they will be very juicy and will have the color and texture of a perfectly cooked ham. Now you know why Disney sells 1.6 million turkey legs each year.

Video

Nutrition

Calories: 1174kcal