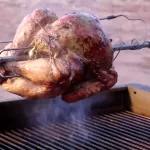
Rotisserie Turkey on the Wyldside using the ThermoWork BlueDOT

Rotisserie Turkey on the Recteq Wyldside using the ThermoWork BlueDOT

This recipe shows how to cook a 12-pound turkey on a rotisserie using herb butter and using a ThermoWorks BlueDot thermometer to monitor the turkey internal temperature.
Print Recipe
CourseMain Course
CuisineAmerican
Keywordbarbecue turkey, herb butter, rotisserie, rotisserie turkey, wyldside grill
Prep Time30 minutes
Cook Time1 hour 50 minutes
Servings8
Calories170kcal
Cost25

Ingredients

Cooking Tools

  • 15.4 Pound Lump Charcoal
  • 1 Bag Hickory Chunks

Cooking Ingredients

Instructions

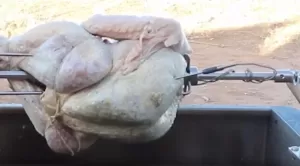
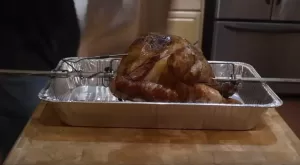
  • Here what it looks like when I first put the turkey on.
    The rotisserie handled this 12-pound turkey like it weighed nothing.
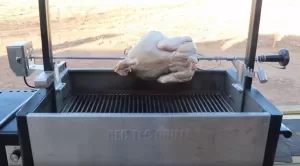
  • The ThermoWorks BlueDOT also ran flawlessly and its round design and two powerful magnets in the back made attaching it rather easy.
  • To attach the BlueDOT all I needed was a round disk used to mount phones magnetically to your dash.
    To attach the BlueDOT you need to route the BlueDOT temperature probe wire through the rotisserie bushing. This bushing allows the spit to turn freely on the grill.
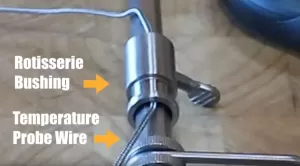
  • Wipe the spit handle clean and remove the paper so the adhesive is exposed
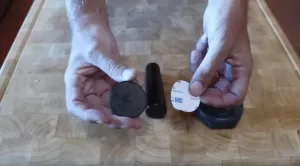
  • Now center the disk at the end of the handle.
    I felt it was easier to put the disk on the table and then center the handle.
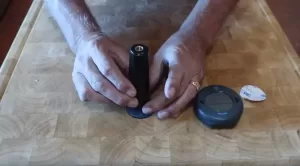
  • With disk attached to handle take the blue dot and test how secure it is.
    I was amazed at how strong the magnet was and how secure the BlueDOT became on the handle.
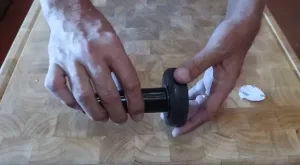
  • Now before you attach the handle just make sure the probe cable can be attached to the BlueDOT and also that the temperature probe can be inserted into the turkey.

    Now screw the handle back on to the spit.
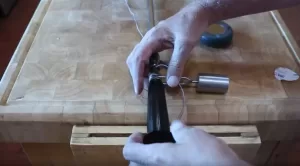
  • Because your cable is going to be a lot longer than you need I wrapped the excess cable around the handle before inserting the cable into the BlueDOT.
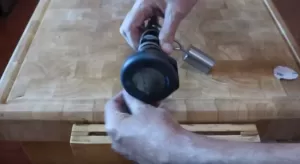
  • Now it is time to prep the turkey.
    I borrow this recipe from Gordon Ramsey and it is great at keeping a turkey moist.
    The secret is making an herb butter.
    Your start with 2 sticks of unsalted butter.
    1 Tablespoon of Sage
    1 Tablespoon of Rosemary
    1 Tablespoon of Thyme
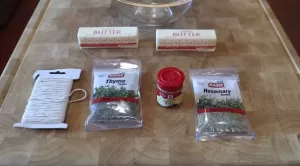
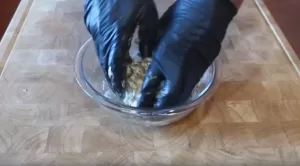
  • Now clean your hands and put on a pair of food preparation gloves and go for it.
    You need to make sure every inch of butter is mixed with the spices.
    Now put the herb butter in the refrigerator and let all those spices become one with the butter.
  • Now on to the turkey.
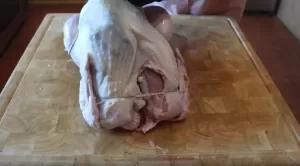
    Got this 12 pound turkey at Sprouts Farmer Market. It is fully natural and has not been injected with salt.
    If you see the words enhanced when you by a turkey it means they injected salt into the turkey. The only thing that is enhanced is the companies bank account.
    For the salt makes the turkey weigh more when it is bought.
    Also, you should never brine an enhance turkey and also an enhanced turkey does mean it is brined. It is not.
    As you see I am removing all the accessories. You do not need any plastic holding legs or a popup temperature gauge that guarantees an overcooked turkey.
    Do keep the neck and all the gizzards for they make a great gravy.
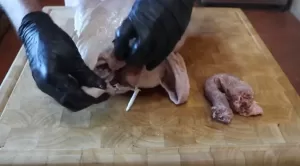
  • Now its time to tie up this bird. You do not want the legs and wings dangling on the rotisserie.
    I separate the job into two twines. One twine to hold the wings in tight and then a second twine to secure the leg s and also hold the skin tight.
    Take twine and loop behind the wings then go around the turkey and secure the wings.
    Make sure you cut the loose ends of the twine so they do not get close to the fire..
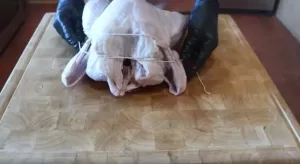
  • With the wings tied get a second twine and loop it around the breast bone and follow behind each leg.
    This will push up the breast and also pull the legs up so the skin will tighten and will cook evenly.
    Put the legs together with one on top of the other and wrap legs with twine.
    Flip the bird over and then circles twine over the pope nose and pull twine tight and tie.
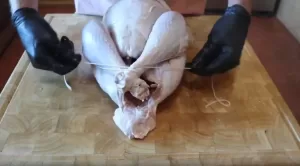
  • Now make final adjustments and get ready to apply herb butter.
    Before the butter can be applied you need to separate the skin from the breast.
    With your finger push slowly but firmly between the breast meat and the skin.
    Do this from both sides of the cavity.
  • Now go get he herb butter and put it into the microwave for around 20 seconds and soften it up.
    Now apply butter on every inch of the breast under the skin.
    As you put more butter in with one hand use the other hand to even out the butter.
    This butter is going to give you a very moist turkey with a perfectly golden turkey skin and the herbs will add those subtle flavors we all crave when we have thanksgiving turkey.
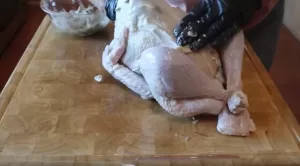
  • When you are done covering the breasts then cover every inch of skin on the outside and also in the cavity.
    More butter means better self-basting as the bird turns on the rotisserie.
    Now you know where the name Butterball came from.
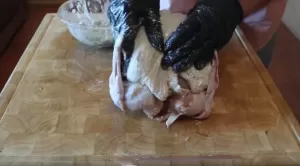
  • Make sure you get into all the crevasses and also underneath the twine.
    Now it is time to put the turkey on the spit rod.
    With the turkey laying with the breasts facing up put spit rod through the top cavity and then the lower cavity making sure the rod is above the legs.
    Insert spit rod fork into the upper part of the breasts
    Now put the other spit rod fork and make sure both legs are secured by the fork.
    Now using plyers make sure both forks are secured.
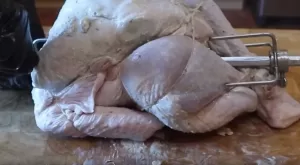
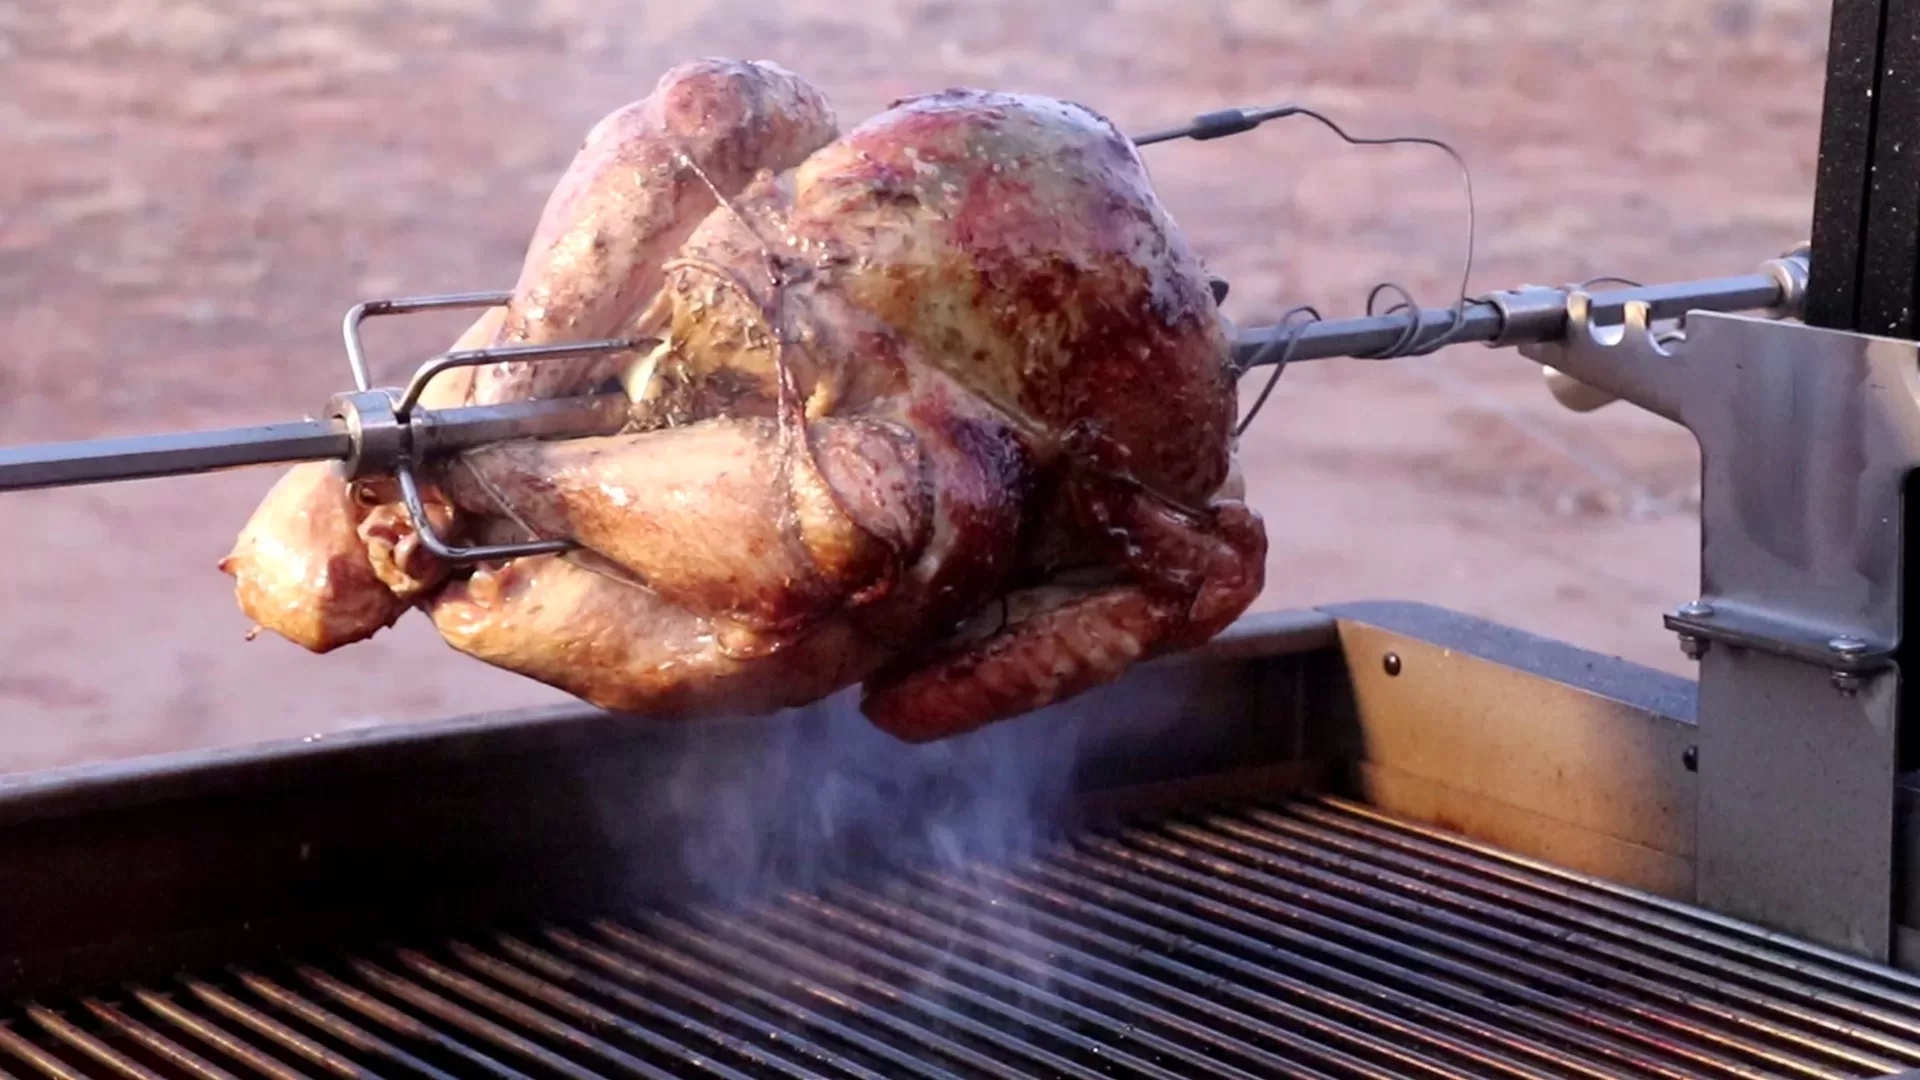
  • Now it is time to get this turkey on the grill and as you can see the rotisserie is turning freely without any hesitation and the bird is not flopping around.
    The BlueDOT temperature probe is also inserted into the thickest part of the breast.
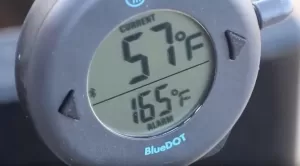
    Here is the BlueDOT only minutes after I put the turkey on.
  • Turkey's temperature is 57 degrees and the alarm is set for 165 degrees. As you can see very easy to read the display.
    For cooking fuel, I am using Royal Oak lump charcoal and Kingsford hickory smoking chunks.
  • Here is the turkey a little over halfway through the cook and you see how evenly the bird is cooking.
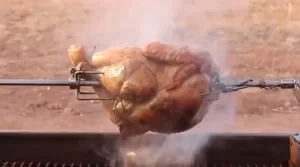
  • The Wyldside pit area maintains an even and consistent heat due to the heavy large metal plate at the bottom of the pit.
    In addition, it has a variable speed blower that acts like bellows giving the fire additional oxygen.
    Now here is the ThermoWorks app showing not only the turkey temperature but shows the complete graph of the cook.
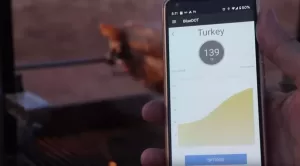
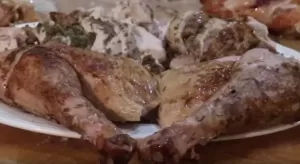
  • When turkey hit 160F I then pulled turkey and covered in foil to rest. Over the next 30 minutes, the turkey temperature raised to 165F and the turkey was ready to be served.
  • Cook time before the rest was 1 hour and 53 minutes. The total time from start to finish was 2 hours and 23 minutes. The turkey came out very moist and was full of flavor from the herb butter.
Video

Nutrition

Serving: 3oz | Calories: 170kcal | Protein: 18g | Fat: 4.4g | Saturated Fat: 1.2g | Polyunsaturated Fat: 1.2g | Monounsaturated Fat: 1.5g | Sodium: 96mg

ThermoWorks Billows on a Weber Kettle 22 – Jerk Chicken

This is a real easy jerk chicken recipe that only requires 4 ingredients and that includes the chicken.

ThermoWorks Billows on a Weber Kettle 22 – Jerk Chicken

This is a real easy jerk chicken recipe that only requires 4 ingredients and that includes the chicken.


Print Recipe
CourseMain Course
CuisineJamaican
Keywordbillows, jamaican chicken, jerk chicken, thermoworks, weber kettle
Prep Time1 day
Cook Time1 hour 30 minutes
Total Time1 day 1 hour 30 minutes
Servings4 people
Calories206kcal
Cost8

Ingredients

Ingredients

Instructions

Marinade

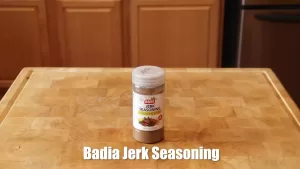
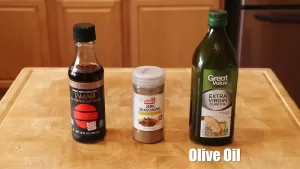
  • Badia Jerk Seasoning.
  • Tamari Sauce.
  • Extra Virgin Olive Oil.
  • Put 1/2 cup of Tamari Sauce into mixing bowl.
  • Add 2 tablespoons of Jerk Seasoning. If you like more heat you can and up to 2 more tablespoons.
  • Add 4 tablespoons of Extra Virgin Olive Oil. The oil allows some of the jerk seasoning to mix for they are oil-based and not water-based.
  • Now wisp it all together.
  • Now get 8 chicken thighs with both skin and bones.
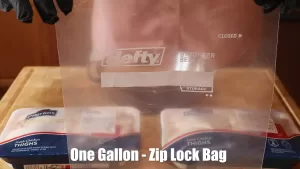
  • get a 1-gallon zip lock bag.
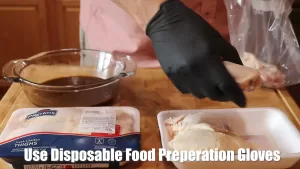
  • Using food preparation disposable gloves put the chicken into the zip lock bag.
  • Pour marinade into the zip lock bag.
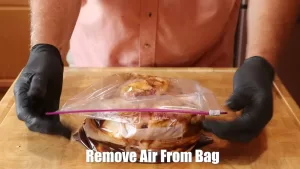
  • Remove as much air from the bag as possible.
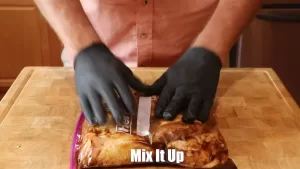
  • Now mix it all up.
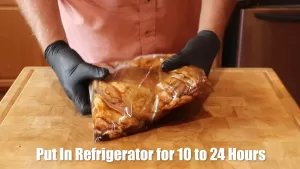
  • Put into refrigerator for 10 to 24 hours.

The Cook

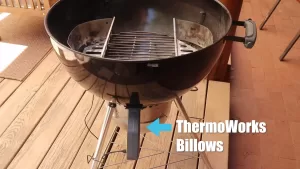
  • Here is were the ThermoWorks Billows is positioned on the Weber Kettle.
    ThermoWorks Billows
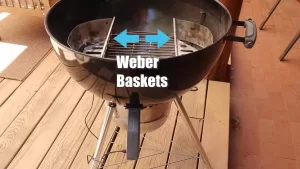
  • Here is where you place the Weber Baskets. They are on both sides of the Billows.
    Weber Baskets
  • Add even amount of briquets so each basket is full.
    Weber Baskets with Briquets
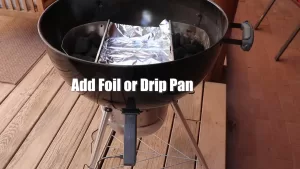
  • Add foil or drip pan.
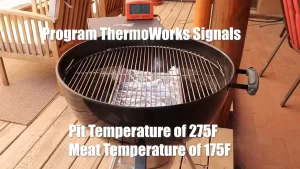
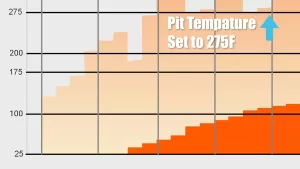
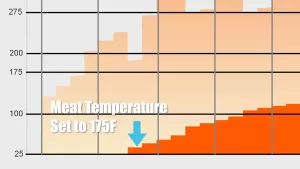
  • Program ThermoWorks Signals BBQ Thermometer to 275F for pit temperature (channel 4) and 175F for meat temperature (channel 1).
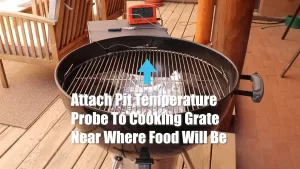
  • Attach pit temperature probe to cooking grate as close to the food as possible.
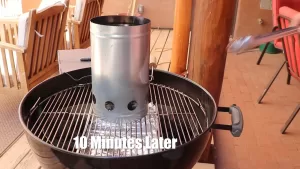
  • Put 6 briquets into a starter chimney and ignite.
  • 19 minutes later.
  • Put lit briquets into each Weber Basket. 3 in each.
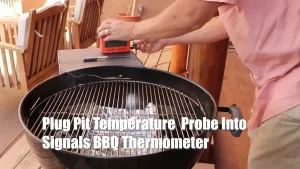
  • Plug pit temperature probe into channel 4 on the Signals BBQ Thermometer.
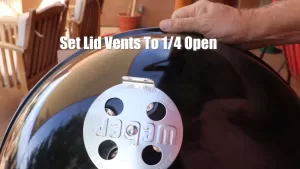
  • Open lid vents to 1/4 open.
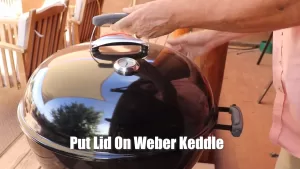
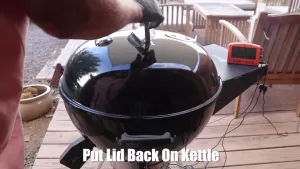
  • Put the lid back on the kettle grill.
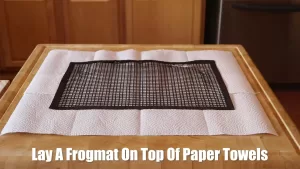
  • In the food prep area put down paper towels for easy cleanup.
  • Now put frogmat or grill mat on top of paper towels.
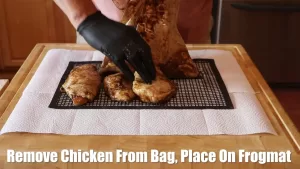
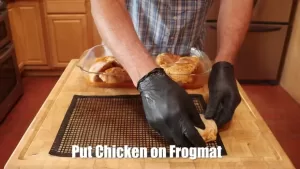
  • Remove chicken from zip-lock bag and place on frogmat.
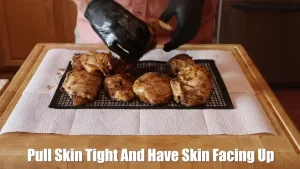
  • Pull skin tight and with the skin facing up.
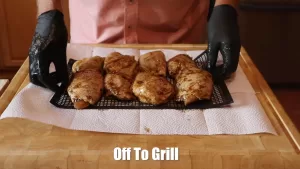
  • Off to grill.
  • Place frogmat between the two Weber Baskets. The chicken is now set up for indirect cooking.
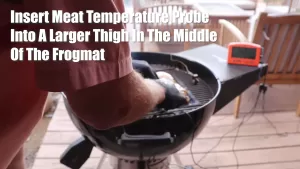
  • Insert meat thermometer probe into a larger thigh that is in the middle of the frogmat. Make sure probe is plugged into channel 1 on the Signals BBQ Thermometer.
  • Put the lid back on the kettle grill.
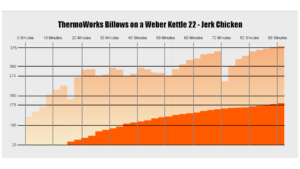
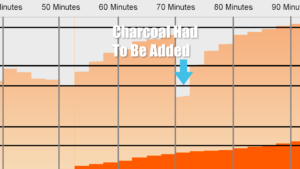
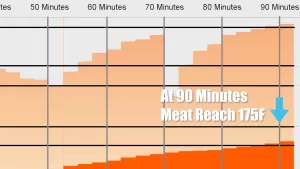
  • Here is the complete cooking chart from start to finish.
  • Here shows the pit temperature at 275F and that during this part of the cook the pit alternated between 275F and 290F.
  • Meat probe was set for 175F when the thighs would be finished.
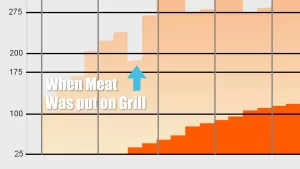
  • We put the meat on about 15 minutes after lighting the Weber Baskets.
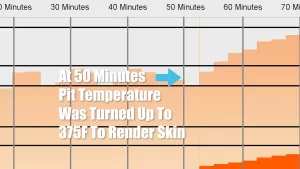
  • At 50 minutes the pit temperature was turned up to 375F so we could render the skin.
  • At 70 minutes we had to add briquets to both of the Weber Baskets.
  • At 90 minutes when the meat temperature reached 175F we pulled the chicken.
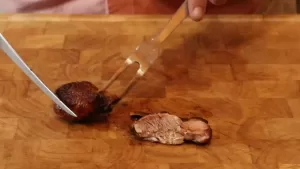
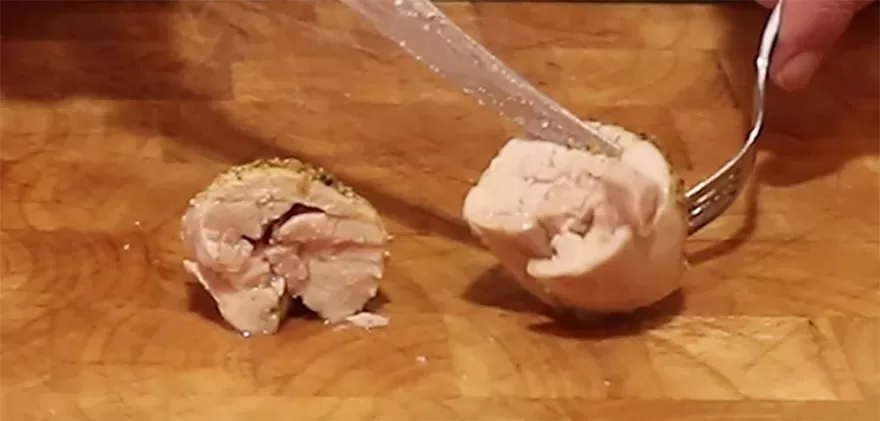
  • Here are the results. The chicken was cooked all the way through and the skin was rendered so it was easy to cut and eat. It also had enough heat from the jerk seasoning and also a nice smoky taste you can only get on a charcoal grill.

Video

Nutrition

Serving: 116g | Calories: 206kcal | Protein: 26g | Fat: 10g | Saturated Fat: 2.6g | Polyunsaturated Fat: 1.9g | Monounsaturated Fat: 3.9g | Cholesterol: 157mg | Sodium: 101mg | Potassium: 321mg | Calcium: 1mg | Iron: 71mg

ThermoWork Billow Insiders Facebook Group

Boneless Chicken Thighs – GoSun Sport Solar Cooker Review

Boneless Chicken Thighs – GoSun Sport Solar Cooker Review

This recipe is one of a series that features the GoSun Sport Solar Cooker. The Challenge – from a room temperature GoSun Sport to cooked boneless and skinless chicken thighs that reach an internal temperature of 185F in under 60 minutes.
Print Recipe
CourseMain Course
CuisineAmerican
Keywordchicken thighs, solar cooking
Prep Time10 minutes
Cook Time1 hour
Total Time1 hour 10 minutes
Servings2
Calories160kcal
AuthorWiley

Instructions

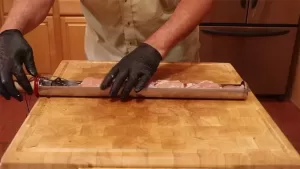
  • We first start off with 3.3 pounds of boneless and skinless chicken thighs. The GoSun Sport manual says that it can handle up to 3 pounds of food so this should be a good test.
  • The cooking tray is made out of stainless steel so it is best to spray the inside of the tray with a cooking oil.
  • When loading the chicken thighs it is best to start from the other end away from the handle. Now, this is important and differs from what you would do in a conventional oven. Pack the chicken in as tight as you can. Because you are cooking with radiant heat and not hot air there is no need have any air spaces. Also because I had to make room for the ambient temperature probe I could only put 2.5 pounds of chicken in the tray. Without that probe, it would have held a full 3pounds of chicken. Enough chicken for 3 to 4 people if served with a salad.
  • I learned a long time ago the best way to cook food is by temperature and not time. So we will be monitoring both the chicken temperature and also the ambient or air temperature inside the cooker. Our target temperature will be 175F for the chicken.
  • When placing the meat temperature probe make sure it is in the middle of the thickest part of the thigh. Also, make sure you are in the middle of the tray and stay away from the space by the handle.
  • Another very important part of using the GoSun Sport is do not preheat the cooker. The cooker gets real hot, real quick in the sun but the cooker can actually get too hot if it lacks food in the chamber. You have been warned.
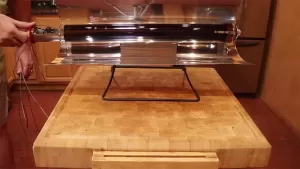
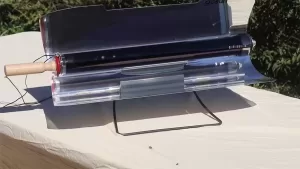
  • With food loaded it is time to put the cooker in the sun. Just point the cooker as direct as you can by looking at the cooker shadow. You do not need to be perfectly aligned and don’t worry it is going to get hot. REAL HOT.
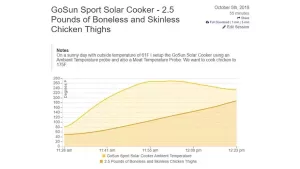
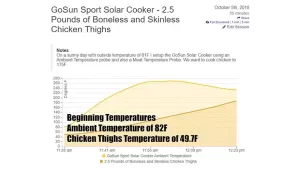
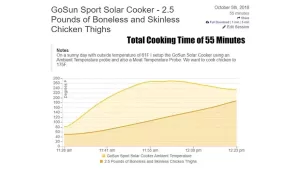
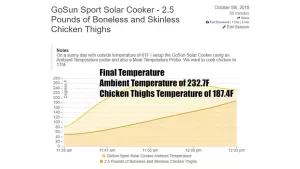
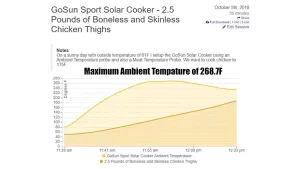
  • Here is the temperature chart of both the chicken temperature and the ambient temperature. A note is the ambient temperature was actually not correct. Because it was near the opening and as the food got above 212F or boiling it produces steam. A lot of steam. That steam is water evaporating and evaporating water has a cooling effect on the probe so the real temperature was much higher.
  • Ambient temperature or air temperature in the cooker started at 82F. The chicken that had come out of the refrigerator started at 49.7F
  • Now here is where I made a mistake but also found out the cooker is extremely forgiving. I lost track of time and cooked the chicken to 187F or 12 degrees hotter than my target. Now in a regular oven that could end up drying the chicken out or makes it mushy. The total cooking time to get to 187F was only 55 minutes. Remember this was without any preheating.
  • So when the cook was complete here is what the chart recorded. Ambient temperature was 232.7F but we know that was not correct due to cooling affect from the water evaporating. Final chicken temperature was 187.4F or 12.4F hotter than our target. Total cooking time 55 minutes.
  • What we found out is because the chicken is being cooked using radiant heat and not hot air the chicken never dries out. That is why the cooker is so forgiving.
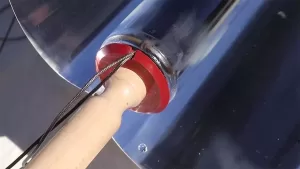
  • In this picture, you can actually see the steam. Also, please note the outside of the tube NEVER gets hot but where the steam comes out gets really hot so please use heat resistant gloves when removing the food.
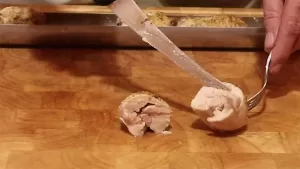
  • Here is what the chicken looks like when removed from the tray. It is very moist and extremely tender. I could and did easily cut it with the side of a fork. Check out the video below to see that section. It also tasted great for the seasoning, due to the steaming effect the seasoning, especially the salt permeates the meat.

Video

Nutrition

Calories: 160kcal

Lollipop Chicken on the GMG Daniel Boone Grill

lollipop chicken

Lollipop Chicken on the GMG Daniel Boone Grill

If you have not guessed by now this recipe is about making Lollipop chicken. I was having a small group of people over so I got two chicken packs for a total of 17 drumsticks.
Print Recipe
CourseMain Course
CuisineAmerican
Keywordchicken drumsticks, daniel boone, gmg, lollipop chicken
Prep Time45 minutes
Cook Time1 hour
Total Time1 hour 45 minutes
Servings17
Calories167kcal
AuthorWiley

Instructions

  • I was having a small group of people over so I got two chicken packs for a total of 17 drumsticks.
  • There is some work involved so I took both packs and combined them into one foil pan that will also be the cooking container.
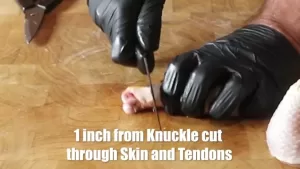
  • Safety first I always wear disposable kitchen gloves when I handle raw chicken. The first step is to make a complete cut around the leg about one inch from the knuckle.
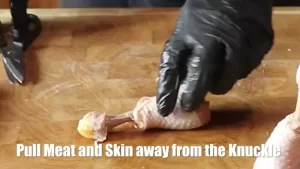
  • There are some tendons so make sure you cut all the way through. Now pull the meat and the skin together and away from the knuckle. Using kitchen scissors trim the tenons away from the meat.
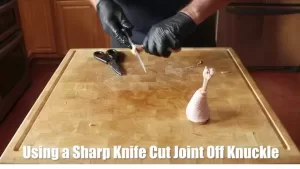
  • Now the last part of making this chicken look like a lollipop id remove the joint from the knuckle. With a small and sharp knife get under the joint and cut it away from the knuckle. This usually takes two to three cuts before you can remove the complete joint. As you see this takes some time and you need to be careful.
  • Next thing is to add the Gold Star Chicken rub. This is now my goto rub for most chicken recipes. Make sure you cover every inch of the meat and skin.
  • Get a measuring cup that can handle being in the microwave. Get one stick of unsalted butter and put into the cup. Now off to the microwave using the melt butter mode or on low power. You do not want to overcook the butter.
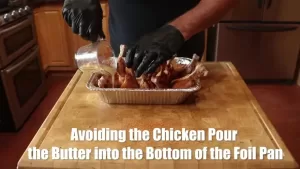
  • Pour melted butter into the bottom of the pan. Be very care for you want to add the butter to the bottom of the pan without getting butter on the skin of the chicken.
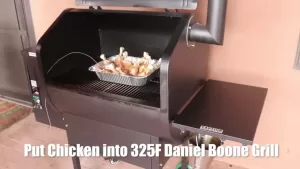
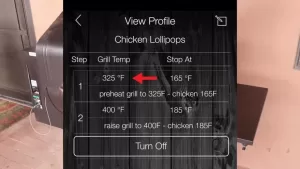
  • Put chicken into a 325F preheat grill like the Daniel Boone. And if you do have a Daniel Bone grill with Wifi you can program the grill to do the complete cook from this point on.
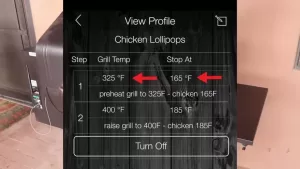
  • What you see is a profile that I set up for this cook. There are two steps to the profile and both are based on reaching a temperature. Step one is running the grill at 325F.
  • Stay at this grill temperature till the meat probe hits 165F.
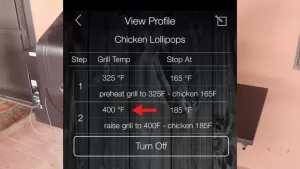
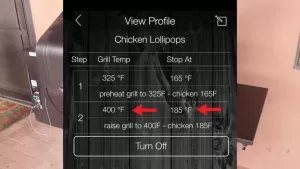
  • At that point, we go to step two which will increase the grill temperature to 400F.
  • Will maintain that grill temperature till the meat probe reaches 185F. At that point, the grill will shut itself off.
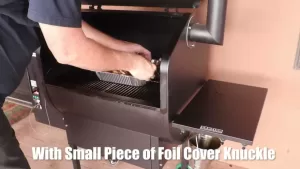
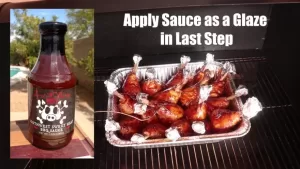
  • What we are looking Is the beginning of step two where put foil on the knuckles and add a glaze to the chicken.
  • The glaze is Southwest Sweet Heat BBQ Sauce. This sauce is a very balanced sweet sauce but with a kick of heat at the end.
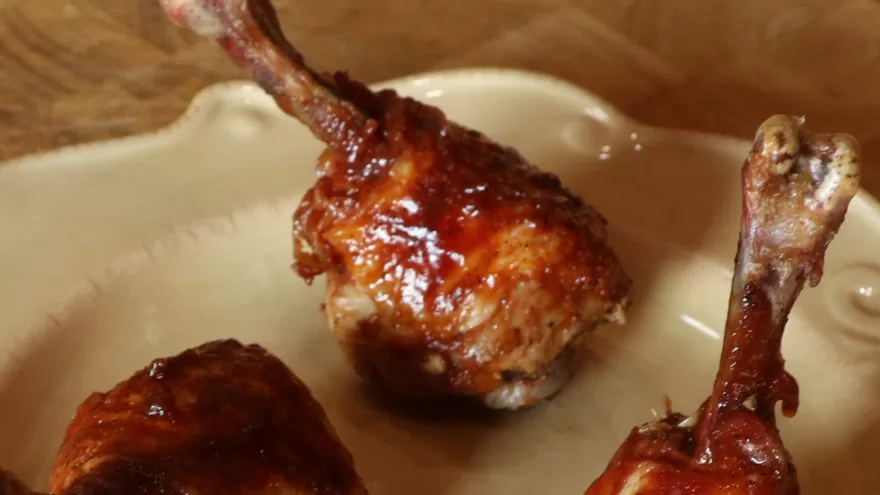
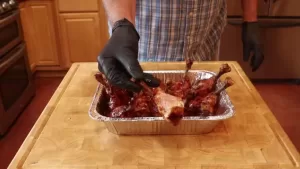
  • I let the lollipops rest for about 5 minutes. The lollipops had a great color and were well cooked. The skin was completely rendered and you could easily bite through. But the best part was the taste. Between the rub and the glaze, these lollipops were flavor bombs.

Video

Nutrition

Calories: 167kcal

Beer Marinated Chicken Thighs on the Recteq Trailblazer

Simple Chicken Thighs

This recipe we are cooking beer marinated chicken thighs on the Recteq Trailblazer. Making the marinade is very straight forward but there are a few steps.

Simple Chicken Thighs

Beer Marinated Chicken Thighs on the Recteq Trailblazer

This recipe we are cooking beer marinated chicken thighs on the Recteq Trailblazer. Making the marinade is very straight forward but there are a few steps.
Print Recipe
CourseMain Course
CuisineAmerican
Keywordbeer marinade, beer marinated, chicken thighs, rec tec trailblazer
Prep Time30 minutes
Cook Time45 minutes
Total Time1 hour 15 minutes
Servings5
Calories260kcal
AuthorWiley

Ingredients

Ingredients

Instructions

Marinade

  • One Tablespoon of Sea or Kosher Salt.
    Salt
  • One Tablespoon of Course Black Pepper.
    black pepper
  • One Tablespoon of Granulated Garlic.
    granulated garlic
  • One Tablespoon of Onion Powder.
    onion powder
  • One Tablespoon of Red Chili Powder.
    red chili powder
  • One Tablespoon of Cumin.
    cumin
  • One Tablespoon of Smoked Paprika.
    smoked paprika
  • 1/2 Cup of Olive Oil.
    olive oil
  • 1 & 1/2 Cups (12 oz.) of a Good Kraft Beer.
    beer
  • Mix all ingredients well.
    mix well
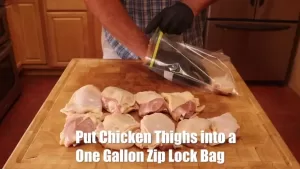
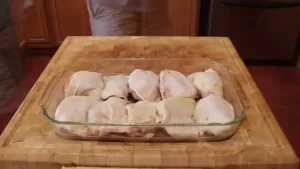
  • Place 10 Chicken Thighs in a One Gallon Zip Lock Bag.
    chicken in bag
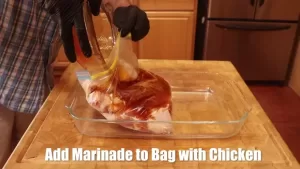
  • Pour Marinade into the Bag with Chicken. Try and get most of the air out of the bag.
    add marinade
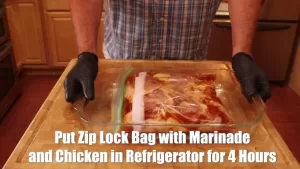
  • Place Bag with Marinade into the refrigerator for at least 4 hours.
    put into refrigerator
  • Remove chicken from bag and place on frogmat. Make sure that chicken skin covers the top side of the chicken thigh.
    chicken on frog mat
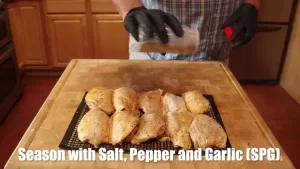
  • Season chicken thighs using SPG, (Salt, Pepper, and Garlic)
    add spg

Cook

  • Place Chicken on Frogmat into Pre-heated Grill set at 425F. Put meat probe into thickest thigh in the middle of the Frogmat.
    place chicken on grill
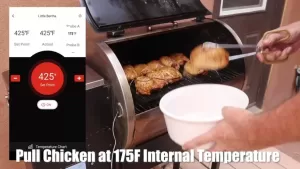
  • Pull Chicken when internal temperature hit 175F.
    pull chicken
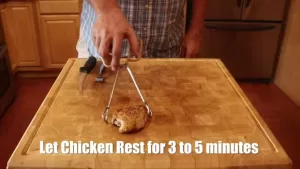
  • Rest Chicken for 3 to 5 Minutes. Then Serve.
    rest chicken

Video

Nutrition

Calories: 260kcal

Adobo Chicken Thighs with Garlic Jalapeno Seasoning on the GMG Daniel Boone Grill

chicken thighs
chicken thighs

Adobo Chicken Thighs with Garlic Jalapeno Seasoning on the GMG Daniel Boone Grill

I will be cooking adobo chicken thighs with garlic and jalapeno seasoning.
Print Recipe
CourseMain Course
CuisineAmerican
Keywordchicken thighs, daniel boone, garlic jalapeno, gmg
Prep Time20 minutes
Cook Time45 minutes
Total Time1 hour 5 minutes
Servings5
Calories260kcal

Instructions

  • When cooking thighs for competition or just having the neighbors over the skin can either make or break the cook. If undercooked the skin is rubbery and if burnt well it is burnt. You can see as I prepare these thighs I pull the skin back over the meat and get rid of any folds or gaps.
    chicken thighs
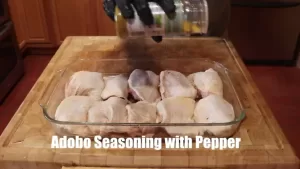
  • We will be applying two seasonings. The first is Adobo with pepper. The adobo seasoning first ingredient is salt and we want to make sure the chicken skin is fully covered.
    adobo seasoning chicken thighs
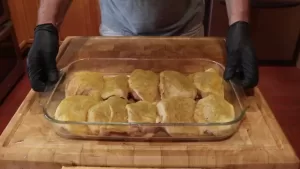
  • The second seasoning is garlic jalapeno and has a bite so add based on your tolerance to spicy foods.
    garlic jalapeno chicken thighs
  • Now it is off to the refrigerator to sit uncovered for 6 hours.
    in refrigerator
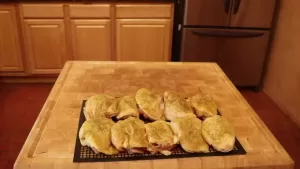
  • Get a Frogmat and position the thighs evenly on the mat. The reason the chicken sat for six hour is the salt acted as a dry brine and also dried the chicken skin.
    frogmat
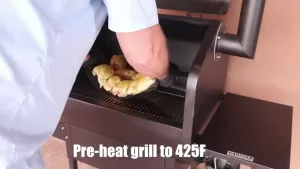
  • Now it is off to the 425F preheated Daniel Boone Grill. Position the chicken right in the middle of the grate.
    preheat 425F
  • After 30 minutes start checking for doneness. The minimum temperature has to be 165F. I usually pull the chicken when all pieces are at least 170F to 175F.
    check temperature
  • The chicken is done. The skin is crisp and not rubbery and it is also a nice golden brown. Now some observations about the Daniel Boone Grill. It held the 425F temperature extremely well. Also the chicken cooked very evenly meaning there no hot or cools spots inside the chamber. For this hot and fast cook I give it very high marks.
    remove chicken
  • Now on to the finished chicken.
    prepare to cut chicken
  • The skin was crisp and the meat was cooked through but very juicy. The adobo with garlic gave it a lot of extra flavor and the jalapeno gave it a nice kick. Here I just eat the skin and it was really good.
    eat skin
  • Overall I gave it one big thumbs up.
    thumbs up
  • As I just keep on eating let close with the three things that made this a great cook. Great seasoning and drying the skin in the refrigerator. Cooking hot at 425F and last a great grill like the Daniel Boone.
    second bite

Video

Nutrition

Calories: 260kcal

Hot and Fast Chicken Thighs on the Recteq Bullseye Grill

chicken thighs
chicken thighs

Hot and Fast Chicken Thighs on the Recteq Bullseye Grill

Hot and fast chicken thighs on the Recteq Bullseye Pellet Grill. How about from cold grill to finished chicken in 45 minutes or less.
Print Recipe
CourseMain Course
CuisineAmerican
Keywordbullseye grill, chicken, chicken thighs, rec tec
Prep Time20 minutes
Cook Time45 minutes
Total Time1 hour 5 minutes
Servings6
Calories260kcal
AuthorWiley

Instructions

Preparation

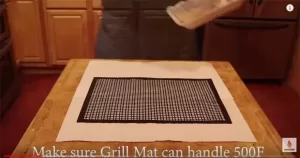
  • To start we need to do a few things. First Layout two paper towels. Then put down a frogmat or grill mat. Just make sure it can handle the high temperature of at least 500F.
    grill mat
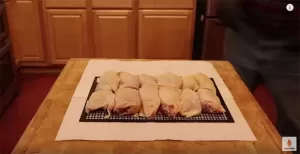
  • Now lay chicken thighs out with the skin facing up.
    chicken on mat
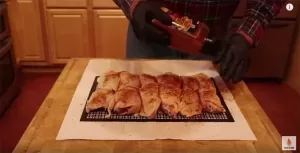
  • To make this easy we are going to use a pre-made rub. The rub we are using is Grill Mates Tennesee Whiskey Chicken Rub. One teaspoon of rub has only 2 grams of carbs so is safe for those that are on the Keto diet or are pre-diabetic like my self.
    chicken with rub
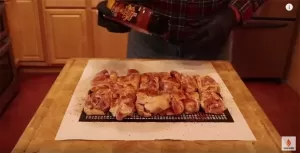
  • After rub is applied to skin side turn chicken over and then apply on the back side. Please note that when you are done with the rub the chicken is sitting on the grill mat with skin facing down.
    other side with rub
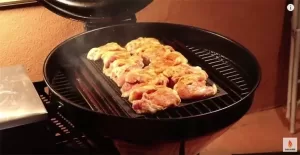
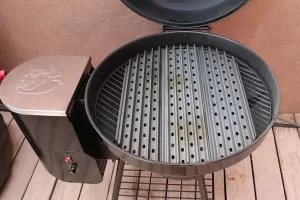
  • Here is the bullseye with the grillgrates in place and on high or knob turn all the way to the right. After preheating for 8 and ½ minutes put chicken it the center of the grillgrates. Now close lid.
    chicken on grill
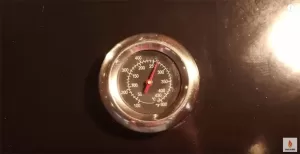
  • And set a timer for 15 minutes. Check ambient or air temperature inside the grill and it should be 500 F.
    ambient temperature
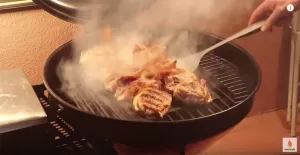
  • After 15 minutes check skin to see it there are grill marks. Even with the grill mat in the way, the grillgrates will still leave grill marks. With grills marks in place and the skin well rendered, it is time to turn the chicken over. Now you see all that smoke. Well it is not from the pellets. It actually the fat that is being rendered that drips onto the really hot grillgrates. As the fat vaporizes it is creating a wonderful flavor that is going right back into the chicken.
    grill marks
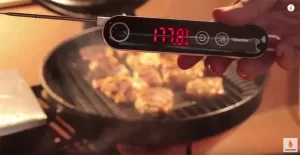
  • After turning the chicken let it cook for another 15 to 20 minutes but you have to start checking the temperature no later than 15 minutes. When all the pieces are a minimum of 175F then it is time to pull the chicken.
    177 temp
  • So how did it come out? The grill rook 8 ½ minutes to warm up and the lichen too a total 34 minutes to cook. That is a total time of 42 and ½ minutes. But is cooked all the way through? You can see the grill marks and the skin is firm. As I cut through there is nothing rubbery about this skin. Also, you can see it is well cooked and cooked all the way through The meat is very moist and very easy to cut. So how does it taste? What can I say? Once you go hot and fast you never want to go back. The Bullseye is a hot and fast searing machine. I challenge anyone to see if the can completely cook chicken thighs in less than 45 minutes and do this without burning the chicken or burning down your house.
    finished chicken

Video

Nutrition

Calories: 260kcal

Chicken Wings with Alabama White Sauce – Keto – HFLC

chicken wings with white sauce

Chicken Wings with Alabama White Sauce – Keto – HFLC

On the Recteq Bullseye grill, we will be cooking chicken wings and making a special Alabama white BBQ Sauce. This white sauce is very popular in Alabama but now has a strong following all over the US. Big Bob Gibson gets the credit for making this white sauce in his restaurant in Decatur, Alabama.
Print Recipe
CourseMain Course
CuisineAmerican
Keywordalabama white sauce, bob gibson, chicken wings
Prep Time1 hour
Cook Time1 hour
Total Time2 hours
Servings5
Calories486kcal
AuthorWiley

Ingredients

Instructions

The Setup

  • Bullseye Grill. GrillGrates – 22 inch round. Frogmats or wire rack to insulate from GrillGrates. ThermoPro TP20.
    grillgrate on bullseye grill

The Rub

  • First we will start with a simple but really good rub. Just two ingredients. 1/2 Cup of Montreal chicken seasoning.
    montreal chicken seasoning
  • 1/4 Cup of dry mustard
  • Mix the two ingredients together well. Put off to the side for later.
The Alabama White BBQ Sauce

  • Now it is time to make the sauce. 2 cups of mayonnaise.
  • 1/2 a cup of apple cider vinegar.
    apple cider vinegar
  • 2 tablespoons of lemon juice.
  • 1 teaspoon of prepared horseradish.
  • 2 tablespoons of spicy mustard.
  • 1 big tablespoon of sriracha sauce.
  • 1 teaspoon of onion powder.
  • 1 teaspoon of garlic powder.
  • salt to taste.
  • Whisp till the sauce is smooth with no lumps. Now put the sauce in the refrigerator and let sit for about an hour.

The Cook

  • Here are the chicken wings. Yesterday I lightly salted them and let them sit in the refrigerator for 24 hours. This allows the skin to dry out and hopefully eliminate rubbery chicken skin.
  • Now it is time to apply the rub. Because the wings are small I like to apply the rub with my hands.
  • Preheat Bullseye Grill to 450F.
  • Place wire rack of chicken wings on top of GrillGrates. You could also use frogmats if you prefer. Make sure that the chicken does not overhang the GrillGrates or it could burn.
  • After 20 minutes turn chicken wings over.
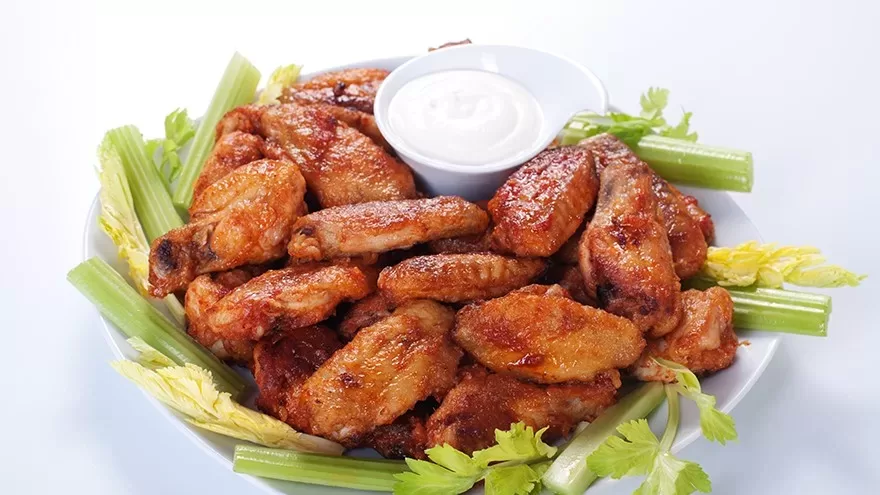
  • Ater another 20 minutes chicken wings will be done. Make sure everyone has their own plate of wings with a small dipping bowl with the Alabama white BBQ sauce. Chicken wings will have a brown and firm skin that is not greasy.
  • The chicken meat will be very juicy and should not be hard to take off the bone.

Video

Nutrition

Calories: 486kcal

Barbecue Chicken Thighs – Super Easy

Simple Chicken Thighs

This recipe is easy and uses a championship rub that has won championships. If you want to impress your family and friends, then this is the recipe for you. Also, if you just got your new BBQ grill or smoker, then this recipe will make you look good.

Simple Chicken Thighs

Barbecue Chicken Thighs – Super Easy – Keto – LCHF

This recipe is easy and uses a championship rub that has actually won championships. If you want to impress your family and friends then this is the recipe for you. Also if you just got your new BBQ grill or smoker then this recipe will make you look good.
Print Recipe
CourseMain Course
CuisineAmerican
Keywordbarbecue chicken, chicken thighs
Prep Time30 minutes
Cook Time1 hour 30 minutes
Total Time2 hours
Servings4
Calories260kcal
AuthorWiley

Instructions

Preparation

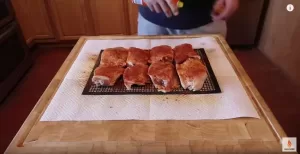
  • This recipe is very easy. First, you buy the rub so you do not have to make anything. The Rub is Plowboys Yardbird Rub and if you are trying to find it click on the name in the list of ingredients above. This is the rub from the team that won the 2009 American Royal Invitational. From the team of Todd Johns and his brother-in-law Randy Hinck (who compete as the Pork Pullin Plowboys) who bested 123 past grand champions to capture the overall crown. So it has actually won championships so it makes your job easy. I highly recommend you use frog mats and use installed food handling gloves. If you watch the video below you can get a good idea of how they all work together. The frog mats will allow you to handle eight chicken thighs at the same time and the gloves will totally eliminate having to use tongs or a spatula. Also, makes cleanup a breeze. I put eight chicken thighs on to one frog mat. I then apply the rub to the chicken thighs. This rub has a lot of salt so beware if you are salt intolerant. Also, you really want to make sure you cover all the skin. After applying the rub I spray the chicken with spray-on cooking oil. The oil does two things. First, it keeps the rub in place and second it will allow the chicken skin to crisp up.
    Chicken Thighs on Frog Mat

The Cook

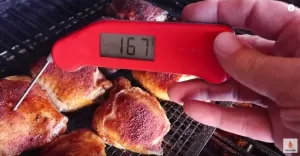
  • While I am doing all the prep I preheat my smoker or grill (using indirect cooking method) to 350F. Do NOT cook at a lower temperature for the chicken skin will become rubbery. You also need to bring the internal chicken temperature up quickly and it has to cook above 165F to be safe. I do not pull the chicken until I read at least 165F in the thickest part of the thigh but not touching bone. This is usually at least an hour and on my smoker, it is one hour and fifteen minutes. Now with your insulated gloves you can now take the chicken off the grill or grate and let it sit for about five minutes and then serve.
    Chicken Thighs with Thermometer

Video

Nutrition

Calories: 260kcal

Thai Chicken Wings – Peak Gai Yang

Thai Barbecue Chicken Wings

Gai Yang originated in Isan, Thailand’s Northeastern region, which is primarily populated by Thai Lao people. It is one of those dishes that is so good it has spread to all corners of the country and the world.

Thai Barbecue Chicken Wings

Thai Chicken Wings – Peak Gai Yang – Keto – LCHF

Gai Yang originated in Isan, Thailand’s Northeastern region that is largely populated by Thai Lao people. It is one of those dishes that is so good it has spread to all corners of the country and the world.
Print Recipe
CourseAppetizer
CuisineThailand
Keywordchicken wings, gai yang, Thai Lao
Prep Time30 minutes
Cook Time15 minutes
Total Time45 minutes
Servings6
Calories286kcal
AuthorWiley

Instructions

  • This is a favorite barbecue recipe. The enticing aroma of the sizzling meat on the grill makes it very popular with the street vendors’ clientele. Combine all the marinade ingredients and marinate the chicken wings overnight. Barbecue the wings over medium coals using direct heat for 10 to 15 minutes on each side or 425F in a smoker for 30 to 40 minutes or until they are cooked through and golden brown. Serve with steamed sticky rice. Keto diet note: There is one tablespoon of light brown sugar in this recipe. That represents 13 grams of carbs for 1.5 pounds of chicken wings. If you eat 1/2 pound (a lot of wings) your carb intake would be 4.3 grams and If your carb limit is 20 grams a day (like mine) you can still eat some chicken wings and stay within the 20-gram limit.

Video

Nutrition

Calories: 286kcal